Why Investing in High-Quality Replacement Parts is Essential for Bathroom Partitions

In this blog post, we discuss the importance of investing in high-quality replacement parts for bathroom partitions. We highlight the significance of having durable and reliable components to ensure the longevity and functionality of bathroom partitions. We delve into the various benefits of using high-quality replacement parts for bathroom partitions, such as improved aesthetics, enhanced privacy, and increased hygiene. Additionally, we provide practical tips for identifying and selecting the right replacement parts for different types of bathroom partitions. Whether you are a facility manager or a business owner, this blog post serves as a valuable resource to understand why investing in high-quality replacement parts is essential for maintaining and upgrading bathroom partitions.

Introduction

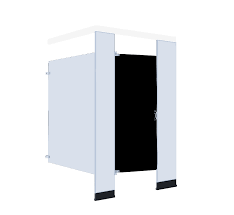
Bathroom partitions play a crucial role in providing privacy and functionality in public restrooms. However, over time, these partitions may require replacement parts due to wear and tear. When investing in replacement parts, it is important to prioritize quality to ensure the durability and longevity of your bathroom partitions.

Ensuring durability and longevity of bathroom partitions:

By investing in high-quality replacement parts, you can ensure that your bathroom partitions withstand the test of time. These parts are designed to be durable and resistant to common damages such as rust, corrosion, and moisture. With high-quality replacement parts, you can avoid frequent repairs and replacements, saving you time and money in the long run.

Enhancing safety and security in public restrooms:

High-quality replacement parts contribute to the overall safety and security of public restrooms. These parts are designed to fit seamlessly and securely, reducing the risk of accidents or unauthorized access. By investing in high-quality replacement parts, you can create a safer and more secure environment for restroom users.

Reducing maintenance and repair costs:

Investing in high-quality replacement parts can significantly reduce maintenance and repair costs. These parts are built to withstand heavy usage and require minimal maintenance. By choosing reliable replacement parts, you can avoid frequent repairs, saving both time and money.

Finding the right replacement parts for bathroom partitions

Identifying the specific needs of your bathroom partitions:

Before purchasing replacement parts, it is important to identify the specific needs of your bathroom partitions. Consider factors such as the material, size, and design of your partitions to ensure that you choose compatible replacement parts.

Researching reputable suppliers and manufacturers:

When it comes to replacement parts, it is crucial to source them from reputable suppliers and manufacturers. Research different suppliers, read reviews, and seek recommendations to ensure that you are purchasing high-quality replacement parts that meet industry standards.

Considering the material and design of replacement parts:

The material and design of replacement parts can greatly impact the aesthetics and functionality of your bathroom partitions. Consider factors such as durability, ease of cleaning, and compatibility with existing partitions when selecting replacement parts.

Installation and maintenance

Following manufacturer guidelines for installation:

Proper installation is essential for the optimal performance of replacement parts. Follow the manufacturer’s guidelines and instructions to ensure that the parts are installed correctly. This will help prevent any issues or damages in the future.

Regular inspection and cleaning of replacement parts:

Maintaining cleanliness is important for the longevity and hygiene of your bathroom partitions. Regularly inspect and clean the replacement parts to remove any dirt, grime, or bacteria. This will help maintain the appearance and functionality of your partitions.

Addressing any issues or damages promptly:

If you notice any issues or damages with your replacement parts, address them promptly. Ignoring small issues can lead to bigger problems down the line. By addressing problems early on, you can prevent further damage and extend the lifespan of your bathroom partitions.

Budget considerations and cost-effectiveness of high-quality parts

Comparing upfront costs vs. long-term benefits:

While high-quality replacement parts may have a higher upfront cost, they offer long-term benefits that outweigh the initial investment. Consider the cost-effectiveness of these parts by evaluating their durability, longevity, and the potential savings from reduced maintenance and repairs.

Understanding the value of investment in bathroom partitions:

Bathroom partitions are an integral part of any public restroom. They contribute to the overall comfort, privacy, and functionality of the space. Investing in high-quality replacement parts ensures that your bathroom partitions continue to provide these benefits, enhancing the overall value of your facility.

Calculating potential savings from reduced maintenance and repairs:

By investing in high-quality replacement parts, you can significantly reduce maintenance and repair costs. Calculate the potential savings by considering the frequency of repairs, the cost of replacement parts, and the labor required. This will help you make an informed decision and choose the most cost-effective option.

Conclusion

Investing in high-quality replacement parts is essential for maintaining and upgrading bathroom partitions. By prioritizing quality, you can ensure the durability, functionality, and aesthetics of your partitions. Consider the specific needs of your partitions, research reputable suppliers, and follow proper installation and maintenance guidelines. While the upfront cost may be higher, the long-term benefits and cost-effectiveness of high-quality replacement parts make them a worthwhile investment. Ensure the longevity and functionality of your bathroom partitions by investing in high-quality replacement parts.

The Ultimate Guide to Choosing Screws for Your Drawer Slides

Drawer slides are an essential component in any piece of furniture that requires drawers, such as cabinets and dressers. To ensure that your drawer slides work properly and last for a long time, it is important to choose the right screws for their installation. In this guide, we will provide an overview of the different types of screws that can be used with drawer slides, as well as tips on how to choose the right size, material, and head type for your specific needs.

Why choosing the right screws is important

Choosing the right screws for your drawer slides is crucial for several reasons. First, using the wrong type of screw can affect the stability and durability of your drawer slides, making them prone to wobbling or breaking. Second, using screws that are too long or too short can damage the drawer slides or the surrounding furniture. Finally, using low-quality screws can cause rust or corrosion over time, which can compromise the functionality of your drawer slides.

Overview of different types of screws

The two most common types of screws that are used with drawer slides are wood screws and machine screws. Wood screws are designed to be used with wood, while machine screws are designed to be used with metal. Wood screws have a tapered shaft and a pointed end that helps them grip the wood, while machine screws have a uniform shaft and a flat end that requires a nut or washer to secure them in place.

Type of Drawer Slide

Before choosing the screws for your drawer slides, it is important to consider the type of drawer slide you are using. There are three main types of drawer slides:

  • Ball Bearing Drawer Slides: These are the most common type of drawer slides and are known for their smooth and quiet operation. They require screws to be inserted into pre-drilled holes in the slide.
  • Roller Drawer Slides: Also called Epoxy Slides, these are less expensive than ball bearing drawer slides but are not as smooth. They require screws to be inserted into the side of the slide.
  • Under Mount Drawer Slides: These are mounted underneath the drawer and require screws to be inserted into pre-drilled holes in the slide and the same screws are used to fasten the under mount slide’s front locking devices.

Screw Size

The size of the screw you choose for your drawer slide depends on the thickness of the drawer and the cabinet or dresser where the slide will be installed. It is important to choose a screw that is long enough to provide adequate support, but not too long that it penetrates through the other side. Typically, the recommended screw length for a drawer slide installation is between 1/2 and 3/4 of an inch.

Material

The material of the screw you choose also affects its durability and resistance to corrosion. Stainless steel screws are the most common and provide the best resistance to rust and corrosion. Zinc-plated screws are also popular and provide good resistance to corrosion. Brass screws are more expensive but are ideal for decorative finishes because of their golden hue.

Head Type

The head type of the screw you choose depends on the type of screwdriver you have and the aesthetic you want to achieve. There are four main types of screw heads:

  • Flat Head Screws: These are the most common and have a flat top that sits flush with the surface of the material.
  • Pan Head Screws: These have a rounded top and are ideal for applications where the screw head will be visible.
  • Round Head Screws: These have a domed top and are often used in woodworking applications.
  • Truss Head Screws: These have a wide and flat top and are commonly used for heavy-duty applications.

Conclusion

Choosing the right screws for your drawer slides is essential for ensuring their stability and durability. When selecting screws, consider the type of drawer slide, screw size, material, and head type that is best suited for your specific needs. Following these guidelines will help you choose the right screws for your drawer slides and ensure a successful installation every time.

For more information on drawer slides and other woodworking supplies, visit woodworkerexpress.com.

GRABO: The Versatile Woodworker’s Solution for Effortless Heavy Lifting

Introduction:
In the world of woodworking, handling heavy objects and materials can be a daunting task. However, with the revolutionary GRABO Paver Vacuum Lifter, woodworking enthusiasts can say goodbye to the challenges of lifting and moving heavy items. In this blog post, we will explore how the GRABO can transform your woodworking projects by providing a powerful and versatile solution for effortless heavy lifting.

Efficiency and Safety Made Easy:
Woodworking often involves working with large and cumbersome materials such as timber, doors, and countertops. The GRABO Paver Vacuum Lifter simplifies these tasks by securely gripping the objects using its powerful suction system. With a press of a button, the vacuum seal is created, allowing you to effortlessly lift and maneuver heavy pieces without straining your muscles or risking accidents.

Powerful Seal and Electric-Powered Design:
What sets the GRABO apart is its exceptional seal and electric-powered functionality. The unit features a unique and powerful seal that ensures a strong and reliable grip on various woodworking materials. Unlike traditional air pump-based lifters, the GRABO is electrically powered with a built-in rechargeable battery. This means you can work without the need for external power sources, enjoying the freedom of movement in your woodworking projects.

Versatility for Woodworkers:
While the GRABO is an excellent Paver Vacuum Lifter, its applications extend far beyond pavers and slabs. Woodworkers will find this versatile tool indispensable in their craft. Here are some ways in which the GRABO excels in the woodworking realm:

Timber Handling:
Whether you’re moving large planks or hardwood panels, the GRABO makes it easy to lift and position timber for precise cuts and assembly.

Door Installation:
When hanging doors, the GRABO ensures a secure grip, making the process of aligning and fitting doors hassle-free.

Countertop Placement:
The GRABO is a valuable tool for positioning heavy countertops accurately. Say goodbye to straining your back and hello to effortless installation.

Sheet Goods Handling:
Moving plywood, MDF, or other sheet goods becomes a breeze with the GRABO. You can easily transport and position large sheets without worrying about slippage or damage.

Furniture Assembly:
The GRABO is your perfect partner when assembling furniture pieces. It enables you to lift and position heavy components, ensuring a precise and efficient assembly process.

Simplifying DIY Woodworking Projects:
Even if you’re a woodworking enthusiast working on DIY projects at home, the GRABO can significantly enhance your experience. Its compact size and easy storage make it a practical addition to your toolbox. Whether you’re building an extension, tiling your bathroom, or laying down pavers in your garden, the GRABO will simplify the heavy lifting involved, allowing you to focus on the creative aspects of your woodworking endeavors.

Using the GRABO Paver Vacuum Lifter:
Using the GRABO is a straightforward process that enhances your workflow. Here’s a step-by-step guide:

Press the GRABO firmly against the woodworking material you wish to lift.
Activate the vacuum seal by pressing the green button, ensuring a secure hold on the object.
Utilize the ergonomic handle of the GRABO to move the material effortlessly to the desired location.
For larger or heavier objects, consider using two GRABO units to ensure stability and safety.
Release the material by pressing the red button once you have completed your task.
Conclusion:
The GRABO Paver Vacuum Lifter is a game-changer for woodworkers, offering a versatile and efficient solution for heavy lifting in woodworking projects. Its powerful seal, electric-powered design, and user-friendly operation make it a must-have tool for woodworking enthusiasts. With the GRABO, you can say goodbye to the physical strain and safety risks associated with manual lifting, allowing you to focus on the craftsmanship and artistry of your woodworking projects.

Whether you’re handling timber, installing doors, placing countertops, moving sheet goods, or assembling furniture, the GRABO provides a secure grip and effortless maneuverability. Its versatility and reliability ensure that you can tackle a wide range of woodworking tasks with ease and efficiency.

Even for DIY woodworking projects at home, the GRABO proves to be an invaluable asset. From building extensions to remodeling your space, this compact and portable tool fits seamlessly into your toolbox. It eliminates the need for excessive manpower, making heavy lifting a one-person job. With the GRABO, you can transform your home woodworking projects into enjoyable and satisfying experiences.

Using the GRABO Paver Vacuum Lifter is simple and intuitive. Just press it firmly against the woodworking material, activate the vacuum seal, and use the ergonomic handle to effortlessly move the object. Its electric-powered design ensures consistent performance, while the powerful seal guarantees a secure hold throughout the task. The GRABO’s efficiency and ease of use allow you to complete your woodworking projects in a timely manner, without compromising on safety or quality.

In conclusion, the GRABO Paver Vacuum Lifter is a versatile and indispensable tool for woodworkers. Its ability to handle heavy materials with ease, along with its powerful seal and electric-powered operation, sets it apart from traditional lifters. By incorporating the GRABO into your woodworking workflow, you can enhance productivity, reduce physical strain, and achieve exceptional results in your woodworking projects. Embrace the power of the GRABO and elevate your woodworking skills to new heights.

What is the advantage of a concealed hinge?

Vintage cabinet with concealed hinges in room

Concealed hinges offer several advantages over traditional hinges that are visible from the outside. Here are some of the benefits of using concealed hinges:

  1. Aesthetics: One of the primary advantages of concealed hinges is that they provide a clean and sleek look to cabinets and doors. Since the hinge is hidden from view, it does not disrupt the appearance of the furniture or interior design.
  2. Accessibility: Concealed hinges allow doors to open up to a full 180 degrees, which can provide greater accessibility and ease of use. This is especially important in spaces that are tight or have limited room for door swing.
  3. Durability: Concealed hinges are often made from high-quality materials which make them more durable and resistant to wear and tear. They also tend to be more resistant to moisture and humidity, which can be a concern in bathrooms or kitchens.
  4. Adjustability: Many concealed hinges are designed to be adjustable, which allows for fine-tuning of the door alignment and ensures a perfect fit. This can be especially useful in situations where the door or cabinet may have shifted over time.
  5. Soft-Close: Most concealed hinges are available in either self or soft close. There is nothing nicer than a door closing quietly, especially when the kids are fast asleep and you are looking for a midnight snack.

Overall, concealed hinges offer a range of benefits that can enhance the appearance and functionality of cabinets and doors. While they may be more expensive than traditional hinges, their durability and longevity can make them a worthwhile investment in your home or place of business.

https://www.tiktok.com/@woodworkerexpress.com/video/7214105605672324395?lang=en

What are the different types of concealed hinges for cabinetry?

Concealed hinges are designed to be hidden from view when a cabinet door is closed. There are several types of concealed hinges available, here are the most popular ones!

  1. European hinges: European hinges are the most common type of concealed hinge. They are designed to be used on both frameless and face-frame cabinets and feature a two-part design consisting of a mounting plate and a hinge cup.
  2. Barrel hinges: Barrel hinges are another type of concealed hinge that can be used on both frameless and face-frame cabinets. They feature a cylindrical barrel that is inserted into a drilled hole in the cabinet and are held in place by a screw.
  • Pivot hinges: Pivot hinges are a unique type of concealed hinge that is installed at the top and bottom of a door or cabinet. They allow the door or cabinet to swing open on a single pivot point and are often used on large or heavy doors.

Each type of concealed hinge has its own unique features and benefits, so it’s important to choose the right one based on your specific needs and the type of cabinet or door you are working with.

Convenient and Safe: The Role of Lid Supports and Stays

If you have a storage chest, toy box, or any other type of container with a lid, you know how important it is to keep that lid open and in place. Whether you are storing blankets in a storage chest, organizing your children’s toys in a toy box, or keeping your prized possessions organized in a jewelry box, lid supports and stays are an essential feature to consider. These mechanisms hold the lid open and prevent it from falling shut, making it easy to access the contents of your container.

Kitty in an open chest
Kitty in an open chest with no lid support (very dangerous)

But lid supports and stays offer more than just convenience. They also provide a measure of safety. Without these mechanisms, the lid of your container may fall shut unexpectedly, potentially causing injury or even worse, damage to the contents inside. This is especially important if you have children or pets in your home, as they may be more likely to accidentally bump into a container and cause the lid to fall shut.

There are many different types of lid supports and stays on the market, each with its own unique features and benefits. Some are adjustable, allowing you to set the lid at the perfect angle for easy access. Others are spring-loaded, meaning that they will automatically close the lid when you release it. And some even have a soft-close feature built-in. Generally the lid supports and stays are made of metal, although, some are made of plastic or wood.

When shopping for lid supports and stays, there are a few important factors to consider. First and foremost, you’ll want to choose a mechanism that is appropriate for the size and weight of the lid you are working with. It’s also important to consider the materials used in the construction of the lid support or stay, as some materials may be more durable or resistant to wear and tear than others.

In addition to the convenience and safety they provide, lid supports and stays are also an attractive and functional addition to any container. They can help to keep your home organized and clutter-free, while also adding a touch of style to your storage solutions. So the next time you are organizing your home, consider adding lid supports and stays to your storage containers. You’ll be glad you did!

How to Choose and Measure for a Lazy Susan

With Lazy Susans being available in four different shapes and a variety of sizes, it can be difficult to find the susan that you need. I will help you choose and measure for a new Lazy Susan so you can rest assure that you purchase the correct Lazy Susan, the first time!

full circle lazy susan
pie-cut lazy susan

Kidney Shape Lazy Susan

The first on the list is the kidney shape lazy susan. These Lazy Susans are designed to work with corner cabinets that have unattached, double folding doors. By unattached, i am talking about a door that when it swings opens, it leaves behind the kidney susan sitting in the cabinet by itself.

Pie-Cut Lazy Susan

Now number two on the list is the pie cut lazy susan. These are very similar to the kidney Lazy Susans,however, the pie cut has a much stronger 90 degree angle. These susans work just like the kidney lazy susans except these units are designed for the cabinet door to be directly attached to the lazy susan. You’ll know if you need a pie cut lazy susan because your doors will rotate into the cabinet when you actually use a lazy susan.

How to Measure for Pie-Cut and Kidney Shaped Lazy Susans

Whether measuring for a kidney shape lazy susan or a pie cut lazy susan the process is the same. You will need to measure the inside space of your corner cabinet with the doors open. You’re going to take two measurements starting from the right side back wall to the inside edge of the door opening. Do this in both directions (left side back wall as well) to make sure that the measurements are the same. If they are, just subtract approximately two inches from this measurement. This measurement will be the maximum size lazy susan that you will be able to fit into your cabinet. If the measurements are not the same, simply deduct approximately two inches from the smaller of the two measurements. This will ensure that your lazy susan will have enough clearance once it is installed. For example, let’s pretend that our measurements are around 34 inches in both directions. After subtracting two inches, we can install at max a 32-inch lazy susan.

The D-Shaped Lazy Susan

The d-shaped lazy susan is primarily designed for corner diagonal 45 degree wall and base cabinets. This type of lazy susan can also be installed in standard (non-corner) cabinets. When measuring for a d-shaped lazy susan for use in a 45 degree angle cabinet you will need to measure the inside space of the cabinet from the inside back of the cabinet, to the side wall of the cabinet that is parallel with the back side of the cabinet (please watch this video for a visual reference). You next write this measurement down and then subtract two inches from that measurement. Just as for the other susans, order the lazy susan that is the closest to that size without selecting a larger size.

Full Circle Lazy Susan

Finally, we have the full circle lazy susan. The full round lazy susans are among the most versatile. These round susans fit in regular cabinets corner cabinets and into most any upper and lower cabinet you throw at it. When measuring for a full circle lazy susan you will need to measure the inside space of the cabinet from left to right and from front to back. Go ahead and write those measurements down. Now let’s say, for an example, your left to right measurement is 19 inches and your front to back measurement is 23 inches. Compare those two measurements and once again, take the smaller measurement of the two. For the full circle lazy susan you only need to subtract one or two inches from that measurement and order the lazy susan that is closest to that size,once again, without selecting a larger size.

In Conclusion

For the hieght of your cabinet, it is important to be aware that most lazy susans have a telescoping shaft that will fit interior cabinet heights ranging from 26 to 31 inches. So be sure to double check your measurements and the info that is located on the specific Lazy Susan that you are ordering. We have all of the necessary measurements of each unit in the product’s description. Happy Spinning!

Check out our YouTube Channel!

How To Choose Handrail Brackets

Image of a handrail on a staircase
Decorative handrail brackets

When building or remodeling, staircases are functionally important, and they also add some style to a home. Knowing how to choose handrail brackets helps in creating a staircase that is visually stunning and functioning at its best on a daily basis.

What Are Handrail Brackets?

Handrail brackets are used to attach the staircase railing to a wall. They offer support for the thousands of times the railing is grabbed when going up and down the stairs.

Choosing the proper style and fit for your home’s staircase is important. You don’t want to make a mistake, install the wrong ones, and then waste time removing them later.

How Many Brackets Will You Need?

The length of the staircase and its railing determines how many handrail brackets you need for proper handrail support.

After placing one at the bottom of the railing and one at the top, the brackets must be placed in a stud on the wall for proper support of the railing and the person using it. They must be four feet apart or less.

When installed properly at the right distance, the brackets provide safety for stair users by keeping the railing secure.

Measuring the length of the railing is the first step when determining how to choose handrail brackets and the number of brackets you need. Don’t attempt to save time and money by using less than what’s recommended.

What Style To Choose

Handrail brackets come in many styles. Choose the type that match your staircase and railing.

Brackets don’t stand out, but they are visible. Choose the look you want—whether modern or traditional—then choose the best quality and number needed.

Woodworker Express offers many choices in furniture hardware supplies, including handrail brackets. Contact us and together we’ll figure out which brackets best suit your needs.