The Secret to Installing Cabinet Hardware Like a Pro

When it comes to upgrading the look of your cabinets, one of the simplest and most cost-effective solutions is to install new cabinet hardware. However, even the most beautiful hardware can look shoddy if it’s installed poorly. That’s why we’ve put together this comprehensive guide to help you install cabinet hardware like a pro.

Why Cabinet Hardware is Important

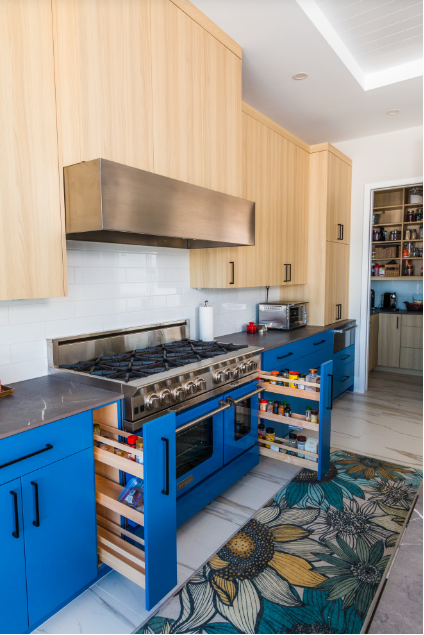
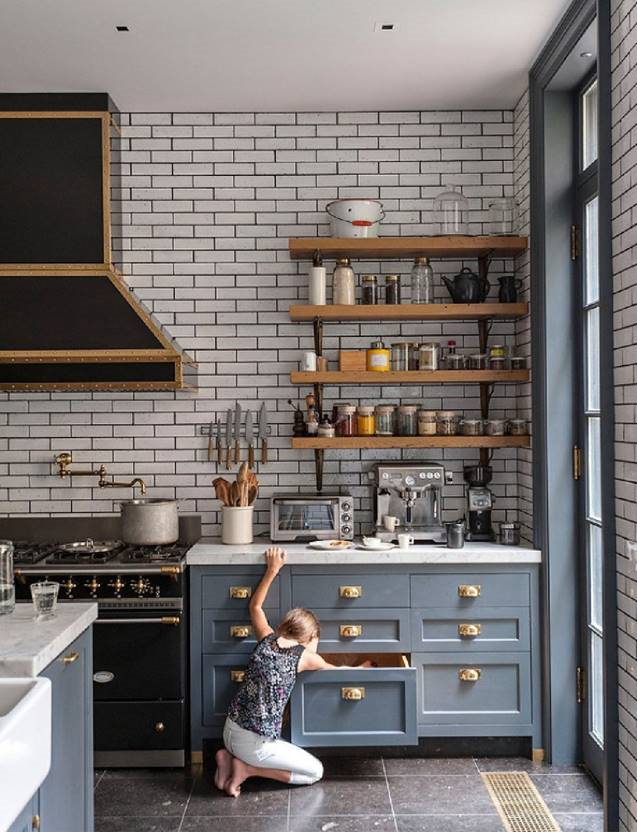
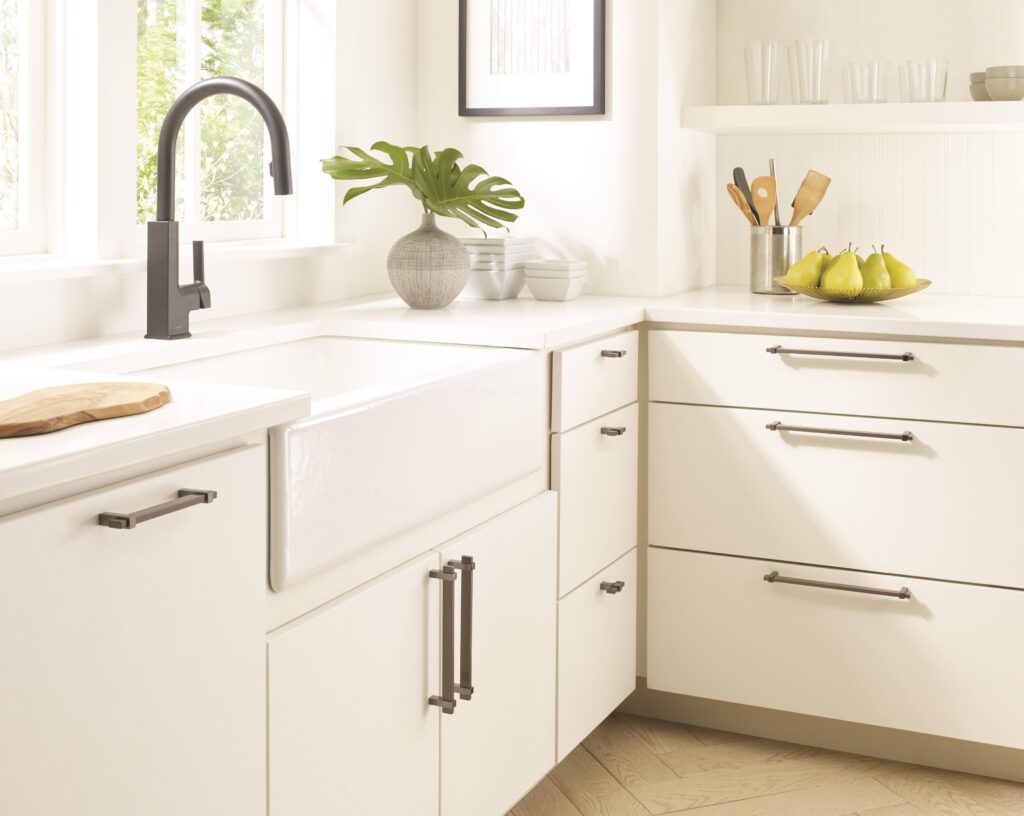
Cabinet hardware serves two main purposes: functionality and aesthetics. The right hardware can make it easier to open and close your cabinets, while also enhancing their visual appeal. Choosing the right hardware can help tie together the overall style of your kitchen or bathroom, whether you prefer a modern, minimalist look or a more traditional, ornate style.

Tools Needed for Installation

Before you begin, it’s important to gather the necessary tools and materials. You’ll need a drill, a 3/16″ drill bit, a tape measure, a pencil, a screwdriver, and of course, the hardware itself. Make sure you have all the necessary components and that they’re the correct size for your cabinets.

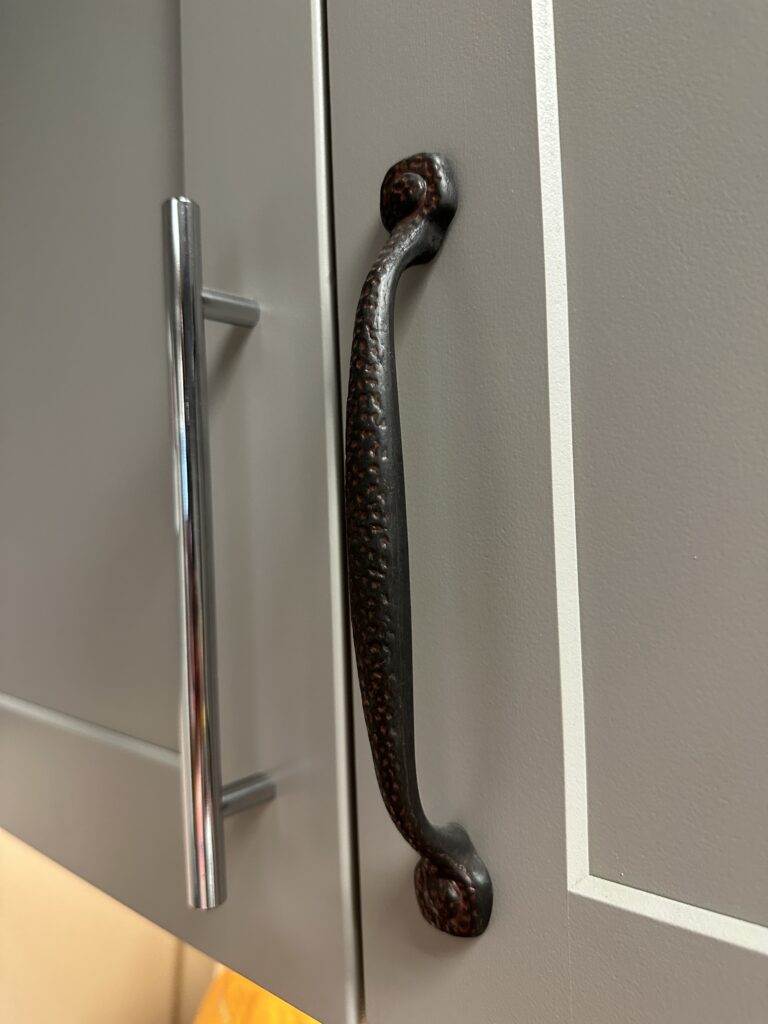
Selecting the Right Cabinet Hardware

The first step in installing cabinet hardware is to choose the right pieces for your cabinets. You’ll want to consider the style of your cabinets, as well as the overall aesthetic of your kitchen or bathroom. Choose hardware that complements the style and finish of your cabinets, whether you prefer sleek stainless steel handles or ornate brass knobs. Measure the distance between the screw holes on your hardware and mark this on your cabinet to ensure accurate placement.

Preparing for Installation

Now that you’ve chosen the perfect hardware, it’s time to prepare your cabinets for installation. Remove any old hardware and fill any holes with wood filler. Clean the cabinet surface with soap and water, and dry thoroughly. Measure and mark where you want to place your new hardware, ensuring that they’re level and in line with each other.

Installing Cabinet Knobs

If you’re installing cabinet knobs, you’ll need to drill pilot holes in the marked spots. Use a drill bit that’s slightly smaller than the screws that came with your hardware. Insert the screws through the back of the cabinet and into the knob, tightening with a screwdriver. Make sure the knobs are straight and level before tightening completely.

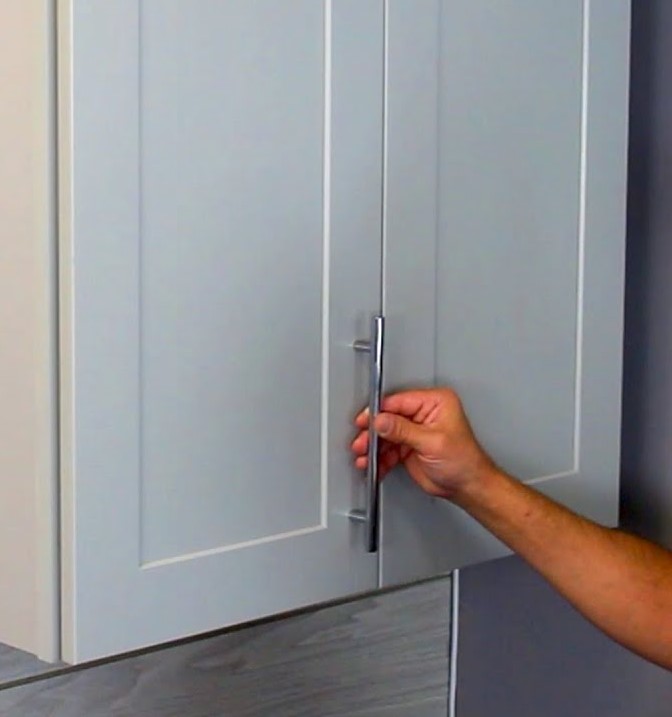
Installing Cabinet Pulls

If you’re installing cabinet pulls, you’ll need to drill holes in the marked spots. Use a drill bit that’s the same size as the screws that came with your hardware. Insert the screws through the front of the cabinet and into the pull, tightening with a screwdriver. Make sure the pulls are straight and level before tightening completely.

Finishing Touches

Once you’ve installed all your hardware, step back and admire your handiwork. Make sure everything is level and straight, and tighten any loose screws. Clean up any dust or debris and enjoy your newly updated cabinets!

With this guide, you’ll be able to install cabinet hardware like a pro, enhancing the overall look and functionality of your cabinets. Remember to choose hardware that complements your existing cabinetry, and take the time to measure and mark your placement before drilling any holes. With a little patience and attention to detail, you’ll have beautiful new cabinets in no time.

Elevate Your Cabinets: A Detailed Guide to Installing Decorative Hardware on Cabinet Doors and Drawer Fronts

Introduction:

Upgrading your cabinet doors and drawer fronts with decorative hardware is a simple yet effective way to enhance the aesthetic appeal and functionality of your kitchen or any other space with cabinets. In this detailed guide, we will walk you through the step-by-step process of installing decorative hardware, such as knobs and handles, to achieve a polished and professional look. Let’s get started on transforming your cabinets!

2 different decorative handles on a kitchen cabinet

Materials Needed:

Step 1: Planning and Preparation

Determine the placement of the hardware. Consider the size, style, and functionality of the hardware, as well as your personal preferences. Measure and mark the desired location for each piece of hardware on the cabinet doors and drawer fronts using a measuring tape and pencil.

Prepare the cabinets by cleaning the surfaces where the hardware will be installed. Remove any dirt, grease, or residue that may affect the adhesion or installation process.

Step 2: Installing Knobs on Cabinet Doors

Start by selecting the appropriate drill bit size for the screws provided with the knobs. Typically, a 3/16-inch bit works well for most knobs.

Hold the knob against the marked spot on the cabinet door. Ensure it is aligned with adjacent hardware and leveled. Mark the locations for screw holes using a pencil.

Attach the drill bit to your drill and carefully drill pilot holes at the marked spots on the cabinet door. Take care not to drill all the way through the door. A depth slightly shorter than the length of the screws is sufficient.

Align the knob with the pilot holes and insert the screws provided. Tighten them using a screwdriver until the knob is securely fastened. Avoid overtightening to prevent damage to the cabinet door.

Repeat this process for all the knobs on your cabinet doors, ensuring consistent spacing and alignment.

Step 3: Installing Handles or Pulls on Cabinet Doors and Drawer Fronts

Similar to the knob installation process, measure and mark the desired location for each handle or pull on the cabinet doors and drawer fronts. Use a level to ensure straight alignment.

Determine the appropriate drill bit size for the screws provided with the handles or pulls. Drill pilot holes at the marked spots using the selected drill bit.

If you have a cabinet template or jig, align it with the marked locations and use it as a guide for drilling the pilot holes. This can help ensure consistency and accuracy in hole placement.

Align the handle or pull with the pilot holes and insert the screws provided. Begin by hand-tightening the screws, then use a screwdriver to fully secure them. Ensure that the hardware is securely fastened without being overtightened.

For drawers, consider using longer screws provided with the handles or pulls, especially for thicker drawer fronts. This will provide a stronger and more secure attachment.

Repeat the process for all handles or pulls on both the cabinet doors and drawer fronts, maintaining consistent spacing and alignment.

Step 4: Finishing Touches and Inspection

After installing all the decorative hardware, double-check the tightness of each screw to ensure all knobs, handles, and pulls are securely fastened.

Take a step back and inspect the cabinets to ensure the hardware is level, aligned, and visually pleasing. Make any necessary adjustments to achieve a balanced and cohesive look.

Clean the cabinets and hardware with appropriate cleaning supplies to remove any fingerprints or smudges from the installation process. This will leave your cabinets looking pristine and ready to showcase their new decorative hardware.

Finally, step back and admire your newly upgraded cabinets! Appreciate the transformation and the added style and functionality that the decorative hardware brings to your space.

Maintenance Tips:

To keep your decorative hardware and cabinets in excellent condition, consider the following maintenance tips:

Regular Cleaning: Wipe down the hardware regularly using a soft, damp cloth to remove any dust or grime that may accumulate. Avoid using harsh chemicals that could damage the finish.

Preventive Maintenance: Periodically check the tightness of screws and fasteners to ensure they remain secure. If any become loose, simply tighten them with a screwdriver.

Cleaning Product Compatibility: When using cleaning products on your cabinets, ensure they are safe for the specific type of hardware and cabinet material. Read product labels and follow manufacturer recommendations.

Avoid Abrasive Materials: Use non-abrasive cleaning tools, such as microfiber cloths, to avoid scratching or damaging the hardware’s finish.

Handle with Care: Open and close cabinet doors and drawers gently, avoiding excessive force or pulling on the hardware. This will help maintain their integrity and prolong their lifespan.

Conclusion:

By following this detailed guide, you can successfully install decorative hardware on your cabinet doors and drawer fronts. This simple DIY project will elevate the overall look and functionality of your cabinets, giving your space a fresh and polished appearance. Enjoy the process and the satisfaction of completing this transformative upgrade. With your newly installed decorative hardware, your cabinets will not only be more visually appealing but also easier to use on a daily basis.

Mondays with Mike…9-12-2022 Edition 31

Matching Sinks, Faucets and Hardware Help to Create the Bathroom of Your Dreams

As is typical for me, I have to rave about the gray tones on display here in this seemingly mirror-less bathroom. I’ve often contemplated replacing my own main floor bathroom’s mirror. You see, it extends all the way down to a level in line with the top of our short faucet fixture, which means without great effort to prevent it, hand washing results in an abundance of water splashing up onto the mirror. It’s such an annoying problem that I sometimes just walk a few step over into the kitchen to wash/dry my hands.

I won’t go too deep here today, but just know that these stunning pulls and matching series knobs are available for purchase at www.WoodworkerExpress.com. Plus, if you want a different look, we’ve got color/finish variety for days, and that’s always a good thing. So, you and I both are disappointed that we don’t carry the missing mirror for this particular bathroom application, but we DO carry an assortment of closet mirrors destined to take your bedroom closet chic to the next level. I realize that is all exciting news, but in your excitement be sure you don’t push past these brilliant acrylic sinks and their accompanying faucets. They complement each other so well while also being essential to the reason this room was walked into to begin with.

Behind the gray cabinet façade, I speculate these cabinets and drawers are mounted with task-specific organizers. Of course, we stock these with a multitude of flexible options…so much so that you’d think they were custom-designed. Care to learn more? Call a www.WoodworkerExpress.com advisor toll-free at:  855-993-4968

Gray themed bathroom with silver faucets and hardware
Photo Courtesy of Houzz

Mondays with Mike…8-22-2022 Edition 28

Creating an Unexpected Space-Confessions of a Woodworker…

Confessions anyone? If you are a creative, semi-handy person then you might find this mudroom cabinet here to be a desirable and attainable project for you to take on. I can tell you firsthand that www.WoodworkerExpress.com is loaded with all the hooks, pulls and other components necessary to assemble this stylishly aeriated cabinet.

As alluded to in the beginning, this project resembles confessional. I’m guessing it might’ve been the dark wood combined with the pull and mesh wire grills that triggered me thinking that. That said, once I focused in on the 2nd door (+ the 2 jackets), I realized this indeed wasn’t a (group!) confessional, but rather a great mudroom cabinet design brought to life. Part of that great design is the installed mesh allowing the contents to always be largely obscured, aerating and nearby. On top of that, the wood tone chosen here is fundamental to helping obscure the ‘mud’ you’ll surely expect in these parts.

Speaking of confessions, I believe the floor tiles shown here in the photo are the exact same ones that are in my own home. I know that’s technically unlikely, but I’d almost agree to a substitution to just see if I’m right. However, that sounds like a whole lot of effort for me to prove a point (that I’m wrong!). I’ll also mention that you are well within your whims to design and build your own confessional….

And if you do, could we please see a photo?

Mudroom closet space complete with hooks, handles and mesh screen door inserts.
Photo Courtesy of Houzz

Mondays with Mike…8-15/2022 Edition 27

Opposites Attract-Create Harmony with Contrast.

We’ve all heard the popular saying “Not everything in life is black and white.” However, the designer of this brilliant kitchen/mudroom combo might just beg to differ whilst offering up a substitute for us all: “Opposites attract.”

Here we can see a clear delineation between the countertop/matching matte black hardware choices and everything else here, really. Starting with the matte black hardware, we can see a fabulous and flexible assortment of chosen hardware: door handles and hinges, faucets, hooks, knobs & cup pulls. Even if the flooring here was a different color, there’s no way that the black hardware isn’t the winner in this designer’s game of what ultimately looks best.

WE (www.WoodworkerExpress.com) also has the items that hold this all together organizationally (Base Cabinet Organizers, Lazy Susans, Under sink Drip Trays, Cabinet Door Racks, etc.). When it comes to style, you also have to have substance. Behind the façade, there must be function; I don’t think you can have one without the other. Funny how this all oddly sounds a bit like our initial ‘popular saying’ about black and white. And speaking of color contrast, I do notice a seemingly glowing yellow container of some of the finest hand sanitizer I’ve come across: Lemyn. After all, it’s a kitchen/mudroom, so perhaps the hand sanitizer is the final piece that helps keep the mud at bay.

Kitchen and mudroom combo finished in shades of black and white.
Photo courtesy of Houzz

Mondays with Mike…8-8-2022 Edition 26

‘A Kind of Blue’ is/was a classic album released in 1959 by legendary trumpeter and jazz icon, Miles Davis. The uniquely colored kitchen cabinets in front of us, could absolutely be described as featuring ‘a kind of blue’ motif. I’m not trying to equate Miles’ musical ethos to be in harmony with this particular kitchen design, but then again: Why not?

Creative freedom in the arts as well as the design world are imperative to self-expression, so why not just go for those designs that you’re dreaming of. What I’m suggesting is simply: Embrace the Bold!

Now there was a time within the last dozen years or so where I had a very navy blue kitchen . But I’ve since moved on from that to a more grayish feel. Although focused at the moment on the big, bright blue kitchen cabinets, the utensils and cookware that we rely on daily generally don’t sit on top of the counters as something to simply look at. That’s what the cabinets are for and as we see here, Base Cabinet Fillers can (and should) be a part of the storage and organizational mindset when we’re designing a kitchen. Also note the muted appeal of the stark black cabinet hardware against the plain birch cabinets. This allows the fantastic blue color to pop!

And this one makes no excuses for being bold and cartoonish in its approach…and I, for one, love it! If you are in this category as well, then head on over to check out these great Base Cabinet Fillers from Rev-A-Shelf and other great manufacturers at: www.WoodworkerExpress.com.

Harkening back to the beginning of this column, please feel free to investigate ‘A Kind of Blue’, which is considered by many to be one of THE greatest jazz records ever recorded. “Not everything has to be shiny and new, so be sure to treasure the niceties in life, some of which already exist.

Bold blue cabinets create a big design statement, but the organizers tell the real story
Photo Courtesy of Houzz

Mondays with Mike…8-1-2022 Edition 25

There’s Gold in That Thar Kitchen !

Ah, yes… the early stages of the search to find that elusive kitchen accessory that just doesn’t have a real home. This young chef-in-training it seems is finding out the hard way that organization is the key to nearly everything in life going smoothly…well, in the kitchen anyway. As we see here, she’s searching shoulder deep within these drawers, which we can deduce are clearly in need of some organizational inserts. For if they were equipped already, there would likely be no search, let alone a shoulder deep one. Speaking of search, www.WoodworkerExpress.com is the answer to where we find these goods, and as such, would be option 1, 2 and 3 for satisfying our kitchen design needs! Like these floating shelves, for example: responsible entirely for supporting the spice offerings available to all who enter and eat.

I’ve mentioned it before, not only because it’s rad, but because it’s bold and who doesn’t like bold from time to time…if not all the time? I’m talking about the intentional gold hardware choices on display here. Those opulent gold pulls could quite likely be causing our junior chef to have to shield her eyes from the sheen. I’ve also got a need to mention this gold-trimmed king-sized range hood that looks aesthetically like it could’ve been in service on the Titanic! It’s surely an amazing hood and yet another item that we can help you spec. out when the time comes for you to purchase your own.

There’s gold in that ‘thar kitchen!

Technically, it’s true…just look at the gold pull near the sink, the gold knob under the country sink, the golden door hinges…and for Pete’ sake: even the floor grate is golden! These folks have brought forth the bold and as a result, this kitchen area is fabulous. The inquisitive eye will find more to like in this small photo and realize that it can likely be found in spades at: www.WoodworkerExpress.com.

Kitchen with bold gold accents

Mondays with Mike…7-18-2022 Edition 23

Everything Old is “New” Again

If it’s a period look they’re going for…then ‘Ding’ is the sound we’ll all hear from the award tower as they chime the winning bell, I suppose. This is undoubtedly the most unique bit of ‘décor-ing’, I’ve witnessed. As I normally act when cleaning up a skillet or pan and equipped with a stainless steel sink, I‘m inclined to go for more of a ‘gentle’ mode, but that all gets thrown out the window when I’m doing my normal countertop work. As a matter of fact, I may actually consider skipping the traditional countertop wipe-downp and instead go for a light-grit sanding to remove some of those scrub-ready stains. In all seriousness, this could be a real contender for folks with small children and/or a care-free spouse/lifestyle. The use of old barn wood, iron fixtures and antiques says everything old can indeed be new again. It just needs repurposing.

Admire, if you will the fantastic incorporation of the ultra-modern floating shelves, which we see regularly in kitchen design. Don’t miss the hardware latches from a bygone era and their accompanying bin pulls. WAY back in the day, kids! Can someone please advise what I’m guessing might be a melon-squisher is exactly being used for? I thought they only used those things in the workshop, not the kitchen…and for hammering/bending/blacksmithing?!

Regardless, if rugged is your thing, we have the components on hand to get you closer to your inner John Wayne ‘sharpen your knife on the countertop’ mindset. Just look us up at: www.WoodworkerExpress.com. And remember, don’t throw anything away just yet because it could all come back into vogue at any time!

Rustic kitchen using old barn wood and iron hardware
Image courtesy of homebnc.com

Mondays with Mike…7-11-2022 Edition 22

Organize for Success

We’ve certainly got a nice closet here to look at today. For starters, I’m a pretty big fan of the gray color scheme. It’s to me, perhaps the most tranquil color to start and end with. I love its passiveness and ability to work with so many other colors. The other standout in the images is how the closet is organized. An organized closet helps you more easily find exactly what you are looking for from a sport coat to your favorite sneakers. Organizing for success saves you time, space and peace of mind knowing you can easily lay your hands on any item you are looking for.

Speaking of organization, look how the combination of both open, hanging and drawer storage works here. The open storage areas allow for the addition of cloth baskets. These make great portable storage or maybe even seasonal storage that could easily be moved elsewhere. And with some side mount slides, you can create custom drawers fit to the exact width of your closet space. And of course, every closet needs closet rods. We have a great selection of styles, lengths and finishes available.

Taking a look at the main center cabinet, I’d be curious if there might be a microwave oven parked behind the two doors? It could perhaps be a convenient addition for the hungry go-getter in a hurry? Think about it, there’s likely a TV and faucet nearby. So it’s not out of the question that this en suite might just be made ‘a bit more complete’ by having a microwave in the mix.

Finally, maybe you want to take the ultimate organizational step and hide the whole closet away! With the additional of barn doors and some large appliance pulls you have created the mac daddy of successful organized closets!

Whether it’s your kitchen, mudroom, garage, or your closet, give www.WoodworkerExpress.com a thought; we can likely help you with whatever it is you need, except for maybe cowboy boots and blue sneakers.

Grey closet with organizers
Photo courtesy of The Closet Factory Los Angeles

Mondays with Mike…June 13th 2022 Edition Twenty

Add sophistication to a neutral kitchen with mixed finish cabinet hardware.

Today we’ve got a neutral kitchen corner on display with accessories that you can find at: www.WoodworkerExpress.com. This kitchen designer has chosen a great new trend in cabinet hardware, mixed finish knobs and pulls. These contemporary shapes feature a dual finish in this case black nickel. When we’re talking about choosing matching knobs and pulls mixed finish hardware can add that class and sophistication you seek but can’t always easily find. The collection featured here is the Mulino Collection by Amerock.

An already effective blend comes alive even further when you combine this clean looking apron front sink with a “touchless” faucet finished in black nickel. Like any white car owner can tell you, a bright color/aesthetic will leave you no choice but to keep things clean…but that’s not a bad thing, is it? There’s a few things for sale in this photo that you likely can’t even see like finish-specific caulk to seal it all up and keep sloppy faucet users from ruining it for the rest of us. Confession- While doing dishes at home, if I drip/spill/submerge water onto the under sink cabinets, the Mrs. will cringe and ‘remind’ me I’m just about to destroy the cabinets. So…I’m sloppy!

And while we’re at it, notice (or not) the nearly camouflaged floating shelf on the back wall whose function is to support, but not be seen….or whatever that military credo is. Lastly, the cutting board here can’t be overlooked. It’s a great piece to add for decorative charm along with the contrast it provides against the white background…but perhaps even more importantly; the fact that it’s designed to hold cheese.

Apron Front Sinks, Mulino Collection cabinet Hardware, cutting Boards, floating shelves
Photo Courtesy of Amerock Hardware