


Woodworking is a craft that requires attention to detail and a keen eye for aesthetics. One technique that can greatly enhance the appearance of your woodworking projects is the use of wood veneer edge banding. In this blog post, we will delve into the advantages of incorporating wood veneer edge banding into your projects, as well as provide tips and insights on how to choose and apply the right banding for your needs.
Definition of Wood Veneer Edge Banding
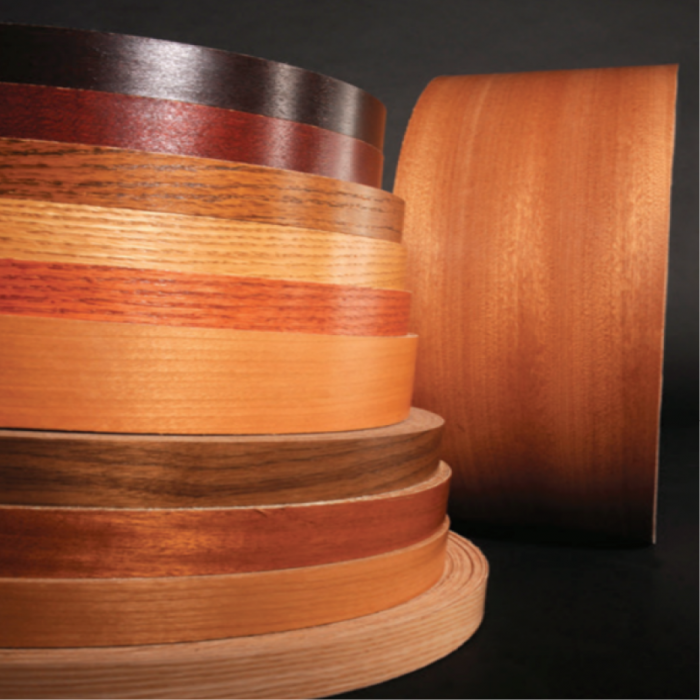
Wood veneer edge banding is a thin strip of real wood that is applied to the edges of plywood or other composite materials. This banding creates a seamless and natural look, mimicking the appearance of solid wood. It is an excellent alternative to solid wood edges, offering both aesthetic and functional benefits.
Importance of Edge Banding in Woodworking Projects
Edge banding plays a crucial role in woodworking projects. Not only does it enhance the visual appeal of the finished product, but it also serves as a protective barrier for the edges. Without edge banding, the edges of plywood or particleboard are vulnerable to damage from moisture, impacts, and wear and tear. By adding wood veneer edge banding, you can significantly increase the durability and lifespan of your projects.
Advantages of Wood Veneer Edge Banding
There are numerous advantages to using wood veneer edge banding in your woodworking projects. Let’s explore some of the key benefits:
Enhances the Aesthetics of the Project
Wood veneer edge banding provides a high-end appearance that is comparable to solid wood. With a wide range of wood species and finishes available, you can easily match the banding to the project’s style and create a cohesive and polished look. Whether you prefer the warm tones of oak or the rich grains of mahogany, there is a wood veneer edge banding option that will suit your design preferences.
Provides Durability and Protection to the Edges
One of the primary functions of wood veneer edge banding is to protect the edges of the material from damage. The banding acts as a shield, preventing moisture penetration and minimizing the risk of chipping or splintering. It also adds structural integrity to the edges, making the overall project more robust and long-lasting.
Offers a Cost-Effective Solution
Compared to using solid wood for edging, wood veneer edge banding is a cost-effective alternative. Solid wood can be expensive and may not always be readily available in the desired species or size. By using wood veneer edge banding, you can achieve the same look and feel without breaking the bank.
Easy Installation and Versatility
Wood veneer edge banding is relatively easy to install, making it suitable for both professional woodworkers and DIY enthusiasts. With the option of pre-glued and iron-on banding, the installation process becomes even more convenient. The versatility of wood veneer edge banding allows you to use it on various materials, including plywood, particleboard, and MDF, expanding the range of projects you can incorporate it into.
Types of Wood Veneer Edge Banding
Wood veneer edge banding comes in different types, each with its unique characteristics and uses. Let’s explore the main types:
Natural Wood Veneer Edge Banding
As the name suggests, natural wood veneer edge banding is made from real wood veneer. It offers the most authentic wood appearance and is available in a variety of species, such as maple, cherry, and walnut. Natural wood veneer edge banding can be finished with stains or clear coats to enhance the grain and color.
Reconstituted Wood Veneer Edge Banding
Reconstituted wood veneer edge banding is made from real wood fibers that have been reassembled and bonded together. This type of banding offers a more consistent appearance and is often more cost-effective compared to natural wood veneer. It is available in a wide range of finishes and can closely mimic the look of expensive wood species.
Pre-Glued and Iron-On Wood Veneer Edge Banding
Pre-glued and iron-on wood veneer edge banding is designed for easy and quick installation. The banding is already coated with adhesive, which can be activated by applying heat. Simply position the banding on the edge, use an iron to heat it, and press it firmly into place. This type of banding is ideal for smaller projects or for those who want a hassle-free installation process.
Unfinished and Finished Wood Veneer Edge Banding
Unfinished wood veneer edge banding allows you to apply your desired stain or finish to match the rest of the project. This type of banding provides the flexibility to customize the appearance according to your preferences. On the other hand, finished wood veneer edge banding comes already stained and sealed, ready for immediate use. This option is convenient for those who prefer a quick and consistent finish.
Choosing the Right Wood Veneer Edge Banding
Selecting the right wood veneer edge banding for your project is crucial to achieving the desired outcome. Here are some considerations to keep in mind:
Considerations for Wood Species and Grain Pattern
When choosing wood veneer edge banding, consider the species and grain pattern that will best complement your project. If you are aiming for a cohesive look, select a banding that matches the predominant wood species used in your project. Additionally, pay attention to the grain pattern, as it can significantly impact the overall aesthetics.
Matching the Veneer Edge Banding with the Project’s Style
The style of your project should also guide your choice of wood veneer edge banding. If you are aiming for a traditional or rustic look, opt for banding in warmer tones and with more pronounced grain patterns. For a more modern or contemporary aesthetic, consider banding with a sleek and minimalistic appearance.
Evaluating the Thickness and Width of the Banding
The thickness and width of the wood veneer edge banding play a role in both the appearance and durability of the finished project. Thicker banding can provide a more substantial and robust look, while narrower banding can create a delicate and refined edge. Consider the overall design and functionality of your project when selecting the appropriate dimensions.
Exploring the Available Finishes and Colors
Wood veneer edge banding comes in various finishes and colors. From natural wood tones to vibrant hues, the options are virtually limitless. Take the time to explore the available finishes and colors to find the one that best suits your project and personal style.
Preparing and Applying Wood Veneer Edge Banding
Proper preparation and application are essential for achieving a seamless and durable result. Follow these steps when working with wood veneer edge banding:
Surface Preparation for Proper Adhesion
Before applying the banding, ensure that the edges of your project are clean, smooth, and free from any dust or debris. Rough edges can compromise the adhesion of the banding, so it is crucial to take the time to properly prepare the surface.
Trimming and Shaping the Banding
Measure and cut the wood veneer edge banding to the appropriate length, allowing a slight overhang on each end. Use a utility knife or a banding trimmer to achieve clean and precise cuts. You can also shape the banding using a router or a file to match the contours of your project.
Applying Adhesive and Ironing On the Banding
If you are using pre-glued or iron-on banding, follow the instructions provided by the manufacturer. Typically, this involves applying heat to activate the adhesive and carefully pressing the banding onto the edge. Use a roller or a block of wood to ensure even pressure and proper adhesion.
Finishing Touches and Sanding
After the banding is firmly in place, trim off the excess with a sharp utility knife. Sand the edges to create a smooth and flush surface. Take care not to damage the surrounding material during this process. Finally, apply a finish or sealant to protect the banding and enhance its appearance.
Troubleshooting and Tips
While working with wood veneer edge banding, you may encounter some common issues. Here are a few tips to help you troubleshoot and achieve successful results:
Common Issues and How to Fix Them
If you notice any lifting or bubbling of the banding, it may be an indication of improper adhesion. Ensure that the surface is clean and free from dust before applying the banding. Applying additional pressure and heat during the installation process can also help achieve better adhesion.


 Do Not Sell My Personal Information