Posted inDesign Inspiration Shaping the Future One Sink at a Time: The Pros and Cons of Different Kitchen Sink Shapes Posted by Jason Rodrigue August 21, 2023 In this blog post, we will explore the various kitchen sink shapes and discuss their…
Posted inCabinet Hardware & Accessories Enhance Your Cabinet Functionality with Side-Mount Drawer Glides Posted by Jason Rodrigue July 14, 2023 Let's explore the benefits and functionality of side-mount drawer glides for your cabinets. We will…
Posted inProduct Spotlights Why Investing in High-Quality Replacement Parts is Essential for Bathroom Partitions Posted by Jason Rodrigue July 13, 2023 In this blog post, we discuss the importance of investing in high-quality replacement parts for…
Posted inDo-It-Yourself (DIY) Discover the Benefits of Wood Veneer Edge Banding in Your Woodworking Projects Posted by Jason Rodrigue July 12, 2023 Woodworking is a craft that requires attention to detail and a keen eye for aesthetics.…
Posted inWoodworking Tools and Equipment The Importance of Glove Protection in Woodworking Posted by Jason Rodrigue July 11, 2023 In this blog post, we discuss the crucial role of glove protection in woodworking and…
Posted inDesign Inspiration Exploring Unconventional Kitchen Sink Shapes: Breaking the Mold Posted by Jason Rodrigue July 10, 2023 Let's dive into the world of kitchen sinks beyond the traditional rectangular shape and explore…
Posted inWoodworking Techniques & Tips Achieve Perfectly Smooth Surfaces: The Key to Using Abrasives in Woodworking Posted by Jason Rodrigue July 7, 2023 As any seasoned woodworker knows, the final finish of a project can make or break…
Posted inDesign Inspiration How to Choose the Right LED Under Cabinet Lighting for Your Kitchen Posted by Jason Rodrigue July 6, 2023 Let's delve into the important factors to consider when selecting LED under cabinet lighting for…
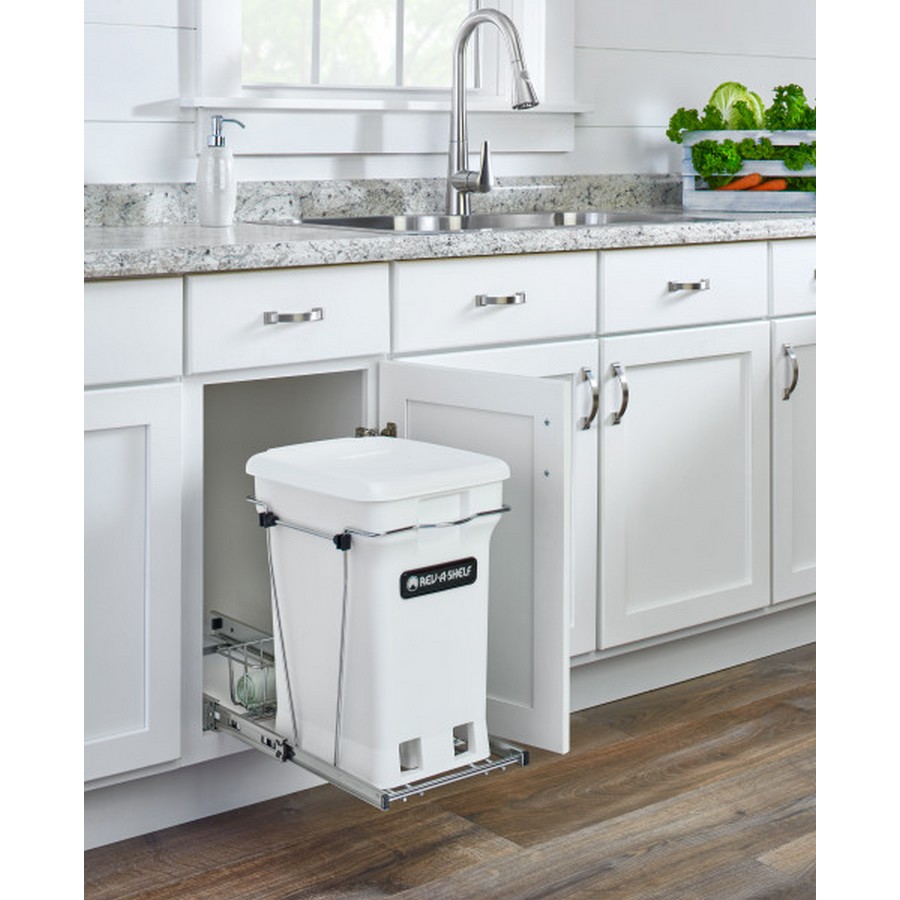
Posted inStorage & Organization Solutions Maximizing Space: How to Transform Your Cabinet into a Pull Out Trash Posted by Jason Rodrigue July 5, 2023 Kitchens are often the hub of a home, but they can also be one of…
Posted inDo-It-Yourself (DIY) Woodworking Tools and Equipment 10 Essential Clamps Every Beginner Woodworker Should Have Posted by Jason Rodrigue July 3, 2023 Introduction Woodworking is a craft that requires precision and stability. One tool that plays a…