Cart:0 Items - $0.00
Order subtotal does not cover discounts and extra costs like shipping charges, etc. The final cost of the order will be calculated at the checkout page.
Inventory Challenges caused by the Supply Chain? NO worries ...Click to learn more | Want a year of FREE shipping? Click to learn about our PRO Membership
Are you looking to add some rustic charm to your home? Look no further than a custom hanging barn door! I recently had the pleasure of building a beautiful barn door for a co-worker using red oak and some top-notch barn door hardware.
First things first: I carefully selected the perfect pieces of red oak. Red oak is a hardwood that’s known for its durability and gorgeous grain patterns, making it an ideal choice for a door that will get a lot of use. I picked out the best boards I could find, making sure they had a nice, straight grain to minimize warping over time.
Next up: size matters! I wanted the door to cover the opening while still fitting snugly within the space provided. So, I designed the door to be 34 inches wide by 89 inches tall and 1.5 inches thick – a standard-ish size for interior barn doors. The height was chosen to fit the opening perfectly, while the width allowed for 1″ overlay on either side.
Now for the fun part: the finish! I opted for a waterborne finish, which is not only environmentally friendly but also super durable. It dries quickly and is easy to clean up, making it a favorite among woodworkers. I applied several coats, making sure to let each one dry completely before moving on to the next.
Last but not least: the hardware. I got my hands on some top-of-the-line barn door hardware from WoodworkerExpress.com, including a sliding rail, rollers, and a door guide. I mounted the sliding rail above the opening, attached the rollers to the top of the door, and installed the door guide at the bottom to keep it from swinging back and forth.
And there you have it – a beautiful, functional barn door that’s sure to impress. Building it was a ton of fun, and I love knowing that I created something with my own two hands. If you’re looking to add some rustic charm to your home, consider building a barn door of your own – it’s easier than you think!
Upgrading your cabinet doors and drawer fronts with decorative hardware is a simple yet effective way to enhance the aesthetic appeal and functionality of your kitchen or any other space with cabinets. In this detailed guide, we will walk you through the step-by-step process of installing decorative hardware, such as knobs and handles, to achieve a polished and professional look. Let’s get started on transforming your cabinets!
Determine the placement of the hardware. Consider the size, style, and functionality of the hardware, as well as your personal preferences. Measure and mark the desired location for each piece of hardware on the cabinet doors and drawer fronts using a measuring tape and pencil.
Prepare the cabinets by cleaning the surfaces where the hardware will be installed. Remove any dirt, grease, or residue that may affect the adhesion or installation process.
Step 2: Installing Knobs on Cabinet Doors
Start by selecting the appropriate drill bit size for the screws provided with the knobs. Typically, a 3/16-inch bit works well for most knobs.
Hold the knob against the marked spot on the cabinet door. Ensure it is aligned with adjacent hardware and leveled. Mark the locations for screw holes using a pencil.
Attach the drill bit to your drill and carefully drill pilot holes at the marked spots on the cabinet door. Take care not to drill all the way through the door. A depth slightly shorter than the length of the screws is sufficient.
Align the knob with the pilot holes and insert the screws provided. Tighten them using a screwdriver until the knob is securely fastened. Avoid overtightening to prevent damage to the cabinet door.
Repeat this process for all the knobs on your cabinet doors, ensuring consistent spacing and alignment.
Step 3: Installing Handles or Pulls on Cabinet Doors and Drawer Fronts
Similar to the knob installation process, measure and mark the desired location for each handle or pull on the cabinet doors and drawer fronts. Use a level to ensure straight alignment.
Determine the appropriate drill bit size for the screws provided with the handles or pulls. Drill pilot holes at the marked spots using the selected drill bit.
If you have a cabinet template or jig, align it with the marked locations and use it as a guide for drilling the pilot holes. This can help ensure consistency and accuracy in hole placement.
Align the handle or pull with the pilot holes and insert the screws provided. Begin by hand-tightening the screws, then use a screwdriver to fully secure them. Ensure that the hardware is securely fastened without being overtightened.
For drawers, consider using longer screws provided with the handles or pulls, especially for thicker drawer fronts. This will provide a stronger and more secure attachment.
Repeat the process for all handles or pulls on both the cabinet doors and drawer fronts, maintaining consistent spacing and alignment.
Step 4: Finishing Touches and Inspection
After installing all the decorative hardware, double-check the tightness of each screw to ensure all knobs, handles, and pulls are securely fastened.
Take a step back and inspect the cabinets to ensure the hardware is level, aligned, and visually pleasing. Make any necessary adjustments to achieve a balanced and cohesive look.
Clean the cabinets and hardware with appropriate cleaning supplies to remove any fingerprints or smudges from the installation process. This will leave your cabinets looking pristine and ready to showcase their new decorative hardware.
Finally, step back and admire your newly upgraded cabinets! Appreciate the transformation and the added style and functionality that the decorative hardware brings to your space.
Maintenance Tips:
To keep your decorative hardware and cabinets in excellent condition, consider the following maintenance tips:
Regular Cleaning: Wipe down the hardware regularly using a soft, damp cloth to remove any dust or grime that may accumulate. Avoid using harsh chemicals that could damage the finish.
Preventive Maintenance: Periodically check the tightness of screws and fasteners to ensure they remain secure. If any become loose, simply tighten them with a screwdriver.
Cleaning Product Compatibility: When using cleaning products on your cabinets, ensure they are safe for the specific type of hardware and cabinet material. Read product labels and follow manufacturer recommendations.
Avoid Abrasive Materials: Use non-abrasive cleaning tools, such as microfiber cloths, to avoid scratching or damaging the hardware’s finish.
Handle with Care: Open and close cabinet doors and drawers gently, avoiding excessive force or pulling on the hardware. This will help maintain their integrity and prolong their lifespan.
Conclusion:
By following this detailed guide, you can successfully install decorative hardware on your cabinet doors and drawer fronts. This simple DIY project will elevate the overall look and functionality of your cabinets, giving your space a fresh and polished appearance. Enjoy the process and the satisfaction of completing this transformative upgrade. With your newly installed decorative hardware, your cabinets will not only be more visually appealing but also easier to use on a daily basis.
Edgebanding adhesive is a type of adhesive that is commonly used to attach edgebanding materials such as veneer, PVC, or ABS to the edges of furniture and cabinetry. When it comes to edgebanding adhesive, there are two common forms: pellets and cartridges. Each form has its advantages and disadvantages, so it’s important to understand the differences between them to make an informed choice.
Pellets are solid pieces of adhesive that are melted and applied to the edge of the material using a specialized edgebander machine. The machine heats the pellets, which are then melted and applied to the edge of the material as it passes through the machine. Pellets are preferred for their ease of use and ability to provide a strong, permanent bond.
Advantages of Pellets:
Pellets provide a strong, permanent bond.
Pellets are easy to use with specialized edgebander machines.
Pellets are ideal for larger projects.
Disadvantages of Pellets:
Pellets require a specialized edgebander machine to use.
Pellets can be difficult to use for smaller projects.
Cartridges:
Cartridges, on the other hand, are pre-packaged units of adhesive that can be loaded into a specialized cartridge gun. The adhesive is dispensed from the gun in a controlled manner and applied to the edge of the material manually. Cartridges are convenient for smaller projects or for those who do not have access to an edgebander machine.
Advantages of Cartridges:
Cartridges are convenient for smaller projects or those without an edgebander machine.
Cartridges provide a strong bond when used correctly.
Cartridges are easy to use and handle.
Disadvantages of Cartridges:
Cartridges may not be cost-effective for larger projects.
Cartridges may not provide as strong of a bond as pellets when used for larger projects.
When choosing an edgebanding adhesive, it is important to consider the type of material being bonded, the size of the project, and the available equipment. It is also important to follow the manufacturer’s instructions for proper application and safety precautions.
In conclusion, both pellet and cartridge forms of edgebanding adhesive have their advantages and disadvantages. If you have a larger project, pellets may be the best choice for their ease of use and ability to provide a strong, permanent bond. However, if you have a smaller project or do not have access to an edgebander machine, cartridges may be the more convenient choice. Ultimately, the choice will depend on your individual needs and preferences. Need large machinery? Contact our customer service team!
Let us talk of the marvels of woodworking and the ancient art of joinery. The joining of two pieces of wood has been an age-old problem for craftsmen, artisans, and do-it-yourselfers since the dawn of time. However, there is one technique that has stood the test of time – Kreg pocket holes.
But what, pray tell, are Kreg pocket holes? To answer this question, we must first delve into the intricacies of joinery. Joinery is the method of joining two pieces of wood together using various techniques such as dowels, mortise and tenon, and biscuits. While these techniques are tried and true, they can be difficult and time-consuming for novice woodworkers.
This is where Kreg pocket holes come in handy. Kreg pocket holes are a method of joinery that allows for a simple and easy connection between two pieces of wood. They work by drilling a pocket hole at an angle into one piece of wood and then attaching it to the other piece using a specialized screw.
The pocket hole itself is a small pocket or cavity that is created by drilling a hole at an angle into the wood. The angle is typically around 15 degrees and is designed to allow the screw to go in at an angle, which creates a strong and secure connection between the two pieces of wood.
But how does one go about creating these wondrous pocket holes? Fear not, for Kreg has provided a specialized jig that helps you drill the pocket hole at the correct angle and depth every time. This makes the process quick and easy, even for beginners.
Using Kreg pocket holes can save you a lot of time and frustration compared to traditional joinery techniques. It’s also a great way to create a professional-looking finish without any visible screws or nails.
Furthermore, Kreg pocket holes can be used in a variety of woodworking projects such as building cabinets, bookcases, and even outdoor furniture. The possibilities are endless!
But what sets Kreg pocket holes apart from other types of joinery? The answer is simple – strength and durability. The angled screw that is used in Kreg pocket holes creates a strong and secure connection that is much stronger than a traditional butt joint or dowel joint.
In conclusion, Kreg pocket holes are a game-changer in the world of woodworking. They provide a simple and easy way to join two pieces of wood together while also providing strength and durability. So the next time you’re working on a woodworking project, consider using Kreg pocket holes for a professional-looking finish that will stand the test of time.
old fashioned kitchen with green cabinets and a white fridge
Yes, it is possible to put new cabinet door hinges on old cabinets. However, it may require some effort and skill to ensure that the new hinges fit properly and that the cabinet doors hang correctly.
Before purchasing new hinges, you’ll need to measure the dimensions of your current hinges to ensure that the new ones will fit. You’ll also want to consider the type of hinge you need. There are several types of hinges available, including overlay, inset, and offset hinges.
Once you have the new hinges, you’ll need to remove the old hinges from the cabinet doors and frames. This may require some careful work with a screwdriver or drill.
After removing the old hinges, you’ll need to install the new hinges in their place. This may require drilling new holes for the screws or adjusting the placement of the hinges to ensure that the doors hang correctly.
Overall, putting new hinges on old cabinets is possible, but it may require some effort and skill to ensure a proper fit and function. If you are not comfortable with this type of DIY project, it may be best to consult with a professional.
Childproof cabinet locks: If you have young children at home, childproof cabinet locks can be an effective way to keep them out of the cabinets. These locks are easy to install. They typically work by attaching a latch or hook to the inside of the cabinet door. This prevents it from being opened without a key or a specific motion.
Magnetic cabinet locks: Magnetic cabinet locks are another option for childproofing your cabinets. These locks use a magnet to keep the cabinet doors closed, and they are typically installed on the inside of the cabinet door and frame. They are easy to install and can be a good choice if you don’t want to drill holes or use adhesive.
Keyed cabinet locks: If you want to secure your cabinets against unauthorized access, keyed cabinet locks are a good option. These locks require a key to unlock the cabinet, and they can be installed on the inside of the cabinet door or the outside.
Combination cabinet locks: Combination cabinet locks are another option if you want to keep your cabinets locked but don’t want to carry around a key. These locks require a combination to open, which can be set and reset as needed.
When you found the way to lock your kitchen cabinet, consider factors such as ease of installation, ease of use, and the level of security you need. Be sure to follow the manufacturer’s instructions carefully when installing your chosen lock to ensure it works properly.
Concealed hinges offer several advantages over traditional hinges that are visible from the outside. Here are some of the benefits of using concealed hinges:
Aesthetics: One of the primary advantages of concealed hinges is that they provide a clean and sleek look to cabinets and doors. Since the hinge is hidden from view, it does not disrupt the appearance of the furniture or interior design.
Accessibility: Concealed hinges allow doors to open up to a full 180 degrees, which can provide greater accessibility and ease of use. This is especially important in spaces that are tight or have limited room for door swing.
Durability: Concealed hinges are often made from high-quality materials which make them more durable and resistant to wear and tear. They also tend to be more resistant to moisture and humidity, which can be a concern in bathrooms or kitchens.
Adjustability: Many concealed hinges are designed to be adjustable, which allows for fine-tuning of the door alignment and ensures a perfect fit. This can be especially useful in situations where the door or cabinet may have shifted over time.
Soft-Close: Most concealed hinges are available in either self or soft close. There is nothing nicer than a door closing quietly, especially when the kids are fast asleep and you are looking for a midnight snack.
Overall, concealed hinges offer a range of benefits that can enhance the appearance and functionality of cabinets and doors. While they may be more expensive than traditional hinges, their durability and longevity can make them a worthwhile investment in your home or place of business.
Concealed hinges are designed to be hidden from view when a cabinet door is closed. There are several types of concealed hinges available, here are the most popular ones!
European hinges: European hinges are the most common type of concealed hinge. They are designed to be used on both frameless and face-frame cabinets and feature a two-part design consisting of a mounting plate and a hinge cup.
Barrel hinges: Barrel hinges are another type of concealed hinge that can be used on both frameless and face-frame cabinets. They feature a cylindrical barrel that is inserted into a drilled hole in the cabinet and are held in place by a screw.
Pivot hinges: Pivot hinges are a unique type of concealed hinge that is installed at the top and bottom of a door or cabinet. They allow the door or cabinet to swing open on a single pivot point and are often used on large or heavy doors.
Each type of concealed hinge has its own unique features and benefits, so it’s important to choose the right one based on your specific needs and the type of cabinet or door you are working with.
In woodworking, there’s always more than one way to skin a cat. With so many adhesives on the market, choosing the adhesive that will work for your project can be a difficult decision. So in this blog i will explain to you the adhesives that are commonly used in woodworking, each with their own unique properties and advantages. Each type of adhesive has its own unique properties and advantages, so it is important to choose the right one for the job.
Man applying glue to wood and gluing boards in carpentry workshop
Here are some of the most common types:
PVA (Polyvinyl Acetate) Glue: This is the most commonly used woodworking glue because of its ease of use, affordability, and versatility. PVA glue is a water-based adhesive that is easy to use and dries clear. It is particularly effective for joining porous materials, such as wood, and can be used on a variety of wood surfaces. PVA glue is also easy to sand once it has dried, making it ideal for projects that require a smooth finish. However, PVA glue is not waterproof and may not be suitable for outdoor projects
Epoxy: Epoxy is a two-part adhesive that provides a very strong bond. It consists of a resin and a hardener, which are mixed together before application. Epoxy can be used on a variety of surfaces, including wood, metal, and plastic, and is particularly useful for bonding wood to non-porous materials. Epoxy takes longer to cure than other adhesives, but it provides a very strong and durable bond that can withstand heavy loads and exposure to moisture.
Cyanoacrylate (CA) Glue: Also known as super glue, CA glue is a fast-drying adhesive that provides a strong bond. It is useful for small repairs and for bonding wood to non-porous materials, such as metal or plastic. CA glue dries clear and is ideal for projects where appearance is important. However, it is not effective for bonding porous materials, such as wood, as it tends to be brittle and can break easily.
Hide Glue: Hide glue is a natural adhesive that has been used in woodworking for centuries. It is made from animal collagen and is particularly useful for repairing antique furniture. Hide glue is reversible, meaning that it can be heated and reactivated if necessary. It is also great for use in veneering, as it provides a strong and stable bond. Hide glue has a longer working time than other adhesives.
Polyurethane Glue: Polyurethane glue is a very strong adhesive that provides a waterproof bond. It is particularly useful for outdoor woodworking projects or for bonding wood to non-porous materials.
Contact Cement: Contact cement is a strong adhesive that is particularly useful for laminating wood surfaces together. It is also useful for bonding wood to non-porous materials, such as metal or plastic.
If you’re someone who enjoys woodworking, metalworking, or any kind of crafting that involves smoothing surfaces, then you’ve likely come across sandpaper at some point. Sandpaper comes in a variety of grits, or levels of abrasiveness, and one of the most commonly used is 400 grit sandpaper.
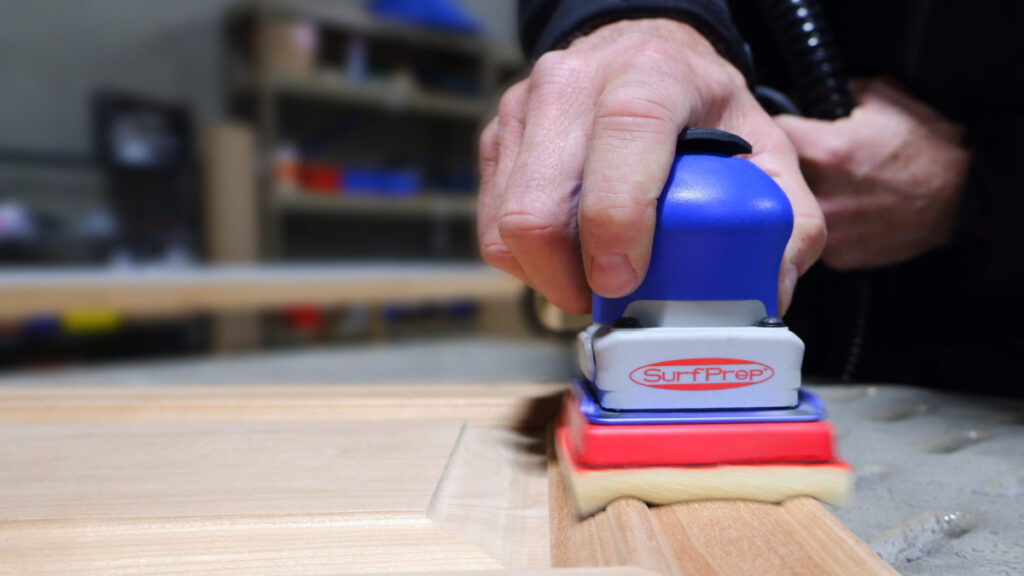
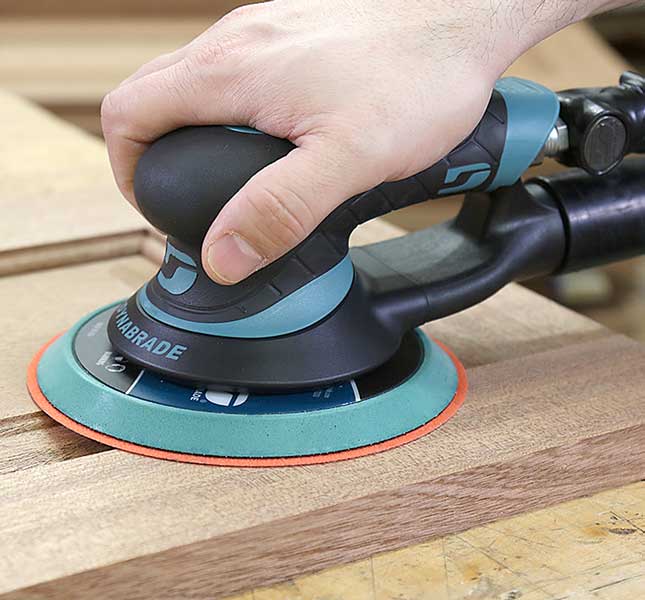
Man Hands using and orange and black sanding apparatus with 400 grit sandpaper
Smoothing wood surfaces: If you’re working with wood and you want a smooth surface, 400 grit sandpaper is a good choice. It can help to remove small imperfections, such as bumps or rough spots, and leave you with a silky smooth finish.
Preparing surfaces for painting: When you’re preparing a surface for painting, it’s important to have a smooth and clean surface. This grit can help to remove any roughness or bumps, making it easier for the paint to adhere properly.
Sanding between coats: If you’re applying multiple coats of a finish, such as varnish or lacquer, it’s important to sand between coats to ensure a smooth and even finish. 400 grit sandpaper is often used for this purpose.
Smoothing metal surfaces: If you’re working with metal, this grit of sandpaper can be used to smooth out any rough spots or imperfections. This can be especially useful if you’re working on a metal object that will be visible, such as a piece of jewelry.
Removing rust or paint: If you’re trying to remove rust or paint from a metal surface, 400 grit sandpaper can be a good choice. It’s not as abrasive as some other grits, so it’s less likely to damage the metal underneath.
Overall, sandpaper is a versatile tool that can be used for a variety of finishing and smoothing tasks. Whether you’re working with wood, metal, or other materials, having the proper grit of sandpaper on hand can be a helpful addition to your toolkit. Check this out if you want to learn more about sandpaper for woodworking.