Shaping the Future One Sink at a Time: The Pros and Cons of Different Kitchen Sink Shapes

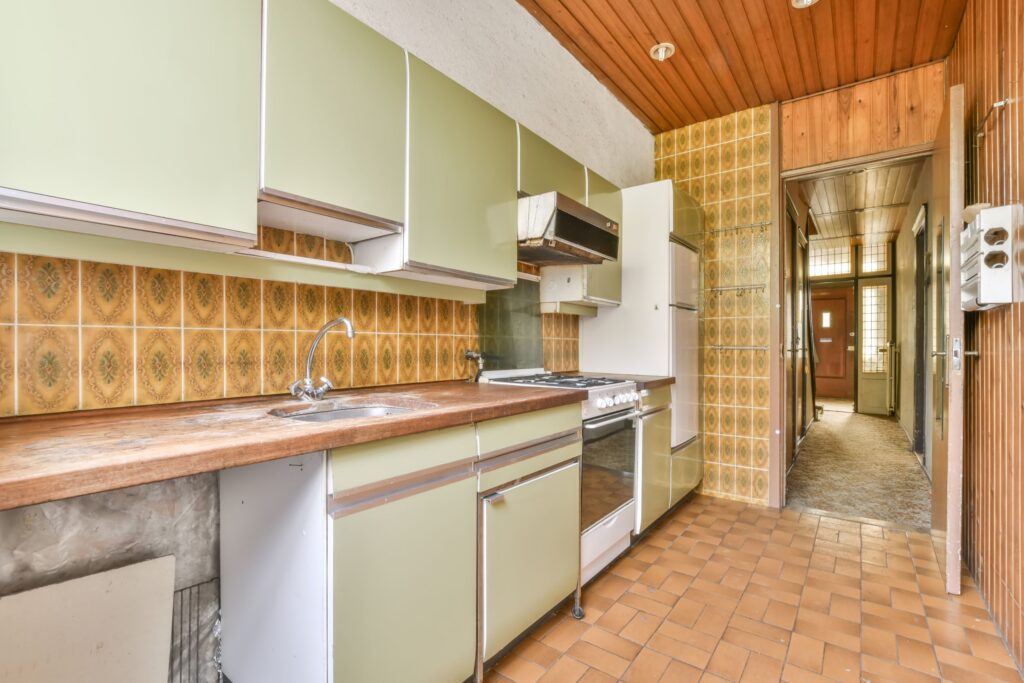
In this blog post, we will explore the various kitchen sink shapes and discuss their pros and cons. Kitchen sinks come in a wide range of shapes, including rectangular, square, round, and oval. Each shape offers unique benefits and drawbacks that can impact the functionality and aesthetics of your kitchen. We will analyze factors such as space utilization, ease of cleaning, and overall design to help you make an informed decision when choosing a kitchen sink shape for your home. Whether you prioritize a modern look, efficient use of space, or easy maintenance, this blog post will provide valuable insights to guide you in selecting the perfect kitchen sink shape for your needs.

Kitchen sink with faucet in front of window

Company url:

https://woodworkerexpress.com

When it comes to designing your dream kitchen, every detail matters. From the countertops to the cabinets, each element contributes to the overall aesthetic and functionality of the space. One of the most important features in any kitchen is the sink. The shape of your kitchen sink can greatly impact how you use your kitchen, how easy it is to clean, and even how it looks. In this blog post, we will explore the various kitchen sink shapes and discuss their pros and cons to help you make the best decision for your home.

Pros and Cons of choosing a rectangular kitchen sink

Advantages

  1. Rectangular kitchen sinks provide a sleek and modern look that complements contemporary kitchen designs.
  2. They offer a large and spacious basin, allowing for easy washing of large pots and pans.

Disadvantages

  1. The rectangular shape may not be as efficient in terms of space utilization, especially in smaller kitchens.
  2. Corners can be harder to clean, potentially leading to the build-up of dirt and grime.

Pros and Cons of choosing a round kitchen sink

Advantages

  1. Round kitchen sinks are a classic and timeless choice that can suit a variety of kitchen styles.
  2. They can be more space-efficient compared to rectangular sinks, making them a great option for smaller kitchens.

Disadvantages

  1. The curved shape may make it more difficult to clean larger items, such as baking sheets or cutting boards.
  2. Round sinks may not offer as much counter space around the basin compared to other shapes.

Pros and Cons of choosing a farmhouse kitchen sink

Advantages

  1. Farmhouse sinks, also known as apron sinks, are a popular choice for rustic and farmhouse-style kitchens.
  2. They have a deep basin that can accommodate large cookware and allow for easy washing.

Disadvantages

  1. Due to their size and design, farmhouse sinks may require custom cabinetry to properly fit and support the weight.
  2. They may take up more counter space and limit the available workspace in the kitchen.

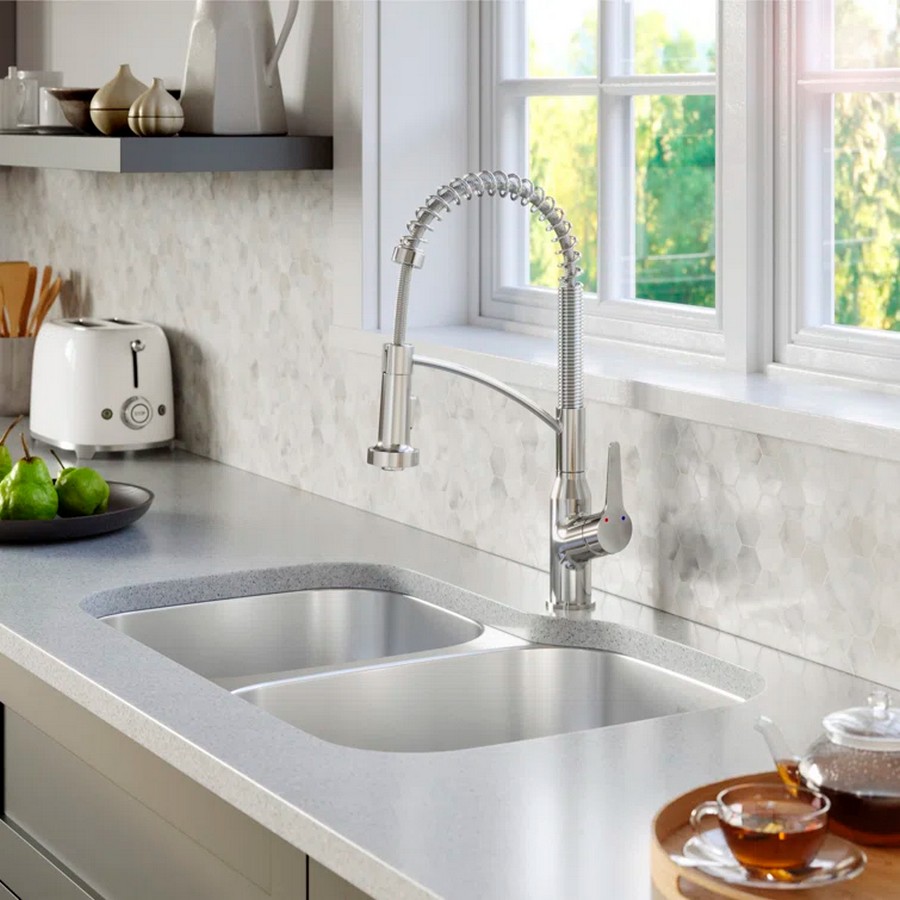
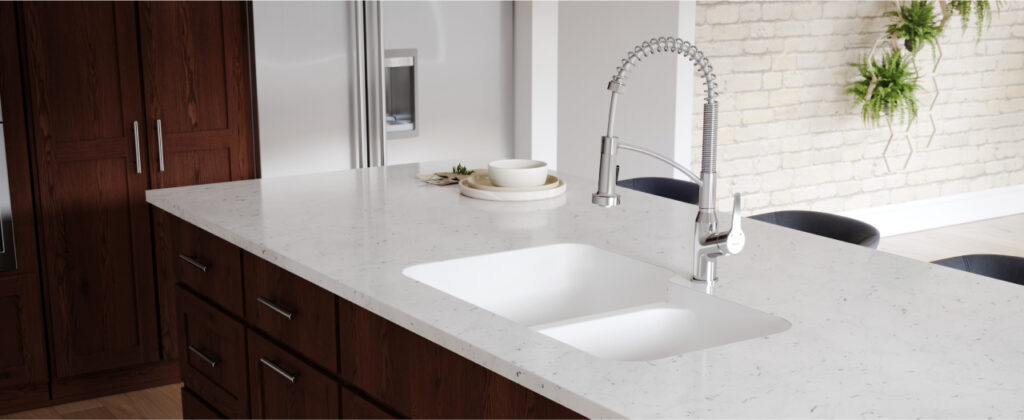
Pros and Cons of choosing a double-bowl kitchen sink

Advantages

  1. Double-bowl sinks offer the convenience of separate compartments for different tasks, such as washing and rinsing.
  2. They provide flexibility in organizing and dividing the sink space, allowing for multitasking and efficient use.

Disadvantages

  1. Smaller individual bowls may not accommodate larger items, such as baking sheets or large pots.
  2. The divider between the two bowls can limit the space available for washing larger items.

Conclusion

Choosing the right kitchen sink shape is an important decision that can greatly impact the functionality and aesthetics of your kitchen. Rectangular sinks offer a modern look and a large basin, but may not be as space-efficient. Round sinks are versatile and space-efficient, but may have limitations in cleaning and counter space. Farmhouse sinks are popular for their deep basin but may require custom cabinetry. Double-bowl sinks provide convenience but may have limitations in accommodating larger items. Consider your specific needs and preferences when choosing a kitchen sink shape, and remember to prioritize factors such as space utilization, ease of cleaning, and overall design. With the right sink shape, you can create a beautiful and functional kitchen that suits your lifestyle.

Exploring Unconventional Kitchen Sink Shapes: Breaking the Mold

Let’s dive into the world of kitchen sinks beyond the traditional rectangular shape and explore unique and unconventional sink designs that can transform the look and functionality of your kitchen. From round and oval sinks to asymmetrical and geometric models, we showcase these innovative sink shapes that break away from the mold of traditional kitchen design. Discover how these unconventional sinks can add a touch of modernity, style, and individuality to your kitchen space while still providing practicality and functionality. Whether you are looking to renovate your kitchen or simply seeking inspiration, this blog post offers a fresh perspective on kitchen sink options that go beyond the ordinary. Join us as we break the mold and explore the exciting world of unconventional kitchen sink shapes.

Traditional Kitchen Sink Shapes

Before we dive into the world of unconventional kitchen sink shapes, let’s first take a look at the traditional options that have been the standard for many years. These classic sink shapes have stood the test of time and continue to be popular choices for homeowners.

Double Basin Sinks: Double basin sinks feature two separate basins, allowing you to multitask in the kitchen. You can use one basin for washing dishes and the other for food preparation, making these sinks highly practical.

Single Basin Sinks: Single basin sinks offer a larger, uninterrupted space for washing dishes and cleaning larger items. They are perfect for those who prefer a more minimalist look in their kitchen.

Undermount Sinks: Undermount sinks are installed beneath the countertop, creating a seamless look and making cleaning easier. They are a popular choice for modern kitchens.

Unconventional Kitchen Sink Shapes

If you’re looking to add a unique touch to your kitchen, consider exploring unconventional sink shapes. These designs can add a sense of style and individuality to your space.

Corner Sinks: Corner sinks are a great option for maximizing space in smaller kitchens. By utilizing the corners of your kitchen, you can create a more efficient and functional workspace.

Trough Sinks: Trough sinks are elongated and shallow, making them ideal for larger families or those who do a lot of cooking and entertaining. They offer plenty of space for multiple people to use the sink at once.

Apron Front Sinks: Apron front sinks, also known as farmhouse sinks, are characterized by their exposed front panel. They add a rustic and charming element to the kitchen and are often made of durable materials such as cast iron or fireclay.

Integrated Sinks: Integrated sinks are seamlessly integrated into the countertop, creating a sleek and modern look. They are often made of the same material as the countertop, such as granite or quartz, resulting in a cohesive and visually appealing design.

Benefits of Unconventional Shapes

Choosing an unconventional sink shape for your kitchen can offer a range of benefits beyond just aesthetics.

Maximizing Space: Unconventional sink shapes, such as corner sinks, can help you make the most of limited kitchen space. By utilizing unconventional areas of your kitchen, you can create a more efficient and functional layout.

Enhancing Functionality: Some unconventional sink shapes, like trough sinks, provide ample space for multiple users at once. This can be especially useful for busy households or those who love to host gatherings and cook together.

Creating a Unique Design: Unconventional sink shapes allow you to break away from the norm and express your personal style. Whether you prefer a rustic farmhouse look or a sleek and modern design, there is an unconventional sink shape that can help you achieve your desired aesthetic.

Considerations before Choosing an Unconventional Sink

Before you commit to an unconventional sink shape, there are a few important factors to consider.

Plumbing Modifications: Depending on the unconventional sink shape you choose, you may need to make adjustments to your plumbing. It’s important to consult with a professional plumber to ensure that the installation process goes smoothly.

Sink Material and Durability: Different sink materials offer varying levels of durability and require different levels of maintenance. Consider your lifestyle and how much wear and tear your sink will endure before making a decision.

Compatibility with Countertops: It’s crucial to ensure that your chosen unconventional sink shape is compatible with your existing or planned countertop material. Take into account factors such as how the sink will be installed and whether any modifications will be needed.

Examples of Kitchen Designs with Unconventional Sinks

To inspire you in your own kitchen design journey, here are a few examples of how unconventional sink shapes can transform the look and functionality of a kitchen:

  1. A modern and minimalist kitchen with a sleek integrated sink seamlessly blending into the countertop.
  2. A farmhouse-style kitchen featuring an apron front sink as the centerpiece, adding a touch of rustic charm.
  3. A compact kitchen with a corner sink, making the most of limited space and creating an efficient work area.
  4. A spacious kitchen with a trough sink, perfect for large families or those who love to entertain.

These examples demonstrate how unconventional sink shapes can enhance the overall design and functionality of a kitchen, catering to different styles and needs.

Conclusion

When it comes to kitchen sinks, the possibilities are endless. By exploring unconventional sink shapes, you can break away from the traditional rectangular mold and add a unique touch to your kitchen. These innovative sink designs offer both style and practicality, transforming your kitchen into a space that reflects your individuality. Consider the benefits and factors to consider before making your decision, and get ready to embark on a kitchen design journey that breaks the mold.

Maximizing Space: How to Transform Your Cabinet into a Pull Out Trash

Image

Kitchens are often the hub of a home, but they can also be one of the most cramped and cluttered areas. One common problem that contributes to this issue is the placement of trash cans. Often, they take up valuable floor space and can be unsightly. However, there is a solution to this problem – converting a cabinet into a pull-out trash can. Not only does this maximize space, but it also keeps trash out of sight and improves the overall appearance and functionality of your kitchen.

At Woodworker Express, we want to help you make the most of your cabinet space. In this blog post, we’ll provide step-by-step instructions on how to convert your cabinet into a pull-out trash can. We’ll cover the benefits of this transformation, the materials and tools needed, and helpful tips and tricks for achieving a seamless and functional result.

Assessing Your Cabinet Space

The first step in converting your cabinet into a pull-out trash can is to assess your cabinet space. Not all cabinets are created equal, so it’s important to determine if your cabinet is a good candidate for this type of conversion. Take a look inside your cabinet and ask yourself the following questions:

  • Is there enough space for a trash can to fit comfortably?
  • Is the cabinet deep enough to accommodate the trash can and still allow the cabinet door to close?
  • Are there any shelves or other obstacles that would need to be removed?

If you answered yes to these questions, then your cabinet is likely a good candidate for a pull-out trash can. The next step is to measure your cabinet dimensions to determine the size of the trash can and hardware needed.

Choosing the Right Hardware

Once you’ve determined that your cabinet is a good candidate for a pull-out trash can, it’s time to select the appropriate hardware. This includes slides and brackets to mount the trash can inside the cabinet. When choosing your hardware, consider the weight capacity of the slides, as well as the size and shape of the brackets. You’ll also need to decide on the type of trash can that will work best for your needs.

Each option has its own benefits and drawbacks, so choose the one that works best for your lifestyle and needs.

Installation

With the right hardware and trash can selected, it’s time to install your pull-out trash cabinet. Start by preparing your cabinet and hardware, making sure to remove any obstacles and clean the inside of the cabinet. Next, mount the slides and brackets according to the manufacturer’s instructions, taking care to ensure that they are level and secure. Finally, install the trash can and adjust the mechanism to ensure that it slides smoothly in and out of the cabinet.

Maintaining Your Pull-Out Trash Cabinet

Now that your pull-out trash cabinet is installed, it’s important to properly maintain it to ensure that it continues to function properly and look its best. This includes cleaning and sanitizing the trash can on a regular basis, replacing the bin liners as needed, and troubleshooting any common problems such as sticking or uneven sliding.

Conclusion

Converting your cabinet into a pull-out trash can is a simple and effective way to maximize space in your kitchen while also improving its overall functionality. With the right hardware and a little bit of know-how, you can transform your cluttered and cramped kitchen into a streamlined and organized space. Consider other cabinet transformations to maximize storage, such as adding pull-out shelves or racks, and enjoy the benefits of a functional and beautiful kitchen.

The Secret to Installing Cabinet Hardware Like a Pro

When it comes to upgrading the look of your cabinets, one of the simplest and most cost-effective solutions is to install new cabinet hardware. However, even the most beautiful hardware can look shoddy if it’s installed poorly. That’s why we’ve put together this comprehensive guide to help you install cabinet hardware like a pro.

Why Cabinet Hardware is Important

Cabinet hardware serves two main purposes: functionality and aesthetics. The right hardware can make it easier to open and close your cabinets, while also enhancing their visual appeal. Choosing the right hardware can help tie together the overall style of your kitchen or bathroom, whether you prefer a modern, minimalist look or a more traditional, ornate style.

Tools Needed for Installation

Before you begin, it’s important to gather the necessary tools and materials. You’ll need a drill, a 3/16″ drill bit, a tape measure, a pencil, a screwdriver, and of course, the hardware itself. Make sure you have all the necessary components and that they’re the correct size for your cabinets.

Selecting the Right Cabinet Hardware

The first step in installing cabinet hardware is to choose the right pieces for your cabinets. You’ll want to consider the style of your cabinets, as well as the overall aesthetic of your kitchen or bathroom. Choose hardware that complements the style and finish of your cabinets, whether you prefer sleek stainless steel handles or ornate brass knobs. Measure the distance between the screw holes on your hardware and mark this on your cabinet to ensure accurate placement.

Preparing for Installation

Now that you’ve chosen the perfect hardware, it’s time to prepare your cabinets for installation. Remove any old hardware and fill any holes with wood filler. Clean the cabinet surface with soap and water, and dry thoroughly. Measure and mark where you want to place your new hardware, ensuring that they’re level and in line with each other.

Installing Cabinet Knobs

If you’re installing cabinet knobs, you’ll need to drill pilot holes in the marked spots. Use a drill bit that’s slightly smaller than the screws that came with your hardware. Insert the screws through the back of the cabinet and into the knob, tightening with a screwdriver. Make sure the knobs are straight and level before tightening completely.

Installing Cabinet Pulls

If you’re installing cabinet pulls, you’ll need to drill holes in the marked spots. Use a drill bit that’s the same size as the screws that came with your hardware. Insert the screws through the front of the cabinet and into the pull, tightening with a screwdriver. Make sure the pulls are straight and level before tightening completely.

Finishing Touches

Once you’ve installed all your hardware, step back and admire your handiwork. Make sure everything is level and straight, and tighten any loose screws. Clean up any dust or debris and enjoy your newly updated cabinets!

With this guide, you’ll be able to install cabinet hardware like a pro, enhancing the overall look and functionality of your cabinets. Remember to choose hardware that complements your existing cabinetry, and take the time to measure and mark your placement before drilling any holes. With a little patience and attention to detail, you’ll have beautiful new cabinets in no time.

10 Creative Storage Solutions for Small Kitchens

Are you tired of digging through cluttered cabinets and drawers in your small kitchen? Don’t worry, you’re not alone. Many people struggle with organizing their limited kitchen space, but there are plenty of innovative solutions to help you make the most out of your small kitchen. Here are ten creative ideas to help you maximize storage space:

Maximizing Vertical Space

When you’re short on counter space, it’s time to look up. Here are two solutions to help you utilize the space above your cabinets:

  • Wall-Mounted Shelves: Install open shelves on the wall above your countertops to store dishes, spices, and other kitchen essentials. These shelves can also add a decorative touch to your kitchen.
  • Pegboards: Pegboards are not just for tools. You can use them to hang pots and pans, utensils, and other kitchen items. They are easy to install and can be hung on any wall in your kitchen.

Utilizing Cabinet Doors

Don’t let the space on the back of your cabinet doors go to waste. Here are two solutions to help you maximize that space:

  • Door-Mounted Spice Racks: Install a spice rack on the back of your cabinet door to keep your spices organized and easily accessible. This will free up space in your cabinets and on your countertops.
  • Over-the-Door Organizers: You can also use over-the-door organizers to store everything from cutting boards to cleaning supplies. These organizers come in different sizes and designs to fit your needs.

Using Under-the-Sink Space

The area under your sink can be a treasure trove of storage space. Here are two solutions to help you make the most of it:

  • Pull-Out Organizers: Install pull-out organizers under your sink to store cleaning supplies, trash bags, and other items. These organizers are easy to install and can be customized to fit your needs.
  • Stackable Bins: Use stackable bins to organize your cleaning supplies and other items under your sink. These bins will help you access everything easily and keep your under-the-sink area clutter-free.

Multi-Functional Furniture

Furniture that serves more than one purpose is a great way to save space in a small kitchen. Here are two examples:

  • Kitchen Islands with Storage: A kitchen island can provide extra counter space and storage space. Look for an island with shelves, cabinets, or drawers to maximize its storage potential.
  • Banquette Seating with Hidden Storage: Banquette seating is not only cozy and comfortable, but it can also provide hidden storage space. Look for a banquette with a lift-up seat to store tablecloths, placemats, and other items.

With these creative storage solutions, you can make the most out of your small kitchen. Whether you’re renting or you own your home, these ideas are easy to implement and will help you keep your kitchen organized and clutter-free.

About Woodworker Express

Woodworker Express is a leading supplier of cabinet hardware, woodworking supplies, and furniture hardware. We offer a wide range of products for DIY enthusiasts, contractors, and professionals. Our products are high-quality, reliable, and affordable. Visit our website at https://woodworkerexpress.com to learn more.

Elevate Your Cabinets: A Detailed Guide to Installing Decorative Hardware on Cabinet Doors and Drawer Fronts

Introduction:

Upgrading your cabinet doors and drawer fronts with decorative hardware is a simple yet effective way to enhance the aesthetic appeal and functionality of your kitchen or any other space with cabinets. In this detailed guide, we will walk you through the step-by-step process of installing decorative hardware, such as knobs and handles, to achieve a polished and professional look. Let’s get started on transforming your cabinets!

2 different decorative handles on a kitchen cabinet

Materials Needed:

Step 1: Planning and Preparation

Determine the placement of the hardware. Consider the size, style, and functionality of the hardware, as well as your personal preferences. Measure and mark the desired location for each piece of hardware on the cabinet doors and drawer fronts using a measuring tape and pencil.

Prepare the cabinets by cleaning the surfaces where the hardware will be installed. Remove any dirt, grease, or residue that may affect the adhesion or installation process.

Step 2: Installing Knobs on Cabinet Doors

Start by selecting the appropriate drill bit size for the screws provided with the knobs. Typically, a 3/16-inch bit works well for most knobs.

Hold the knob against the marked spot on the cabinet door. Ensure it is aligned with adjacent hardware and leveled. Mark the locations for screw holes using a pencil.

Attach the drill bit to your drill and carefully drill pilot holes at the marked spots on the cabinet door. Take care not to drill all the way through the door. A depth slightly shorter than the length of the screws is sufficient.

Align the knob with the pilot holes and insert the screws provided. Tighten them using a screwdriver until the knob is securely fastened. Avoid overtightening to prevent damage to the cabinet door.

Repeat this process for all the knobs on your cabinet doors, ensuring consistent spacing and alignment.

Step 3: Installing Handles or Pulls on Cabinet Doors and Drawer Fronts

Similar to the knob installation process, measure and mark the desired location for each handle or pull on the cabinet doors and drawer fronts. Use a level to ensure straight alignment.

Determine the appropriate drill bit size for the screws provided with the handles or pulls. Drill pilot holes at the marked spots using the selected drill bit.

If you have a cabinet template or jig, align it with the marked locations and use it as a guide for drilling the pilot holes. This can help ensure consistency and accuracy in hole placement.

Align the handle or pull with the pilot holes and insert the screws provided. Begin by hand-tightening the screws, then use a screwdriver to fully secure them. Ensure that the hardware is securely fastened without being overtightened.

For drawers, consider using longer screws provided with the handles or pulls, especially for thicker drawer fronts. This will provide a stronger and more secure attachment.

Repeat the process for all handles or pulls on both the cabinet doors and drawer fronts, maintaining consistent spacing and alignment.

Step 4: Finishing Touches and Inspection

After installing all the decorative hardware, double-check the tightness of each screw to ensure all knobs, handles, and pulls are securely fastened.

Take a step back and inspect the cabinets to ensure the hardware is level, aligned, and visually pleasing. Make any necessary adjustments to achieve a balanced and cohesive look.

Clean the cabinets and hardware with appropriate cleaning supplies to remove any fingerprints or smudges from the installation process. This will leave your cabinets looking pristine and ready to showcase their new decorative hardware.

Finally, step back and admire your newly upgraded cabinets! Appreciate the transformation and the added style and functionality that the decorative hardware brings to your space.

Maintenance Tips:

To keep your decorative hardware and cabinets in excellent condition, consider the following maintenance tips:

Regular Cleaning: Wipe down the hardware regularly using a soft, damp cloth to remove any dust or grime that may accumulate. Avoid using harsh chemicals that could damage the finish.

Preventive Maintenance: Periodically check the tightness of screws and fasteners to ensure they remain secure. If any become loose, simply tighten them with a screwdriver.

Cleaning Product Compatibility: When using cleaning products on your cabinets, ensure they are safe for the specific type of hardware and cabinet material. Read product labels and follow manufacturer recommendations.

Avoid Abrasive Materials: Use non-abrasive cleaning tools, such as microfiber cloths, to avoid scratching or damaging the hardware’s finish.

Handle with Care: Open and close cabinet doors and drawers gently, avoiding excessive force or pulling on the hardware. This will help maintain their integrity and prolong their lifespan.

Conclusion:

By following this detailed guide, you can successfully install decorative hardware on your cabinet doors and drawer fronts. This simple DIY project will elevate the overall look and functionality of your cabinets, giving your space a fresh and polished appearance. Enjoy the process and the satisfaction of completing this transformative upgrade. With your newly installed decorative hardware, your cabinets will not only be more visually appealing but also easier to use on a daily basis.

Can you Install NEW hinges on old cabinets?

old fashioned kitchen with green cabinets and a white fridge

Yes, it is possible to put new cabinet door hinges on old cabinets. However, it may require some effort and skill to ensure that the new hinges fit properly and that the cabinet doors hang correctly.

Before purchasing new hinges, you’ll need to measure the dimensions of your current hinges to ensure that the new ones will fit. You’ll also want to consider the type of hinge you need. There are several types of hinges available, including overlay, inset, and offset hinges.

Once you have the new hinges, you’ll need to remove the old hinges from the cabinet doors and frames. This may require some careful work with a screwdriver or drill.

After removing the old hinges, you’ll need to install the new hinges in their place. This may require drilling new holes for the screws or adjusting the placement of the hinges to ensure that the doors hang correctly.

Overall, putting new hinges on old cabinets is possible, but it may require some effort and skill to ensure a proper fit and function. If you are not comfortable with this type of DIY project, it may be best to consult with a professional.

https://youtube.com/shorts/-EW41SSGSTw?feature=share

4 Ways to lock kitchen cabinets?

There are several ways to lock your kitchen cabinets, depending on your specific needs and preferences. Here are a few options:

https://youtube.com/shorts/hsaUQtpBxk8?feature=share
  1. Childproof cabinet locks: If you have young children at home, childproof cabinet locks can be an effective way to keep them out of the cabinets. These locks are easy to install. They typically work by attaching a latch or hook to the inside of the cabinet door. This prevents it from being opened without a key or a specific motion.
  2. Magnetic cabinet locks: Magnetic cabinet locks are another option for childproofing your cabinets. These locks use a magnet to keep the cabinet doors closed, and they are typically installed on the inside of the cabinet door and frame. They are easy to install and can be a good choice if you don’t want to drill holes or use adhesive.
  3. Keyed cabinet locks: If you want to secure your cabinets against unauthorized access, keyed cabinet locks are a good option. These locks require a key to unlock the cabinet, and they can be installed on the inside of the cabinet door or the outside.
  4. Combination cabinet locks: Combination cabinet locks are another option if you want to keep your cabinets locked but don’t want to carry around a key. These locks require a combination to open, which can be set and reset as needed.

When you found the way to lock your kitchen cabinet, consider factors such as ease of installation, ease of use, and the level of security you need. Be sure to follow the manufacturer’s instructions carefully when installing your chosen lock to ensure it works properly.

How to Choose and Measure for a Lazy Susan

With Lazy Susans being available in four different shapes and a variety of sizes, it can be difficult to find the susan that you need. I will help you choose and measure for a new Lazy Susan so you can rest assure that you purchase the correct Lazy Susan, the first time!

full circle lazy susan
pie-cut lazy susan

Kidney Shape Lazy Susan

The first on the list is the kidney shape lazy susan. These Lazy Susans are designed to work with corner cabinets that have unattached, double folding doors. By unattached, i am talking about a door that when it swings opens, it leaves behind the kidney susan sitting in the cabinet by itself.

Pie-Cut Lazy Susan

Now number two on the list is the pie cut lazy susan. These are very similar to the kidney Lazy Susans,however, the pie cut has a much stronger 90 degree angle. These susans work just like the kidney lazy susans except these units are designed for the cabinet door to be directly attached to the lazy susan. You’ll know if you need a pie cut lazy susan because your doors will rotate into the cabinet when you actually use a lazy susan.

How to Measure for Pie-Cut and Kidney Shaped Lazy Susans

Whether measuring for a kidney shape lazy susan or a pie cut lazy susan the process is the same. You will need to measure the inside space of your corner cabinet with the doors open. You’re going to take two measurements starting from the right side back wall to the inside edge of the door opening. Do this in both directions (left side back wall as well) to make sure that the measurements are the same. If they are, just subtract approximately two inches from this measurement. This measurement will be the maximum size lazy susan that you will be able to fit into your cabinet. If the measurements are not the same, simply deduct approximately two inches from the smaller of the two measurements. This will ensure that your lazy susan will have enough clearance once it is installed. For example, let’s pretend that our measurements are around 34 inches in both directions. After subtracting two inches, we can install at max a 32-inch lazy susan.

The D-Shaped Lazy Susan

The d-shaped lazy susan is primarily designed for corner diagonal 45 degree wall and base cabinets. This type of lazy susan can also be installed in standard (non-corner) cabinets. When measuring for a d-shaped lazy susan for use in a 45 degree angle cabinet you will need to measure the inside space of the cabinet from the inside back of the cabinet, to the side wall of the cabinet that is parallel with the back side of the cabinet (please watch this video for a visual reference). You next write this measurement down and then subtract two inches from that measurement. Just as for the other susans, order the lazy susan that is the closest to that size without selecting a larger size.

Full Circle Lazy Susan

Finally, we have the full circle lazy susan. The full round lazy susans are among the most versatile. These round susans fit in regular cabinets corner cabinets and into most any upper and lower cabinet you throw at it. When measuring for a full circle lazy susan you will need to measure the inside space of the cabinet from left to right and from front to back. Go ahead and write those measurements down. Now let’s say, for an example, your left to right measurement is 19 inches and your front to back measurement is 23 inches. Compare those two measurements and once again, take the smaller measurement of the two. For the full circle lazy susan you only need to subtract one or two inches from that measurement and order the lazy susan that is closest to that size,once again, without selecting a larger size.

In Conclusion

For the hieght of your cabinet, it is important to be aware that most lazy susans have a telescoping shaft that will fit interior cabinet heights ranging from 26 to 31 inches. So be sure to double check your measurements and the info that is located on the specific Lazy Susan that you are ordering. We have all of the necessary measurements of each unit in the product’s description. Happy Spinning!

Check out our YouTube Channel!

How Much Does it Cost to Remodel a Kitchen?

The cost of a kitchen remodel can vary greatly depending on a number of factors, including the size of the kitchen, the extent of the renovations, and the materials and appliances you choose. On average, homeowners can expect to pay between $12,000 and $33,000 for a full kitchen remodel.

To get a more accurate estimate of what your kitchen remodel might cost, it’s important to consider the following factors:

  1. Size of the kitchen: A larger kitchen will naturally cost more to remodel than a smaller one.
  2. Extent of the renovations: Are you just updating the cabinets and countertops, or are you tearing down walls to create an open floor plan? The more extensive the renovations, the higher the cost will be.
  3. Materials and appliances: The cost of materials like countertops, cabinets, and appliances can vary greatly. Higher-end materials and appliances will naturally cost more, but they may also have a longer lifespan and add more value to your home. Woodworker Express offers a wide variety of cabinet parts such as lazy susans, blind corner units, and so much more that will help save you money. This allows you to save money and purcahse less expensive stock cabinets. You can then purchase the upgrades for your new kitchen cabniets directly from us and even install them yourself! (Take a look at the video below for more info)
  4. Labor costs: The cost of labor can vary depending on where you live and the complexity of the renovations. It’s important to get estimates from multiple contractors to ensure you’re getting a fair price.

It’s also important to remember that a kitchen remodel is a significant investment, so it’s worth taking the time to carefully plan and budget for the project. It may be helpful to consult with a kitchen design professional or contractor to get a more accurate estimate and to help you make informed decisions about materials and design choices.

Check out our YouTube Channel full of helpful DIY’s and Tips!