The Secret to Installing Cabinet Hardware Like a Pro

When it comes to upgrading the look of your cabinets, one of the simplest and most cost-effective solutions is to install new cabinet hardware. However, even the most beautiful hardware can look shoddy if it’s installed poorly. That’s why we’ve put together this comprehensive guide to help you install cabinet hardware like a pro.

Why Cabinet Hardware is Important

Cabinet hardware serves two main purposes: functionality and aesthetics. The right hardware can make it easier to open and close your cabinets, while also enhancing their visual appeal. Choosing the right hardware can help tie together the overall style of your kitchen or bathroom, whether you prefer a modern, minimalist look or a more traditional, ornate style.

Tools Needed for Installation

Before you begin, it’s important to gather the necessary tools and materials. You’ll need a drill, a 3/16″ drill bit, a tape measure, a pencil, a screwdriver, and of course, the hardware itself. Make sure you have all the necessary components and that they’re the correct size for your cabinets.

Selecting the Right Cabinet Hardware

The first step in installing cabinet hardware is to choose the right pieces for your cabinets. You’ll want to consider the style of your cabinets, as well as the overall aesthetic of your kitchen or bathroom. Choose hardware that complements the style and finish of your cabinets, whether you prefer sleek stainless steel handles or ornate brass knobs. Measure the distance between the screw holes on your hardware and mark this on your cabinet to ensure accurate placement.

Preparing for Installation

Now that you’ve chosen the perfect hardware, it’s time to prepare your cabinets for installation. Remove any old hardware and fill any holes with wood filler. Clean the cabinet surface with soap and water, and dry thoroughly. Measure and mark where you want to place your new hardware, ensuring that they’re level and in line with each other.

Installing Cabinet Knobs

If you’re installing cabinet knobs, you’ll need to drill pilot holes in the marked spots. Use a drill bit that’s slightly smaller than the screws that came with your hardware. Insert the screws through the back of the cabinet and into the knob, tightening with a screwdriver. Make sure the knobs are straight and level before tightening completely.

Installing Cabinet Pulls

If you’re installing cabinet pulls, you’ll need to drill holes in the marked spots. Use a drill bit that’s the same size as the screws that came with your hardware. Insert the screws through the front of the cabinet and into the pull, tightening with a screwdriver. Make sure the pulls are straight and level before tightening completely.

Finishing Touches

Once you’ve installed all your hardware, step back and admire your handiwork. Make sure everything is level and straight, and tighten any loose screws. Clean up any dust or debris and enjoy your newly updated cabinets!

With this guide, you’ll be able to install cabinet hardware like a pro, enhancing the overall look and functionality of your cabinets. Remember to choose hardware that complements your existing cabinetry, and take the time to measure and mark your placement before drilling any holes. With a little patience and attention to detail, you’ll have beautiful new cabinets in no time.

Elevate Your Cabinets: A Detailed Guide to Installing Decorative Hardware on Cabinet Doors and Drawer Fronts

Introduction:

Upgrading your cabinet doors and drawer fronts with decorative hardware is a simple yet effective way to enhance the aesthetic appeal and functionality of your kitchen or any other space with cabinets. In this detailed guide, we will walk you through the step-by-step process of installing decorative hardware, such as knobs and handles, to achieve a polished and professional look. Let’s get started on transforming your cabinets!

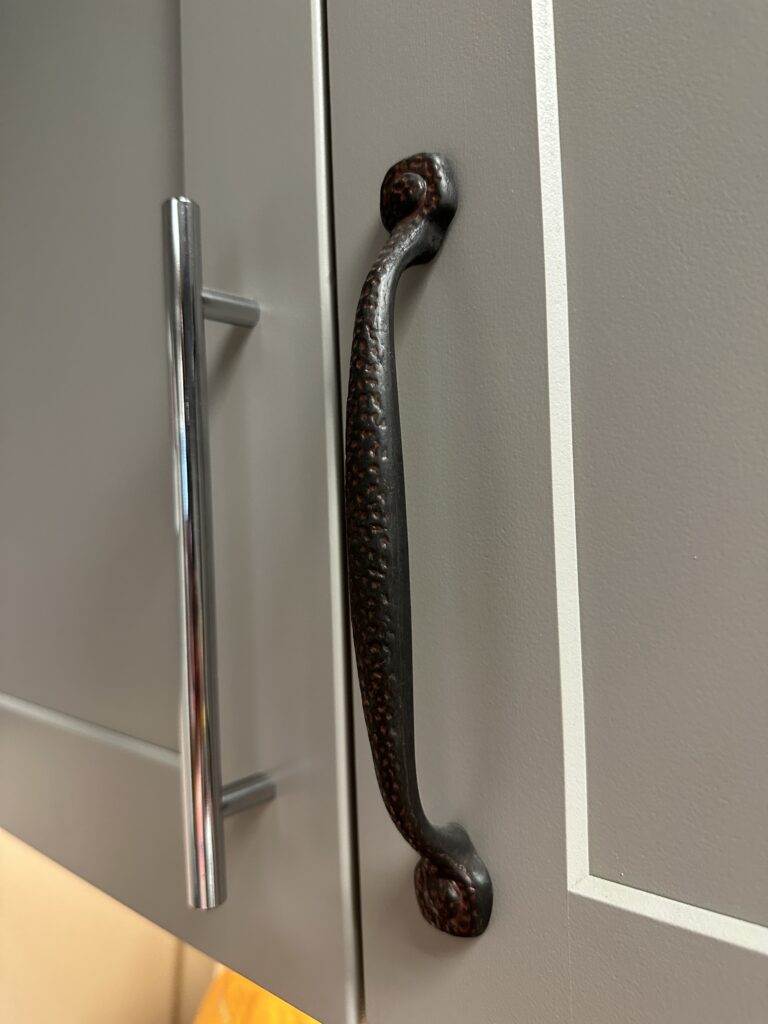
2 different decorative handles on a kitchen cabinet

Materials Needed:

Step 1: Planning and Preparation

Determine the placement of the hardware. Consider the size, style, and functionality of the hardware, as well as your personal preferences. Measure and mark the desired location for each piece of hardware on the cabinet doors and drawer fronts using a measuring tape and pencil.

Prepare the cabinets by cleaning the surfaces where the hardware will be installed. Remove any dirt, grease, or residue that may affect the adhesion or installation process.

Step 2: Installing Knobs on Cabinet Doors

Start by selecting the appropriate drill bit size for the screws provided with the knobs. Typically, a 3/16-inch bit works well for most knobs.

Hold the knob against the marked spot on the cabinet door. Ensure it is aligned with adjacent hardware and leveled. Mark the locations for screw holes using a pencil.

Attach the drill bit to your drill and carefully drill pilot holes at the marked spots on the cabinet door. Take care not to drill all the way through the door. A depth slightly shorter than the length of the screws is sufficient.

Align the knob with the pilot holes and insert the screws provided. Tighten them using a screwdriver until the knob is securely fastened. Avoid overtightening to prevent damage to the cabinet door.

Repeat this process for all the knobs on your cabinet doors, ensuring consistent spacing and alignment.

Step 3: Installing Handles or Pulls on Cabinet Doors and Drawer Fronts

Similar to the knob installation process, measure and mark the desired location for each handle or pull on the cabinet doors and drawer fronts. Use a level to ensure straight alignment.

Determine the appropriate drill bit size for the screws provided with the handles or pulls. Drill pilot holes at the marked spots using the selected drill bit.

If you have a cabinet template or jig, align it with the marked locations and use it as a guide for drilling the pilot holes. This can help ensure consistency and accuracy in hole placement.

Align the handle or pull with the pilot holes and insert the screws provided. Begin by hand-tightening the screws, then use a screwdriver to fully secure them. Ensure that the hardware is securely fastened without being overtightened.

For drawers, consider using longer screws provided with the handles or pulls, especially for thicker drawer fronts. This will provide a stronger and more secure attachment.

Repeat the process for all handles or pulls on both the cabinet doors and drawer fronts, maintaining consistent spacing and alignment.

Step 4: Finishing Touches and Inspection

After installing all the decorative hardware, double-check the tightness of each screw to ensure all knobs, handles, and pulls are securely fastened.

Take a step back and inspect the cabinets to ensure the hardware is level, aligned, and visually pleasing. Make any necessary adjustments to achieve a balanced and cohesive look.

Clean the cabinets and hardware with appropriate cleaning supplies to remove any fingerprints or smudges from the installation process. This will leave your cabinets looking pristine and ready to showcase their new decorative hardware.

Finally, step back and admire your newly upgraded cabinets! Appreciate the transformation and the added style and functionality that the decorative hardware brings to your space.

Maintenance Tips:

To keep your decorative hardware and cabinets in excellent condition, consider the following maintenance tips:

Regular Cleaning: Wipe down the hardware regularly using a soft, damp cloth to remove any dust or grime that may accumulate. Avoid using harsh chemicals that could damage the finish.

Preventive Maintenance: Periodically check the tightness of screws and fasteners to ensure they remain secure. If any become loose, simply tighten them with a screwdriver.

Cleaning Product Compatibility: When using cleaning products on your cabinets, ensure they are safe for the specific type of hardware and cabinet material. Read product labels and follow manufacturer recommendations.

Avoid Abrasive Materials: Use non-abrasive cleaning tools, such as microfiber cloths, to avoid scratching or damaging the hardware’s finish.

Handle with Care: Open and close cabinet doors and drawers gently, avoiding excessive force or pulling on the hardware. This will help maintain their integrity and prolong their lifespan.

Conclusion:

By following this detailed guide, you can successfully install decorative hardware on your cabinet doors and drawer fronts. This simple DIY project will elevate the overall look and functionality of your cabinets, giving your space a fresh and polished appearance. Enjoy the process and the satisfaction of completing this transformative upgrade. With your newly installed decorative hardware, your cabinets will not only be more visually appealing but also easier to use on a daily basis.

Can you Install NEW hinges on old cabinets?

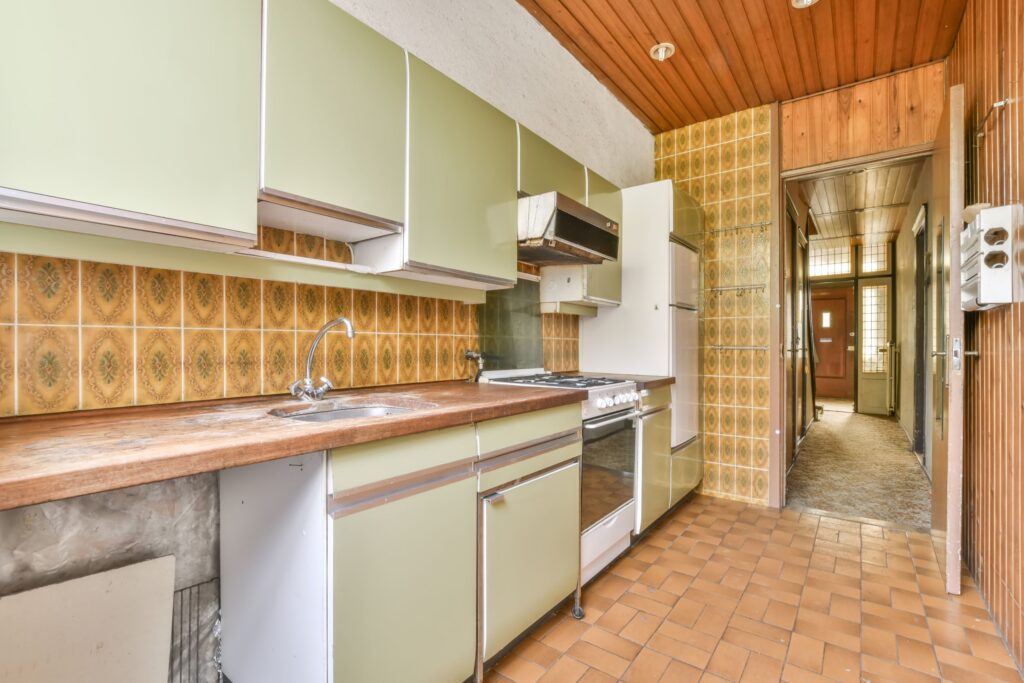
old fashioned kitchen with green cabinets and a white fridge

Yes, it is possible to put new cabinet door hinges on old cabinets. However, it may require some effort and skill to ensure that the new hinges fit properly and that the cabinet doors hang correctly.

Before purchasing new hinges, you’ll need to measure the dimensions of your current hinges to ensure that the new ones will fit. You’ll also want to consider the type of hinge you need. There are several types of hinges available, including overlay, inset, and offset hinges.

Once you have the new hinges, you’ll need to remove the old hinges from the cabinet doors and frames. This may require some careful work with a screwdriver or drill.

After removing the old hinges, you’ll need to install the new hinges in their place. This may require drilling new holes for the screws or adjusting the placement of the hinges to ensure that the doors hang correctly.

Overall, putting new hinges on old cabinets is possible, but it may require some effort and skill to ensure a proper fit and function. If you are not comfortable with this type of DIY project, it may be best to consult with a professional.

https://youtube.com/shorts/-EW41SSGSTw?feature=share

Mondays with Mike…8-22-2022 Edition 28

Creating an Unexpected Space-Confessions of a Woodworker…

Confessions anyone? If you are a creative, semi-handy person then you might find this mudroom cabinet here to be a desirable and attainable project for you to take on. I can tell you firsthand that www.WoodworkerExpress.com is loaded with all the hooks, pulls and other components necessary to assemble this stylishly aeriated cabinet.

As alluded to in the beginning, this project resembles confessional. I’m guessing it might’ve been the dark wood combined with the pull and mesh wire grills that triggered me thinking that. That said, once I focused in on the 2nd door (+ the 2 jackets), I realized this indeed wasn’t a (group!) confessional, but rather a great mudroom cabinet design brought to life. Part of that great design is the installed mesh allowing the contents to always be largely obscured, aerating and nearby. On top of that, the wood tone chosen here is fundamental to helping obscure the ‘mud’ you’ll surely expect in these parts.

Speaking of confessions, I believe the floor tiles shown here in the photo are the exact same ones that are in my own home. I know that’s technically unlikely, but I’d almost agree to a substitution to just see if I’m right. However, that sounds like a whole lot of effort for me to prove a point (that I’m wrong!). I’ll also mention that you are well within your whims to design and build your own confessional….

And if you do, could we please see a photo?

Mudroom closet space complete with hooks, handles and mesh screen door inserts.
Photo Courtesy of Houzz

Mondays with Mike…3-28-2022 Edition Nine

An Amazing Lift System and Gold Hardware Lift This Kitchen to the Highest Level

Mondays with Mike Header

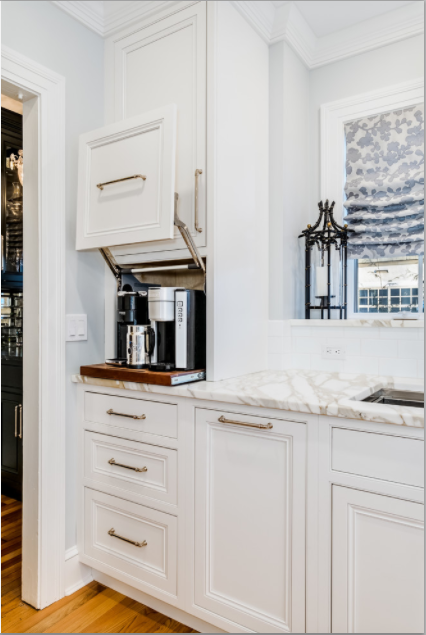
As if the ultra-white walls and cabinets in this kitchen weren’t enough each day to wake you up and keep you that way for the next 3 days, then some super strong java made from the coffee caddy here just might. A quick first glance had me thinking this caddy was sitting atop a butcher block cutting board, not unlike one of the many we have for sale here at www.WoodworkerExpress.com.

I really can’t overstate just how fabulous their incorporation of gold finished hardware works in harmony with this bright white kitchen backdrop. From a design perspective, I would’ve expected a satin nickel finish…always a trustworthy option but, here, the choice was made to ‘go for the gold’…where have we heard that before?

You’ve also got to appreciate the amazing Lift System just above the caddy. I’m not sure if (m)any of you have had a chance to actually use one of these but, they are undeniably great! I’m just fascinated by how smooth, streamlined (and strong) they design these units to be. The arms on these are designed so precisely…they’re practically scientific in their make-up. We carry all of the top Lift Systems brands currently getting it done at a high level,… those top performers include: Blum, Grass and Salice. We’ve also got EZ configuration wizards on our site to help with the planning of your order and fulfillment of the right unit including ALL of the accompanying parts.

If you like Gold (and Lift Systems)…we’re your one-stop shop…can’t you tell?

An amazing lift system and gold decorative hardware give this kitchen a high end look and much energy.
Photo: https://www.houzz.com/pro/gilleykb/gilley-kitchen-bath

Mondays with Mike… 2-14-2022 Edition Three

When I think of my own personal definition of streamlined, I apply it to different items that I interact with regularly.

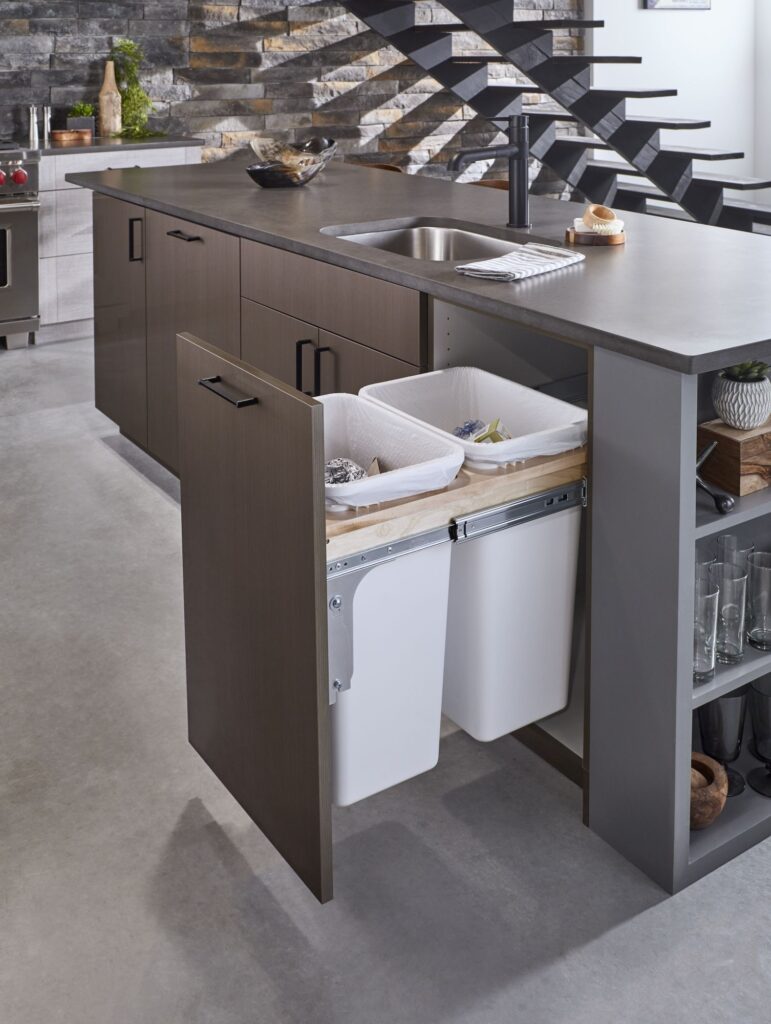
Not that I live a trashy life…I don’t, but as a homeowner I do interact with refuse and this Rev-A-Shelf dual top mount trash pull-out meets that definition for me. When mounted directly to this frameless cabinet front the result is a smooth, lightweight pull action. If you’ve never owned a mounted trash pull-out kit, trust us when we tell you you’ll want one. Turns out, Woodworker Express has a huge selection of brands in stock to meet your requirements regarding function, fit and finish.

Pulling back a bit more, we’ve got a really nice kitchen excerpt here. As I mentioned in my last post, one of my favorite finishes is on display here: Oil-Rubbed Bronze. Ultra-classy and so unbelievably suitable in so many decorative scenarios. Not only are the pulls adorned in ORB, so too is the faucet

I think the stairs look amazing, but the lack of hand railing might make me reconsider my new hobby of sleepwalking. I reckon Woodworker Express could help out with some railing options…last I heard, there’s a spot on the site for those types of products.

I could go on about this nice gray kitchen with a fabulous trash pull-out Oil Rubbed Bronze highlights, but upon noticing the oven hiding in back there, I’m reminded that I’ve got a Range Oven Ignitor component piece to replace later today…no flame, no dinner! The chef beckons for the repair…so I’ll see you all next week.


Mike

Photo courtesy of Rev-A-Shelf

Mondays with Mike… 1-31-2022 Edition One

Belly Up to The Bar

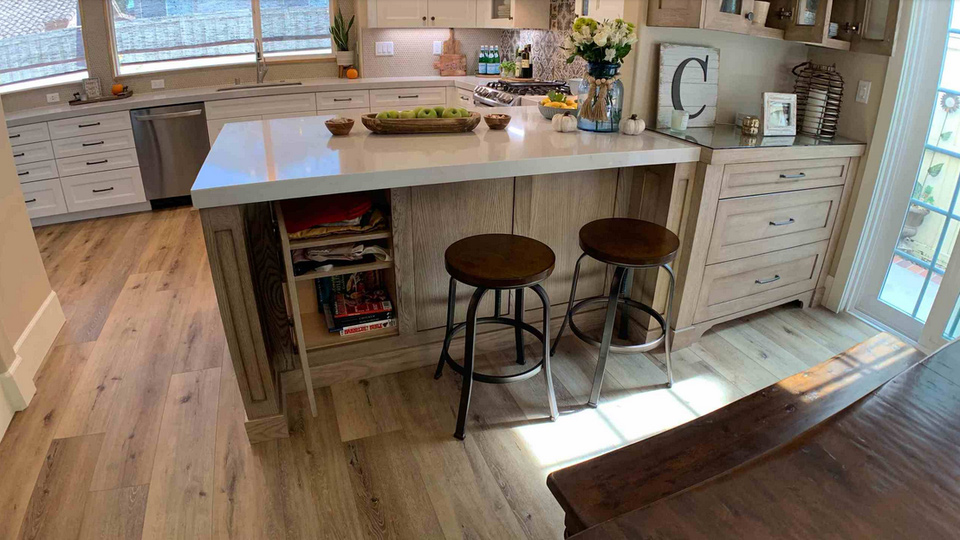
Who wants to belly-up to the bar….or at least the kitchen counter? To that end, isn’t this surely a nice kitchen on display here? Fantastic wood tones and great incorporation of one of my favorite hardware finishes: Oil Rubbed Bronze. That finish reminds me of colonial times….not that I’d know anything about that time period, but I will confess, I’ve been accused of sounding like I’m 100 years old with some degree of regularity…can anyone else relate? Speaking of Oil Rubbed Bronze, check out the pulls on the glass-covered cabinet to the right….it matches the stool legs to a “T”. Ditto for the round knobs on the cabinet just above it. Classy!

As I see it, this designer…or creatively talented homeowner has a real knack for “putting it all together”. As pretty as this all is, some of the details that make using it a real pleasure are hardly visible. Those things include soft-close and self-close drawer slides and hinges….and believe me, those details are nice and make a real difference! For practicality’s sake, they can help you successfully sneak a snack in the middle of the night without the loud retracting of the ‘silverware drawer’ to blow your cover — that’s never good. Semi-relatedly, all pet owners know that you’ll NEVER sneak a snack past the dog…no matter what!

Not to get off track, but I have to mention that we’ve got a great selection of kitchen sinks, faucets, and related accessories. After all, what’s a kitchen without a sink and faucet? Technically, it’d probably be considered a lunchbox/cooler combo that you can stand up and socialize in.🙃

Let me try to sum this all up before I go completely off this tangential track to nowhere…If the kitchen you own needs a thing…or ten, to get it whupped back into acceptable aesthetic shape, then WoodworkerExpress.com would be the route to go. Online or via phone, we are the advocates and support system for you and your kitchen rehabilitation. Lean on us to help you make it great!

Photo is courtesy of: www.Houzz.com

In the World of Decorative Cabinet Hardware, Opposites Attract

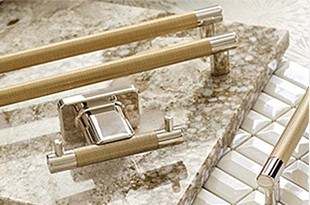
A hot trend in the world of decorative cabinet hardware now is split-finish. This means the knob or pull will be a combination of 2 metal finishes. This allows the ability to match more interiors as you are not married to just one metal tone.

Woodworker Express carries a full selection of Amerock decorative cabinet hardware collections that feature a split finish option.

ESQUIRE

Amerock Esquire  decorative hardware
Esquire Collection

Esquire is a sophisticated pairing of textured crosshatch centers with smooth metallic ends. The collection features 5 split finish options, 6 pull sizes as well as a knob and hook option.

MULINO

Mulino collection decorative hardware
Mulino Collection

The clean geometry and split finishes of this collection offer a testament to the allure of simplicity. Mulino features 4 finish options, 3 pull sizes and a matching knob.

LONDON

London collection decorative hardware
London Collection

With its faceted forms and clean geometric patterns, the London collection creates a sophisticated modern statement. This collection features a whopping 12 finish options and a knob plus 5 pull sizes.

Interested in updating your bath? Amerock has a diverse line of bath decorative hardware as well featuring both transitional and contemporary designs. The Arrondi collection is a great choice to pair with any of the above collections. We also carry wall and switch plates as well as decorative hooks. And if you want a fast easy way of installing your new hardware, check out the selection of installation templates.