How To Install Open Bathroom Shelves

Bathrooms come in all shapes and sizes, but they always have one thing in common—there is never enough storage space. Learning how to install open bathroom shelves is a quick and easy way to squeeze extra storage on the walls of the bathroom. Plus, when chosen correctly, open shelves bring a little charm into an otherwise dull room of the house.

Determine Size and Spacing

Step into your bathroom and choose a wall where you will hang the shelves. Then, measure for width and height and how much space you’ll want in between each shelf. Next, determine how much shelving you will need based on your available space and needs.

A helpful hint is to find the tallest items you want to store to make sure the shelves are distanced apart enough to provide room for them.

Decide What Kind of Shelves to Install

There are multiple options when choosing open shelves: make them; buy them unfinished and stain or paint them yourself; or buy them pre-cut and prefinished. Whichever direction you choose, a visit to your favorite online shop or a trip to the local home improvement store is in order to choose your materials.

Floating Shelf with dishes and glassware
36″ Alder Floating Shelf System from Omega National (SKU # 11315387)

For simple open shelves, all you’ll need are boards to use for shelves and brackets for hanging along with the necessary tools, anchors, and screws. Or, purchase shelving kits such as floating shelves which contain the shelves and your hardware for hanging. Another option is standards and brackets for shelving.

Measure the space in your bathroom where the shelves will go to determine what size shelves you need to purchase or create.

Measure and Mark the Location

After measuring your space and choosing shelves and brackets, it’s time to drill some holes.

To hang your shelves properly and make sure they are stable and safe, you should anchor the shelves to a wall stud. Wall studs are boards within your walls that provide structure within your home, supporting the walls. Studs are spaced 16” or 24” apart within your walls and drywall is mounted to the boards.

Because studs are wood or metal and provide strong support for the walls in your home, they are ideal to provide additional support for your shelves.

Use an electronic stud finder device to determine where the studs are in the wall and mark the location.

Position the brackets on the wall where you are hanging the shelves. If you can position the bracket to mount into the stud, that would be ideal. Mark the spot using a pencil. Measure the distance between the holes on your brackets and transfer the measurements to the wall.

If you are unable to mount your shelves into wall studs, you can use a drywall anchor instead. Drywall anchors provide some support when mounting into drywall directly.

Drill your holes and/or insert your wall anchors and mount your brackets to the wall with screws or fasteners provided with your shelves. Check to make sure everything is level and make adjustments if necessary.

Attach the Shelves to the Brackets

Now that you have marked the wall and mounted the brackets, it’s time to set the shelves in place. Position your shelves and check to be sure everything is still level.

For added stability, screw the shelves directly into the brackets, which usually come with predrilled holes for that purpose.

Use Your New Shelves

Now that you’ve learned how to install open bathroom shelves, enjoy them by adding some items for storage and even a little decoration too. Placing baskets on open shelves creates an attractive look allowing you to still hide items from sight.

Woodworker Express offers bathroom storage solutions and many other bathroom necessities, including bathroom hardware for sale to help you continue improving your bathroom.

Awesome Ways To Add Pull-Out Storage

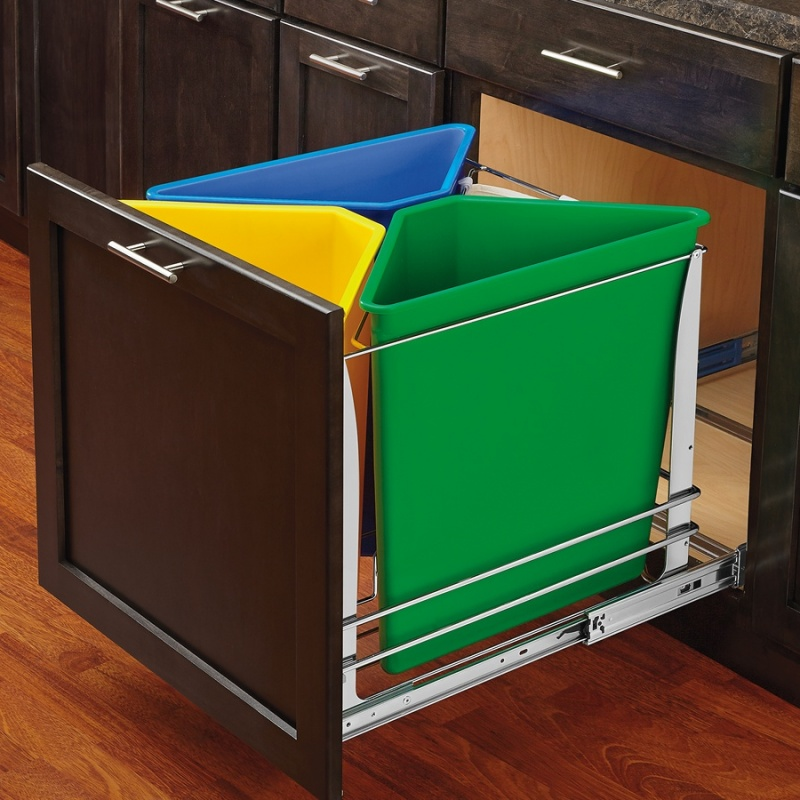
Image of cabinet with multi-color bottom mount trash and recycling pull-out
Rev-A-Shelf Triple 25 Quart Bottom Mount Recycling Center (SKU #11229909)

Poor design or a lack of storage leads to cabinets and drawers shoved full of unorganized items, and that makes cooking in the kitchen less than desirable. Let’s discuss some awesome ways to add pull-out storage to what already exists so you can start making your kitchen work for you.

Trash and Recycling

There simply is no way to make trash and recycling look attractive, but pull-out storage can help hide it. Trash pull-outs are mounted one of four ways: mounted to the bottom of a cabinet and slide out when needed, top mounted with slides and drop-in waste bins, rotating lazy susan style mounts for corner cabinets, and door mounts that pivot out when a cabinet door is opened. They can be purchased with one, two, or even three properly fitting waste cans with one for kitchen waste and the others for dividing your recyclables.

Pots and Pans

Let’s face it—no one is sure how to handle the storage dilemma of pots and pans. They are big, bulky, and come in too many odd shapes. There are several answers to this problem?

Pull-out baskets designed specifically for things like pots, pans, and all those mix-and-match plastic containers. Yes, you can even get those under control. The great thing about pull-out baskets is that they are often preassembled, making them easy to install.

Base Cabinet Cookware organizer pull-outs are the Cadillac of organizers. Mount the organizers in the bottom of a cabinet and slide everything out all at once. These organizers include wire dividers to keep all of your pots and pans separated.

And, new to the market are top-mount slider pot and pan organizers. A customizable hook rack system is mounted to the inside top of your cabinets. Hang your pots and pans on the hooks and slide them all out on the track when you need them.

You could have your pots and pans organized by dinner time tonight.

Under the Sink

This has to be the scariest cabinet in every home. With pipes from the drain, garbage disposals, and a few unidentified objects we dare not touch, storage is limited to a few odds and ends.

For added storage in this area, try door-mounted storage for items such as cutting boards, or opt for pull-out caddies that are designed with a low frame to avoid the snakes of piping and tubes under the sink.

Keep the items you use frequently in these caddies, such as dish soap, sponges, and cleaning supplies. This way, you can easily pull out the caddy whenever you need them.

Hide Appliances

Additional counter space is a close runner-up after the desire for more storage. You can give yourself that extra space using an appliance lift. A heavy duty appliance lift pulls up and out of a cabinet, holding a small appliance such as a mixer, then smoothly lowers and goes back into the cabinet when its job is done.

Now, you can impress your family with homemade baked goods and enjoy an uncluttered counter at the same time.

Wine

Pots, pans, and the like are important in the kitchen, but are they as important as wine? Probably not. Wall hanging wine racks take up wall space, and countertop racks use precious working space. Enter the pull-out wine storage rack.

These fabulous racks attach inside a cabinet and multiple shelf racks for wine. Each one moves in and out individually, allowing easy access to your favorite reds, whites, and rosés. An added benefit is the wine is now stored in a dark place, which ideal to keep your precious wine inventory out of the light, possibly making pull-out wine racks one of the most awesome ways to add pull-out storage.

Woodworker Express offers kitchen base cabinet pull-outs and many other cabinet and kitchen storage improvement options. Let us know what your storage concerns are, and we will help you find the best solution.

How to Know if You Should Repair or Replace Kitchen Cabinets

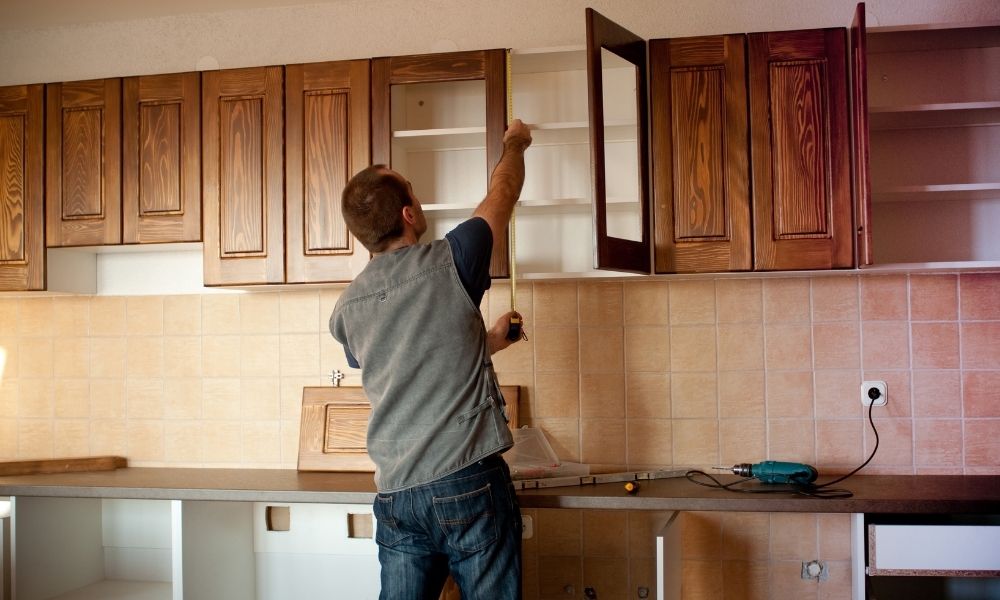
Image of man measuring height of cabinets in kitchen.

Kitchen cabinets are quite an investment and can often be repaired rather than replaced. Quality, age, and style help determine which path to take.

When updating a kitchen or just trying to make it function better, improving things without over-spending can be tough. Cabinets, which include all cabinet bases, doors, drawers, and hardware, play a major role in kitchen design and function. It’s helpful to take inventory of factors such as quality, cost, and style, as these elements play an important role in deciding if you should repair or replace kitchen cabinets.

Quality Matters

The main thing to consider is the quality of the cabinetry. Is it worth saving?

If the cabinets are solid hardwood and have stood the test of time, refinishing and fixing them up might be worth the work and cost savings. If you are going to put in the time for repairs but will have to repeat the repairs regularly because of poor quality, replacing may be a better option.

Damaged Drawers, Cabinet Bases, and Doors

Even a well-maintained and high-quality set of kitchen cabinets can see its fair share of damage through the years. Too many deep scratches on doors, drawers with faces that are falling off, or cabinet bases with corners nearly gone from years of wood chipping away are sometimes beyond repair.

On the other hand, with the right skills, some repairs can go a long way. Maybe that crooked drawer just needs a new undermount slide, or perhaps you could make the scratched drawer look like new with some wood filler, sanding, and fresh paint.

When deciding if you should repair or replace kitchen cabinets, check every area to see if the damage is extensive enough to warrant replacing rather than repairing.

The Layout Isn’t Working

Repairs can’t do much for the kitchen if you don’t like the layout of the cabinets. In this case, a complete remodel may need to take place rather than fixing up what you currently have.

Style

Style is another tough factor to consider but, sometimes, it’s possible to repair and upgrade an outdated style rather than replace it entirely. If you have old metal cabinets and want to swap them with wood then, by all means, replace the cabinets. However, if the style issue is simply the color of your cabinets, it will be far less expensive to paint the cabinets than replace them.

Decide what your style is, and go from there. Get creative, and you may see ways you can incorporate your new style into your old cabinets.

Hardware

The easiest thing to replace on kitchen cabinets and drawers is the hardware. There is no need to replace cabinets if the hardware is the only issue. You can easily install new drawer pulls, cabinet knobs, and even undermount drawer glides, replacing old, worn-out ones. Even if the old hardware is in great shape, you can replace it with a more updated look. Woodworker Express has everything you need for kitchen cabinet and drawer repairs, along with many other options for improving the style, storage, and function of your kitchen

Everything You Need To Get Started With Woodworking

Woodworker measuring and marking his project
Measure twice and cut only once

Sometimes getting started is the hardest part when we decide on a new hobby or possibly even a business. Woodworking can be relaxing, and the end results of the creativity and hard work are worth the effort. Let’s discuss everything you need to get started with woodworking.

What Will You Create?

When choosing how to begin woodworking, the first step is having a rough idea of what you will be creating.

This may change with time as you progress and expand, but having a pretty good idea of how large your projects is necessary in deciding on the space and tools you need.

Small accessories, toys, and utensils projects don’t take up much space or require a large saw. However, a dresser or table will.

Create a Space

Hobbies that actually get done are the ones with a designated space for doing so.

Check out your garage and basement for any nook you can find to setup shop. An outdoor shed might also work.  

Keep in mind, woodworking creates a lot of dust. It isn’t a hobby you can just quickly work on at the kitchen table (unless you enjoy a dusty dinner). Decide on a space that can handle the mess you are about to make.

Work Surfaces

The next step after finding the perfect space is to create areas where wood can be placed while it is being worked with.

A couple of sawhorses with a sheet of plywood on top will usually do the trick.

A workbench is a must for small projects and intricate detailing. The workbench is a permanent fixture you will find yourself using over and over for more than just woodworking.

Keep tools handy near the work bench and hung on pegboard or placed on shelves above it, for quick and easy fixes. 

Saws

Woodworking is not going to happen without a variety of saws to cut the wood. They are quite an investment, but you build your collection over time. Here are five great saws to have in your woodworking toolbox.

Hand Saw

A classic staple for every woodworker, the hand saw will forever be needed. The Hand saw, as its name suggests is a manual tool.

Hand saws take on a few different forms, and each one is designed for quick cuts when there is no need to turn on a power tool.

  • Ripping handsaw — cuts lengthwise with the grain
  • Crosscut handsaw — cuts across the grain
  • Combination handsaws — cuts both with and across the grain
  • Backsaw — rectangular blades for miter cuts
  • Keyhole handsaw — for interior holes
  • Dovetail — for dovetail joint work

Jigsaw

Also recommended for beginners, the jigsaw is a hand-held power tool that can make intricate and curved cuts for beautiful detailing on your wood project.

The jigsaw uses a reciprocating blade to cut irregular curves. A reciprocating blade moves up and down. The jig saw is weak in that the lower end of the blade is unsupported. The user guides the saw to cut but has to be careful not to force the direction of the blade too much.

Circular Saw

The handheld circular saw is a power tool that uses different blades which can be interchanged for different types of cuts. Each blade has different teeth for the type of cuts you are making. It is extremely handy for quick, large cuts.

  • Ripping blade — for cutting lengthwise
  • Crosscut blade — cut across the grain (width)
  • Combination blade — ripping and cutting (both with and against the grain)

Table Saw

As a beginning woodworker, a good larger powered saw to invest in is a table saw. It works similarly to the circular saw, but from a different angle.

Rather than the saw coming down on the wood, the blade from the table saw comes up from the table and the wood is placed on top of it. This eliminates a lot of work and makes long precision cuts a bit easier.

Table saws offer different types of blades for different cuts.

They also can be portable or permanent.

  • Benchtop table saw — Noisiest of all the benchtop table saws, but lightweight, compact and portable.
  • Cabinet table saw — Heavy and made to stay put, they can handle every project. These make a stately centerpiece to your woodworking shop.

Band Saw

A band saw is a power tool, perfect for intricate, curvy woodworking cuts. It consists of a continuous band of toothed metal stretched between two or more wheels to cut material.

Unlike the jigsaw where you guide the saw to cut the wood, a band saw stands stationary and a wood piece is guided against the cutting blade to make the cuts.

They come in a few sizes and make a great addition when it is time to get detailed beyond using a jigsaw.

Sanding

Filing, sanding, and planes all fall under the same category: to smooth or shape the wood for woodworking projects. There are a few different options for each.

Filing

Files are hand tools used for smoothing and are made of metal, giving them a longer life than sandpaper.

Once dull, they don’t sharpen well, so it is best to replace them.

Sanding

Handheld electric sanders are a time saver and a hand saver. A lot of sanding makes a hand sore.

They come in different sizes and power and can alternate between different grades of sandpaper.

Sanding sponges and sandpaper are necessary to have on hand for quick, small projects or intricate details.

Planes

Planes don’t just smooth the wood, but they actually remove some of the wood by scraping pieces off. It is more of a shaving process than a smoothing one as the blade on the plane shaves thin slices off the surface of the wood.

There are several different types of planes.

  • Jack plane — removes a lot of wood at once
  • Block — for intricate, small spaces
  • Rabbet — for right angle grooves
  • Scraper — finely scrapes for smooth finishes
  • Spokeshaves — designed for curves

Measuring Tools

Please don’t “wing it” with woodworking. Taking the time to measure properly from the beginning saves you time from having to fix mistakes later.

There are four measuring tools to keep handy while woodworking. These include:

  • Retractable steel tape measure — handy in every way with the stiffness of steel and a hook on the end for easy measuring
  • Yard stick — great for straight edge measuring and line drawing with a pencil
  • Flexible reel tape — a must when a bendable measure for corners and curves is needed
  • Folding measure — highly accurate and stiff like a yard stick, these fold into multiple sections for easy storage

Hammer and Mallet

A basic hammer has a double-duty steel head with one end basically designed for hammering in nails and the other for pulling them out. A hammer should be a standard tool in everyone’s home, not only woodworkers.

A mallet is different than a hammer, although they are both used for striking. Rather than a steel head, the head is rubber, leather, or wood. The head is sometimes detachable to accommodate multiple sizes.

A mallet is used when a hard strike is needed but damage needs to be prevented. That is why they are made with a softer material head. The shock to the wood is softer than a steel head hammer.

Power Drill

A power drill will become your right-hand man in woodworking, for drilling quick holes and driving screws.

This is a general idea of everything you need to get started with woodworking. Build your collection slowly and enjoy creating heirlooms you can be proud of.

Woodworker Express offers woodworking tools for sale to provide you with everything you need to get your woodworking shop up and running.

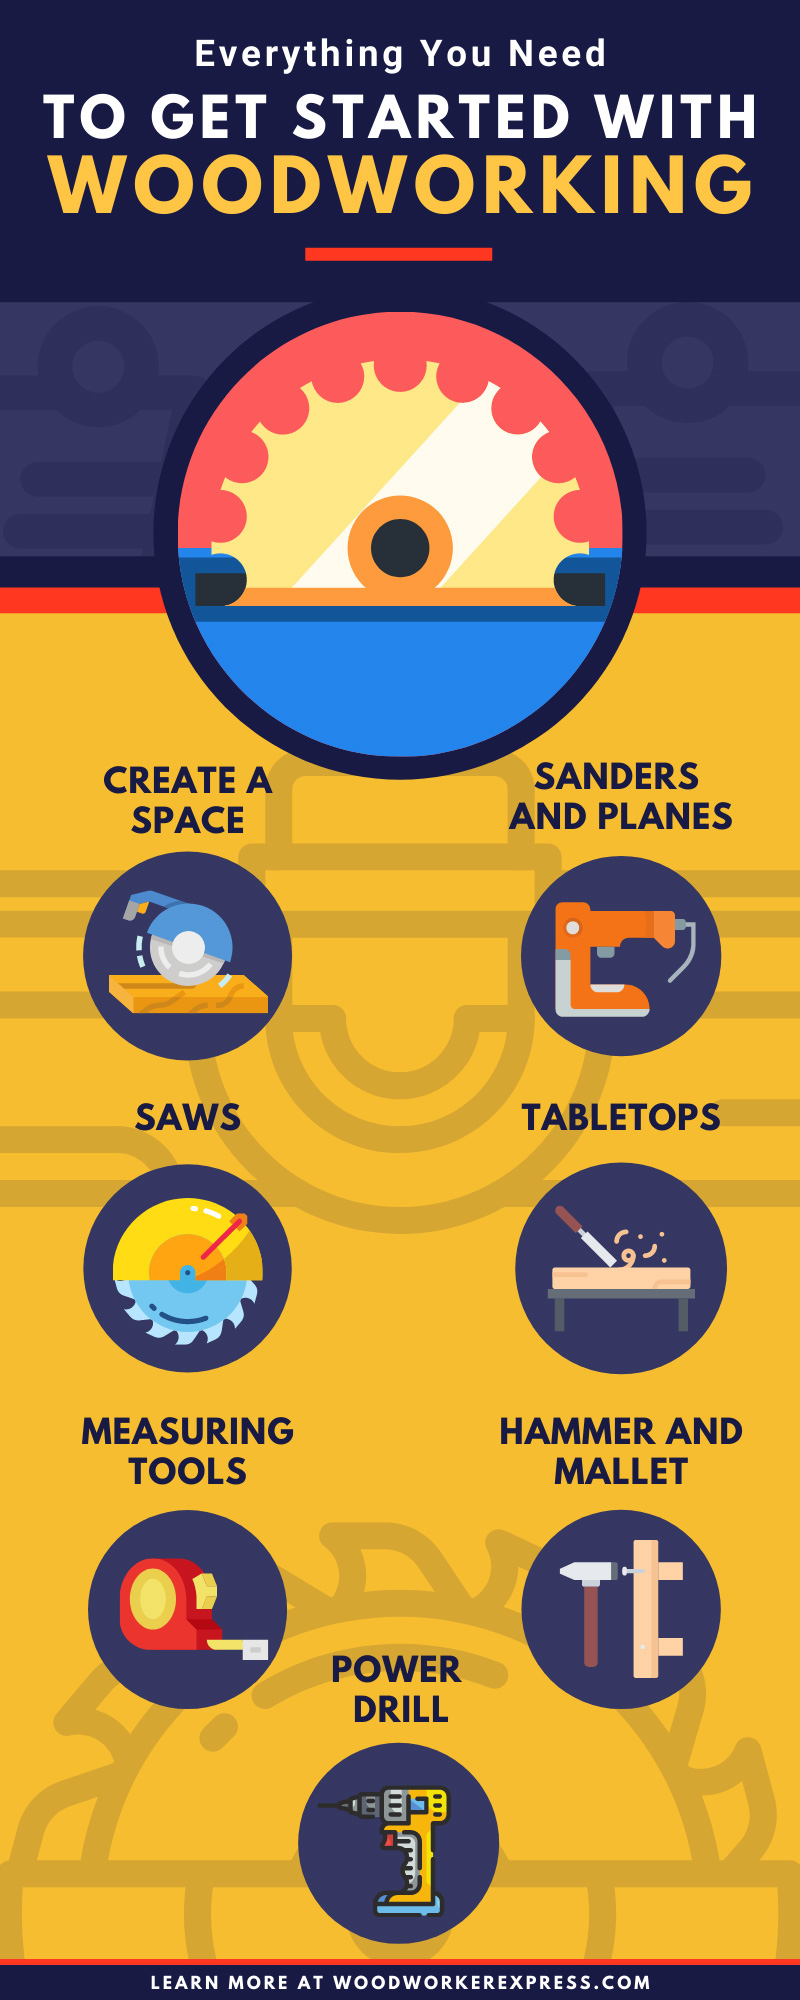
Infographic of Everything you need to get started with woodworking

Hand Sanitizer Ingredients DO Matter

Lemyn Organics Hand Sanitizer

There is no doubt that during the pandemic that cleaning and sanitizing our hands and homes has become a huge priority for us all. But, with so many hand sanitizers on the market, how do you choose one that is safe, effective and healthy for your loved ones? Are there safe hand sanitizer ingredients?

One of the best ways to stay safe during the pandemic, and frankly any flu season, is the frequent washing of hands. But, if you are on the go, soap and water is not always accessible. Thus, the use of hand sanitizer is the new norm in our quest to stay healthy. Ask yourself, what exactly am I putting on mine and my family’s skin? We have all seen FDA warnings about sanitizers containing methanol and propanol. These are not healthy ingredients to be using on a frequent basis. There is a better way…

Lemyn Organics was born out of a passion for green science and good-for-you formulations that use high quality hand sanitizer ingredients and a simple formulation to produce better results. Lemyn is the only hand sanitizer on the market to have a residue-free formula as well as being 97% organic without dyes or synthetic fragrances. Lemyn is also vegan and cruelty-free, USDA Certified Biobased, dermatologist-tested and proven safe for sensitive skin and children as young as 3 years of age, and perhaps most impressively, kills more germs than the majority of other leading hand sanitizers. Lemyn’s formula kills 99.9999% of germs in 15 seconds – compared to 99.99% for the leading competitors.

Image showing the 99.9999% difference in effectiveness of Lemyn

Lemyn Organics is always free of impurities, guaranteed, and every batch is safety tested. Lemyn organics is 100% sensitive skin safe, hypoallergenic and clinically proven non-irritating for ages 3 to 99+.

It’s what’s inside that really counts. Lemyn Organics Medical-Grade Hand Sanitizer Gel exceeds FDA + CDC standards for effectively killing germs while remaining safe for sensitive skin. Check out this impressive list of ingredients and decide for yourself.

FULL HAND SANITIZER INGREDIENT LIST

Active Ingredient: Ethyl Alcohol 70% v/v (Organic Sugar Cane Alcohol) USP Grade

Inactive Ingredients: Water (Aqua), Glycerin* (plant based) , Aloe Barbadensis Leaf Extract*, Sodium Hyaluronate, Simmondsia Chinensis (Jojoba) Seed Oil*, Persea Gratissima (Avocado) Oil*,  Helianthus Annuus (Sun‑ower) Seed Oil*, Panthenol, Tocopheryl Acetate, Citrus Aurantium Dulcis (Orange) Peel Oil, Carbomer, Citric Acid, Aminomethyl Propanol *ORGANIC

Lemyn Bottle Sizes
Lemyn Family of Products

Click here to see the full line of Lemyn Organics Hand Sanitizers made with high quality and safe hand sanitizer ingredients.

What Causes Cabinet Door Hinges To Bind

It is frustrating to have a cabinet door that does not close smoothly or hang properly. Understanding why hinges bind is the first step in repairing them.

We have all experienced the cabinet door in our home that will not shut properly or constantly springs back open. In most cases, a hinge has become bound and is causing the problem. Understanding what causes door hinges to bind makes it easier to figure out the issue and get it fixed.

What Is a Bound Hinge?

The phrase “bound hinge” simply means the door is being difficult in the way it is not easy to close or it springs back open. There are a few reasons why the hinge might be bound.

Screws Are Askew

It is possible that when the hinges were attached, the head of the screws were too big. If this is the case, they will not lay flush and therefore cause binding and create a door that is difficult to close or easily bounces back open.

The solution here is an easy one — simply replace the screws with a smaller head screw for a flush finish.

Hinges Are Not Placed Correctly

When hinges are not placed correctly in the first place, binding is bound to happen and lead to doors that don’t operate smoothly.

The flaps of a hinge should be flush with the surface of the wood. Sometimes the recesses where the hinges are placed have been cut in too deeply. This results in a lack of flushness between the hinge and the surface of the door or doorframe.

Replace Hardware

As hinge repairs are made, be sure you are working with hinges that are worth reinstalling. They are often damaged and bent out of shape after a cabinet door has not been functioning properly. At that point, it is better to purchase new cabinet hinges for sale to give the door a fresh start.

Avoiding what causes door hinges to bind in the first place is your best bet for a smooth operating door. Thankfully, if it does happen, the repairs are simple.

The Different Types of Drawer Slides

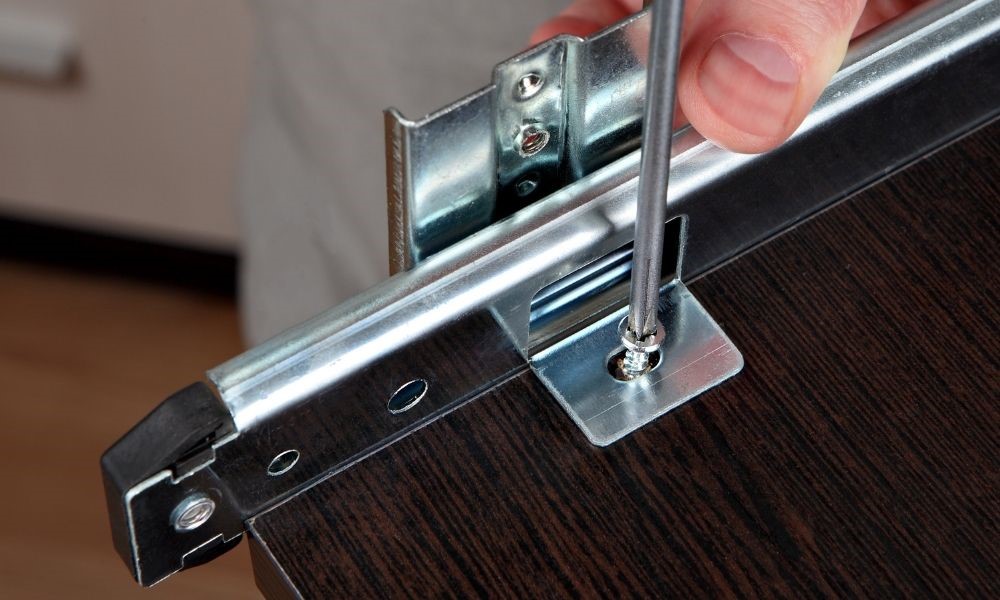
Image of drawer slide being installed

Sometimes a drawer slide just needs to be replaced—but other times an entire kitchen has been redone, and it is then time to decide how you want the drawers in the kitchen to open and close. There is actually more to a drawer than just pulling and pushing to make it work. The different types of drawer slides each make a difference in how the drawer closes and even in its appearance.

The Purpose of a Drawer Slide

A drawer slide quite simply allows the drawer to open and close. The slides are mounted to the drawer and cabinet, giving the drawer a track to move on.

To See or Not To See

Slides come in different colors such as silver, white, black, brown or beige, and you can choose a slide according to whether or not you mind if it is visible.

When choosing between the different types of drawer slides, it may not seem like a big deal, but some people prefer to not see the slide when the drawer is opened. This way, the color isn’t very important as you can’t see it, and you can achieve a clean look.

Two Types of Drawer Slides

We will break down these two categories some more, but the two options for making drawer slides actually slide are ball-bearing and roller drawer slides.

Ball-bearing slides are made with strength in mind, offering the ability to hold a heavier drawer and are also more expensive than roller drawer slides.

Ball-Bearing Slides

As mentioned, a slide designed with ball-bearings is fit for your tougher drawer jobs. Think of a deep and wide drawer that is able to hold all of your pots and pans. A ball-bearing slide will be the stronger option to keep that drawer moving smoothly.

Since bearings are lubricated, these drawer slides are an excellent choice for the smoothest of slides.

Bottom or Undermount Slides

Just as they sound, these slides attach to the bottom of the drawer. This is a nice option if you prefer slides that are not visible when the drawer opens. They also work well with weight in the drawer because they nicely support the bottom.

They can cost a little more because they are very specific. The drawer box must match the specifications of the bottom mount exactly, or the drawer will not slide properly. Therefore, the bottom or undermount drawer slide is a great option when it comes to custom-built drawers.

Side Mount Drawer Slides

These slides come in pairs and are attached to both the cabinet frame and the drawer along their sides. They do not support the bottom of the drawer very well, so they may not be the best choice for the drawer that holds your cast iron skillet collection; however, they do a good job when sliding your basic drawer.

Center Mount Drawer Slides

Center mount drawer slides feature an individual track rather than a pair of tracks, mounted down the center of the drawer and also attached to the cabinet. Like the undermount slides, these create a clean looking drawer as they are not visible.

Soft-Close Drawer Slides

Soft-close drawer slides have become very popular in recent years. Homeowners enjoy them because there is no more accidental slamming of drawers in the kitchen and no pinched fingers. We know you’d never slam a drawer on purpose, but sometimes it just happens.

Basically, when you push the drawer to close it, the soft-close function immediately grabs hold and causes the drawer to take its time. This is a really nice feature if you seek a little more quiet time in your life.

Self-Closing Drawer Slides

Self-closing slides take the soft-close a step further. With just the slightest tap, the drawer will automatically close ever so gently. This adds a touch of elegance to the kitchen.

Touch-Release Drawer Slides

A current trend in modern kitchens is very sleek cabinets, often with the drawer facing flush with the cabinet base and no handles to pull them open. At first glance, one might think the homeowner didn’t think the design through very well.

However, it’s actually a really cool and clean look if you enjoy smooth lines and a minimalistic style. Without handles, the touch-release drawer slides allow you to just tap the drawer while it is closed, and it will then slowly and smoothly open to greet you.

Detent and Locking Drawer Slides

These slides offer a great option for drawers or pull-outs that need to not close too easily. For example, maybe a toaster that is hidden away but needs to stay put rather than moving once it is pulled and in use. The detent and locking system works to hold a drawer open or closed and requires a bit more of a push or pull to move.

Full Extension Drawer Slide

A full extension drawer slide allows the drawer to open completely. Although it may seem that all drawers open completely, without the full extension they do not fully extend.

That means if the kitchen tool you need to use is all the way at the back of the very large silverware drawer, you should be able to get to it.

Installing Drawer Slides

Drawer slides are not difficult to install, and if you are installing one for the purpose of just replacing an old one that is no longer working, you can probably do it yourself with a tape measure and a drill. Just be sure to follow the manufacturer’s instructions.

If you are installing all new cabinets and drawers, it is best to leave it to the professionals to avoid a nasty headache. Slides have to be level, measured correctly, and installed just right to get the smooth slide you are hoping for.

Keep Your Slides Clean

It isn’t at the top of most homeowner’s minds to clean the drawer slides. However, in a place like the kitchen, grease and grime can build up anywhere and everywhere.

Add drawer slide cleaning to the spring-cleaning list and your slides will serve you longer. Simply pull out the drawers and clean slides with some soapy water, dry, and push closed.

A benefit of undermount slides is they catch less dust and grease thanks to being under the drawers rather than on the sides.

Woodworker Express offers many options in drawer slides and we are here for all of your building and remodeling needs.

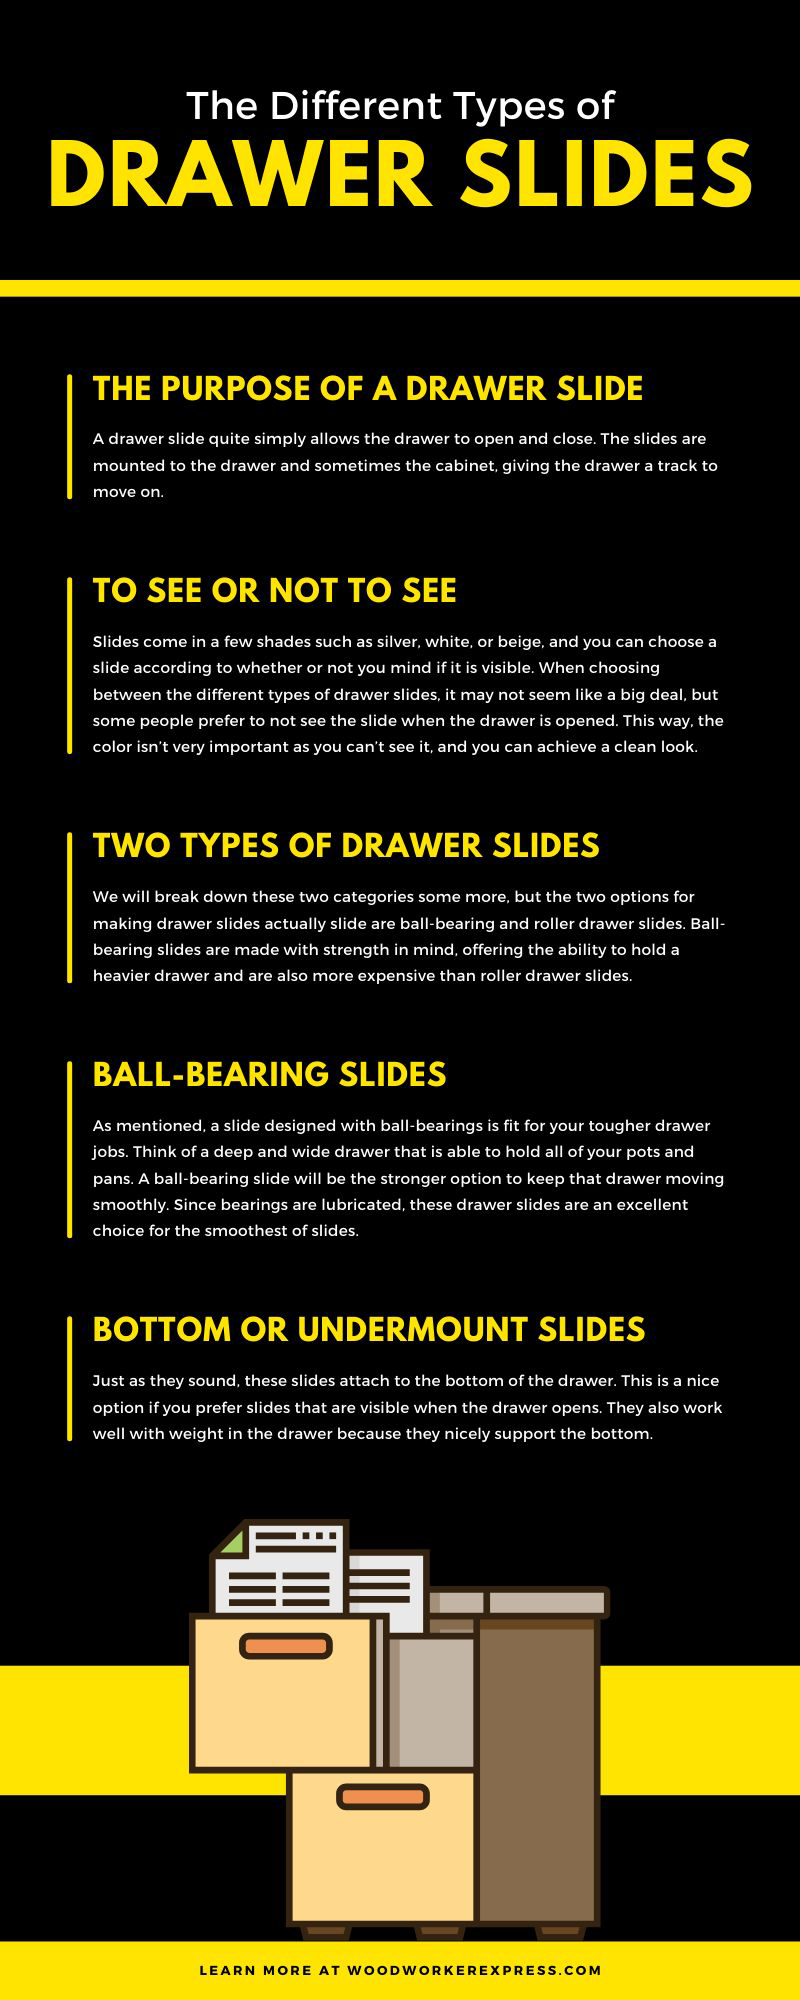
Infographic - The Different Types of Drawer slides

How To Choose Handrail Brackets

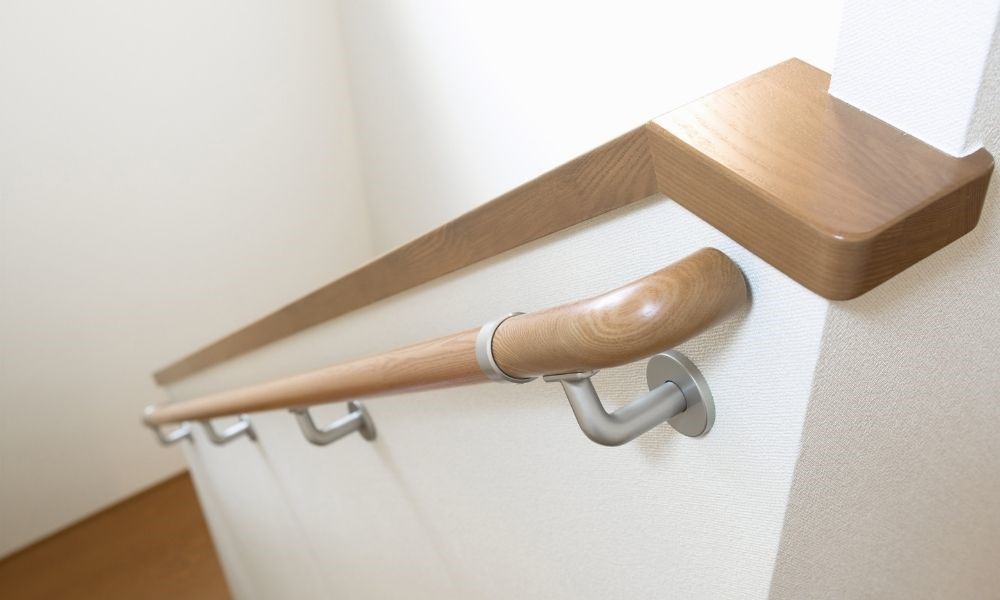
Image of a handrail on a staircase
Decorative handrail brackets

When building or remodeling, staircases are functionally important, and they also add some style to a home. Knowing how to choose handrail brackets helps in creating a staircase that is visually stunning and functioning at its best on a daily basis.

What Are Handrail Brackets?

Handrail brackets are used to attach the staircase railing to a wall. They offer support for the thousands of times the railing is grabbed when going up and down the stairs.

Choosing the proper style and fit for your home’s staircase is important. You don’t want to make a mistake, install the wrong ones, and then waste time removing them later.

How Many Brackets Will You Need?

The length of the staircase and its railing determines how many handrail brackets you need for proper handrail support.

After placing one at the bottom of the railing and one at the top, the brackets must be placed in a stud on the wall for proper support of the railing and the person using it. They must be four feet apart or less.

When installed properly at the right distance, the brackets provide safety for stair users by keeping the railing secure.

Measuring the length of the railing is the first step when determining how to choose handrail brackets and the number of brackets you need. Don’t attempt to save time and money by using less than what’s recommended.

What Style To Choose

Handrail brackets come in many styles. Choose the type that match your staircase and railing.

Brackets don’t stand out, but they are visible. Choose the look you want—whether modern or traditional—then choose the best quality and number needed.

Woodworker Express offers many choices in furniture hardware supplies, including handrail brackets. Contact us and together we’ll figure out which brackets best suit your needs.

How To Choose Undermount Drawer Slides

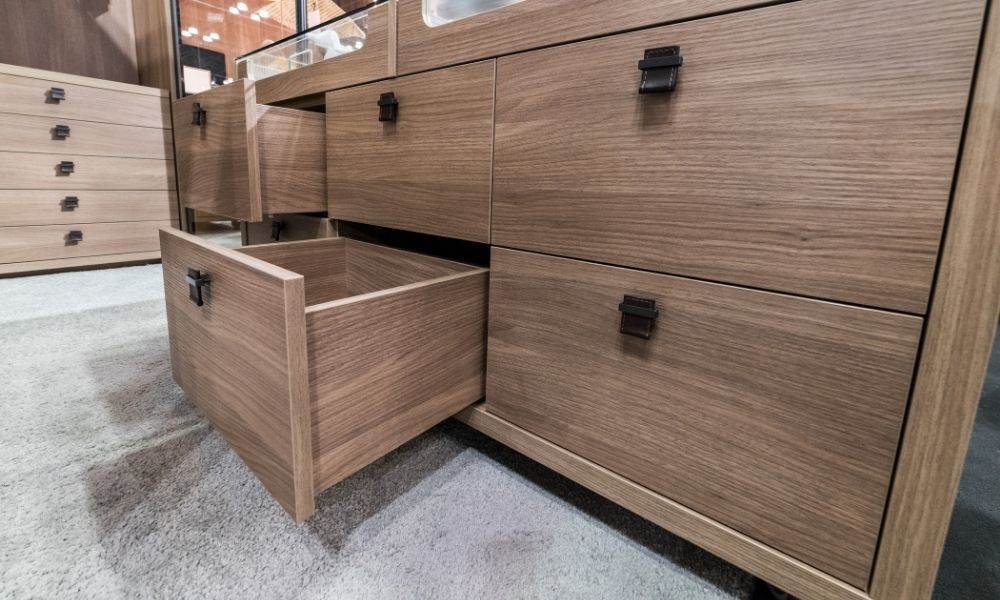
Cabinet/dresser with one drawer open

Designing or redesigning a kitchen requires tons of decisions. The cabinets and drawers make a big impact and often become the focus of the kitchen’s new design. The choices don’t end once the color of cabinetry is chosen, though. Something as simple as how the drawers will be mounted will make a difference in your enjoyment and use of them through the years. Undermount slides are a great option for smoothness and a clean look. Here are some ideas to consider when wondering how to choose undermount drawer slides.

How Do Undermount Slides Work?

Undermount slides come as a pair and are mounted to the cabinet below the drawer and then attach to the drawer. They work using a ball-bearing method, creating easy-to-operate drawers that glide smoothly when being opened and closed. 

Undermount Slides Are a Clean Option

We don’t often consider whether or not our drawer slides are clean—until one gets stuck because so much dirt and grime have built up.

A benefit of the slides being mounted underneath the drawer is they collect less dust simply because of their position.

Undermount Slides Look Better

Just as slides that are underneath the drawer stay cleaner, they also give your cabinets and drawers a clean, sophisticated look due to the fact that they’re unseen when opening a drawer. You want to showcase your cabinetry, not the drawer slides. This makes them perfect for the job.

Choosing the Right Undermount Slides for Your Needs

Knowing the height and width of a drawer will be necessary when deciding how to choose undermount drawer slides. Measure properly to assure you get the right slides. A large, deep drawer will require a different undermount slide than your smallest drawer, for instance.

Decide how you want the drawer to close. Soft close options are available in most undermount slides, allowing the drawer to close slowly and quietly. In other words, no more pinched fingers or slamming drawers.

Your budget will, of course, play a factor when you choose drawer slides. There are economy options and more luxurious ones. Either way, undermount drawer slides are a safe bet for smooth drawers and sleek design.

The Advantages of Soft-Close Drawer Slides

Image of dresser face

Kitchens are the most often used rooms in our homes. Family and friends gather to enjoy warm meals along with great conversation and company. With all the traffic, cabinets, pantries, refrigerators, and drawers are constantly being opened and closed. How many times did your mother have to yell, “Don’t slam the drawers?” Consider the advantages of soft-close drawer slides when designing your kitchen to avoid slamming drawers. Little fingers, cabinet frames, and your mother will thank you.

Safer Drawers

Nothing can make you feel more horrible than accidentally slamming your toddler’s fingers in a kitchen drawer. Young children are curious and won’t take the time to make sure you aren’t about to close the drawer on their fingers. As drawers quickly shut, little fingers can get hurt. Installing a soft-close drawer track system will bring peace of mind and safe fingers.

Less Maintenance

We bang them with our hips when our hands are full or close them with force as we are busy making dinner. Every time we close our kitchen drawers quickly, we create an unpleasant noise and give the frame of the base cabinet a beating.

One of the advantages of soft-close drawer slides is that they require less maintenance on the cabinet frames and the drawer itself. Cracks on the frame, paint chipping, and worn-out slides on the drawers happen easily when the drawers are not controlled with a smoother slide.

A Quieter Kitchen

A kitchen is full of life, and we want the happy noise of that busyness. However, we don’t need the extra noise of drawers slamming. There is an elegance to a kitchen that looks and sounds well-maintained. Soft-close drawer slides aid in that elegance. Your guests will enjoy chatting with you as you make dinner without unnecessary background noise.

As a distributor of over 300 retailers, Woodworker Express is here for all your kitchen renovations, improvements, and new builds.