


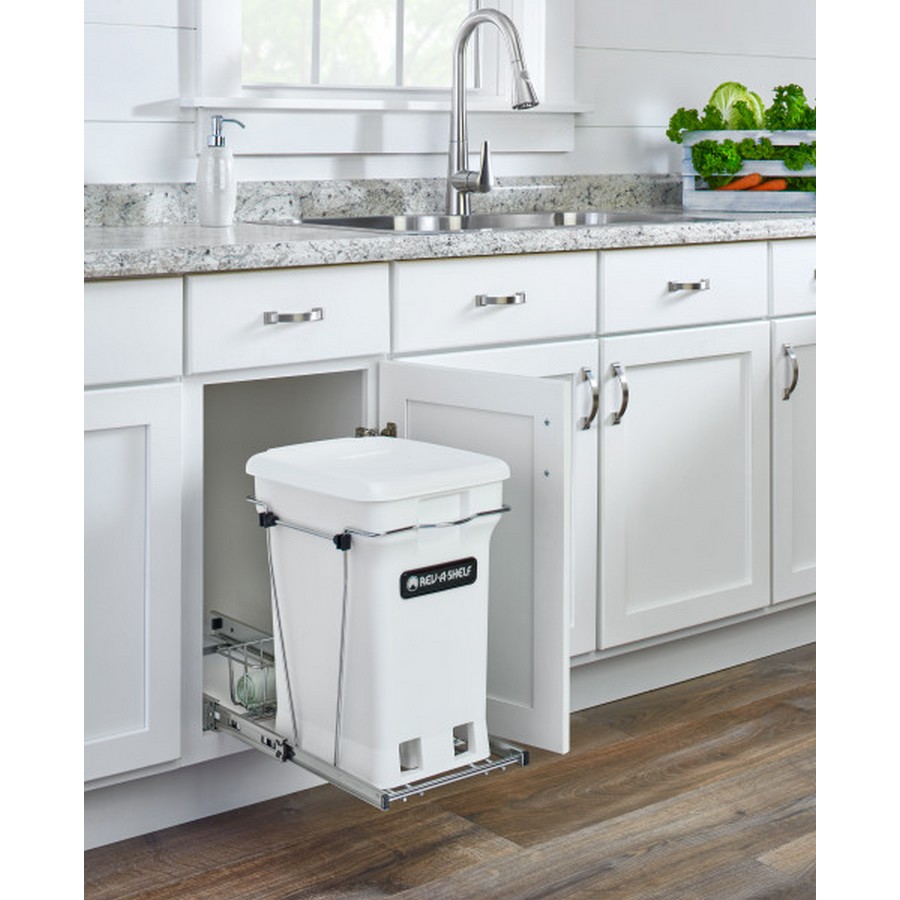
Kitchens are often the hub of a home, but they can also be one of the most cramped and cluttered areas. One common problem that contributes to this issue is the placement of trash cans. Often, they take up valuable floor space and can be unsightly. However, there is a solution to this problem – converting a cabinet into a pull-out trash can. Not only does this maximize space, but it also keeps trash out of sight and improves the overall appearance and functionality of your kitchen.
At Woodworker Express, we want to help you make the most of your cabinet space. In this blog post, we’ll provide step-by-step instructions on how to convert your cabinet into a pull-out trash can. We’ll cover the benefits of this transformation, the materials and tools needed, and helpful tips and tricks for achieving a seamless and functional result.
Assessing Your Cabinet Space
The first step in converting your cabinet into a pull-out trash can is to assess your cabinet space. Not all cabinets are created equal, so it’s important to determine if your cabinet is a good candidate for this type of conversion. Take a look inside your cabinet and ask yourself the following questions:
- Is there enough space for a trash can to fit comfortably?
- Is the cabinet deep enough to accommodate the trash can and still allow the cabinet door to close?
- Are there any shelves or other obstacles that would need to be removed?
If you answered yes to these questions, then your cabinet is likely a good candidate for a pull-out trash can. The next step is to measure your cabinet dimensions to determine the size of the trash can and hardware needed.
Choosing the Right Hardware
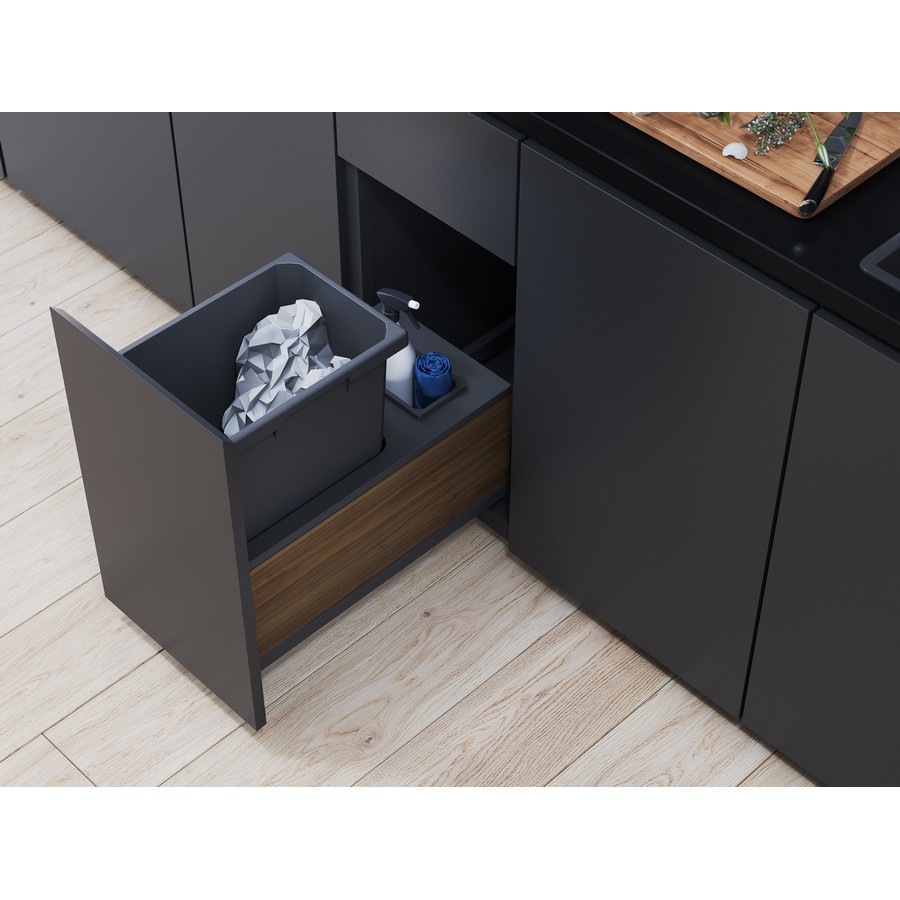
Once you’ve determined that your cabinet is a good candidate for a pull-out trash can, it’s time to select the appropriate hardware. This includes slides and brackets to mount the trash can inside the cabinet. When choosing your hardware, consider the weight capacity of the slides, as well as the size and shape of the brackets. You’ll also need to decide on the type of trash can that will work best for your needs.
Each option has its own benefits and drawbacks, so choose the one that works best for your lifestyle and needs.
Installation
With the right hardware and trash can selected, it’s time to install your pull-out trash cabinet. Start by preparing your cabinet and hardware, making sure to remove any obstacles and clean the inside of the cabinet. Next, mount the slides and brackets according to the manufacturer’s instructions, taking care to ensure that they are level and secure. Finally, install the trash can and adjust the mechanism to ensure that it slides smoothly in and out of the cabinet.
Maintaining Your Pull-Out Trash Cabinet
Now that your pull-out trash cabinet is installed, it’s important to properly maintain it to ensure that it continues to function properly and look its best. This includes cleaning and sanitizing the trash can on a regular basis, replacing the bin liners as needed, and troubleshooting any common problems such as sticking or uneven sliding.
Conclusion
Converting your cabinet into a pull-out trash can is a simple and effective way to maximize space in your kitchen while also improving its overall functionality. With the right hardware and a little bit of know-how, you can transform your cluttered and cramped kitchen into a streamlined and organized space. Consider other cabinet transformations to maximize storage, such as adding pull-out shelves or racks, and enjoy the benefits of a functional and beautiful kitchen.

 Do Not Sell My Personal Information