10 Essential Clamps Every Beginner Woodworker Should Have

Introduction

Woodworking is a craft that requires precision and stability. One tool that plays a crucial role in achieving these qualities is the clamp. Whether you are building a simple shelf or a complex piece of furniture, having the right clamps in your toolbox can make all the difference in the outcome of your project.

Why clamps are important for woodworking

Clamps provide the necessary pressure to hold pieces of wood together while glue dries or when joining parts with screws or nails. They prevent movement and ensure a tight bond, resulting in strong and durable joints. Without clamps, woodworking projects can become a frustrating exercise in imprecision and instability.

The different types of clamps available

There are several types of clamps available, each designed for specific woodworking tasks. Let’s take a closer look at some of the most common ones:
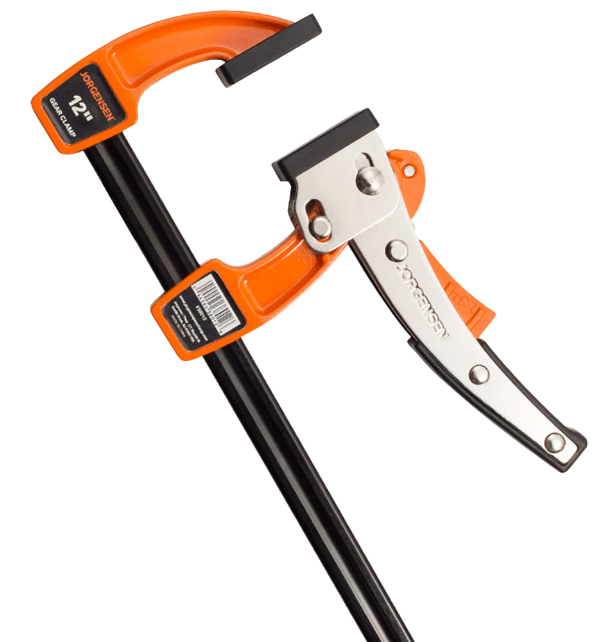
C-clamps are versatile and can be used for a wide range of woodworking tasks. Bar clamps are ideal for larger projects, as they provide greater stability and pressure. Parallel clamps are known for their accuracy and parallel clamping action. Quick-grip clamps are convenient for quick and easy clamping. Spring clamps are handy for smaller projects or when temporary clamping is required. Pipe clamps are commonly used for edge gluing and panel glue-ups. Band clamps are perfect for irregularly-shaped objects. Toggle clamps are useful for holding workpieces in place during cutting or drilling. Hand screw clamps are great for delicate or intricate work. Pinch dog clamps are designed for holding boards at odd angles.

How to choose the right clamps for your woodworking projects

When selecting clamps for your woodworking projects, consider the size and scale of your work, the type of joints you will be making, and the amount of pressure required. For smaller projects, spring clamps or quick-grip clamps may be sufficient, while larger projects may require bar clamps or parallel clamps. It is also important to choose clamps made from high-quality materials to ensure durability and reliability.

Where to buy clamps and what to consider when purchasing

Clamps can be purchased from various sources, including hardware stores, online retailers, and specialized woodworking suppliers such as Woodworker Express (https://woodworkerexpress.com). When purchasing clamps, consider factors such as price, quality, and customer reviews. It is also worth checking if the clamps come with any warranties or guarantees.

Tips and techniques for using clamps effectively

Using clamps effectively requires proper setup and technique. Here are a few tips to keep in mind:

  • Always ensure that surfaces to be clamped are clean and free from debris or glue residue.
  • Apply even pressure across the entire clamping surface.
  • Use protective pads or blocks to prevent damage to wood surfaces.
  • Avoid over-tightening, as it can distort the wood or weaken the joint.
  • Consider using cauls or spacer blocks to distribute pressure evenly.
  • Experiment with different clamping configurations to achieve the desired result.

Common mistakes to avoid when using clamps

While clamps are essential tools, there are some common mistakes that beginners should be aware of to ensure successful woodworking projects:

  • Using too few clamps, resulting in uneven pressure and weak joints.
  • Not aligning the workpieces properly before clamping, leading to misalignment.
  • Using clamps that are not suitable for the specific task or project.
  • Not applying enough pressure, resulting in gaps or weak bonds.
  • Leaving glue to dry for too long before clamping, causing it to lose its adhesive properties.

Conclusion

Clamps are an essential part of any woodworking toolbox. They provide the necessary pressure and stability to ensure precise and strong joints. By understanding the different types of clamps available and how to choose the right ones for your projects, you can enhance the quality and professionalism of your woodworking. Remember to use clamps effectively and avoid common mistakes to achieve outstanding results in your woodworking endeavors.

The Secret to Installing Cabinet Hardware Like a Pro

When it comes to upgrading the look of your cabinets, one of the simplest and most cost-effective solutions is to install new cabinet hardware. However, even the most beautiful hardware can look shoddy if it’s installed poorly. That’s why we’ve put together this comprehensive guide to help you install cabinet hardware like a pro.

Why Cabinet Hardware is Important

Cabinet hardware serves two main purposes: functionality and aesthetics. The right hardware can make it easier to open and close your cabinets, while also enhancing their visual appeal. Choosing the right hardware can help tie together the overall style of your kitchen or bathroom, whether you prefer a modern, minimalist look or a more traditional, ornate style.

Tools Needed for Installation

Before you begin, it’s important to gather the necessary tools and materials. You’ll need a drill, a 3/16″ drill bit, a tape measure, a pencil, a screwdriver, and of course, the hardware itself. Make sure you have all the necessary components and that they’re the correct size for your cabinets.

Selecting the Right Cabinet Hardware

The first step in installing cabinet hardware is to choose the right pieces for your cabinets. You’ll want to consider the style of your cabinets, as well as the overall aesthetic of your kitchen or bathroom. Choose hardware that complements the style and finish of your cabinets, whether you prefer sleek stainless steel handles or ornate brass knobs. Measure the distance between the screw holes on your hardware and mark this on your cabinet to ensure accurate placement.

Preparing for Installation

Now that you’ve chosen the perfect hardware, it’s time to prepare your cabinets for installation. Remove any old hardware and fill any holes with wood filler. Clean the cabinet surface with soap and water, and dry thoroughly. Measure and mark where you want to place your new hardware, ensuring that they’re level and in line with each other.

Installing Cabinet Knobs

If you’re installing cabinet knobs, you’ll need to drill pilot holes in the marked spots. Use a drill bit that’s slightly smaller than the screws that came with your hardware. Insert the screws through the back of the cabinet and into the knob, tightening with a screwdriver. Make sure the knobs are straight and level before tightening completely.

Installing Cabinet Pulls

If you’re installing cabinet pulls, you’ll need to drill holes in the marked spots. Use a drill bit that’s the same size as the screws that came with your hardware. Insert the screws through the front of the cabinet and into the pull, tightening with a screwdriver. Make sure the pulls are straight and level before tightening completely.

Finishing Touches

Once you’ve installed all your hardware, step back and admire your handiwork. Make sure everything is level and straight, and tighten any loose screws. Clean up any dust or debris and enjoy your newly updated cabinets!

With this guide, you’ll be able to install cabinet hardware like a pro, enhancing the overall look and functionality of your cabinets. Remember to choose hardware that complements your existing cabinetry, and take the time to measure and mark your placement before drilling any holes. With a little patience and attention to detail, you’ll have beautiful new cabinets in no time.

Maximizing Storage with Decorative Hooks: Tips and Tricks

Are you tired of cluttered rooms and messy closets? Do you wish you had more storage space for your belongings? Look no further than decorative hooks! These versatile hooks can be used in various areas of the home to create extra storage while adding a decorative touch. Here are some tips and tricks for maximizing your storage with decorative hooks.

Benefits of Using Decorative Hooks for Storage

Decorative hooks are not only functional but also stylish. They come in various shapes, sizes, and designs, making them a perfect addition to any room. Besides, they can help you to:

  1. Maximize space in small areas
  2. Organize items such as coats, hats, bags, and towels
  3. Display artwork and create a unique wall feature
  4. Add a decorative touch to a room

When choosing decorative hooks, consider the style of your room and the items you need to hang. For example, if you need hooks for your bathroom, choose ones that are moisture-resistant. Meanwhile, if you want to hang coats and jackets, select hooks that are sturdy enough to hold the weight.

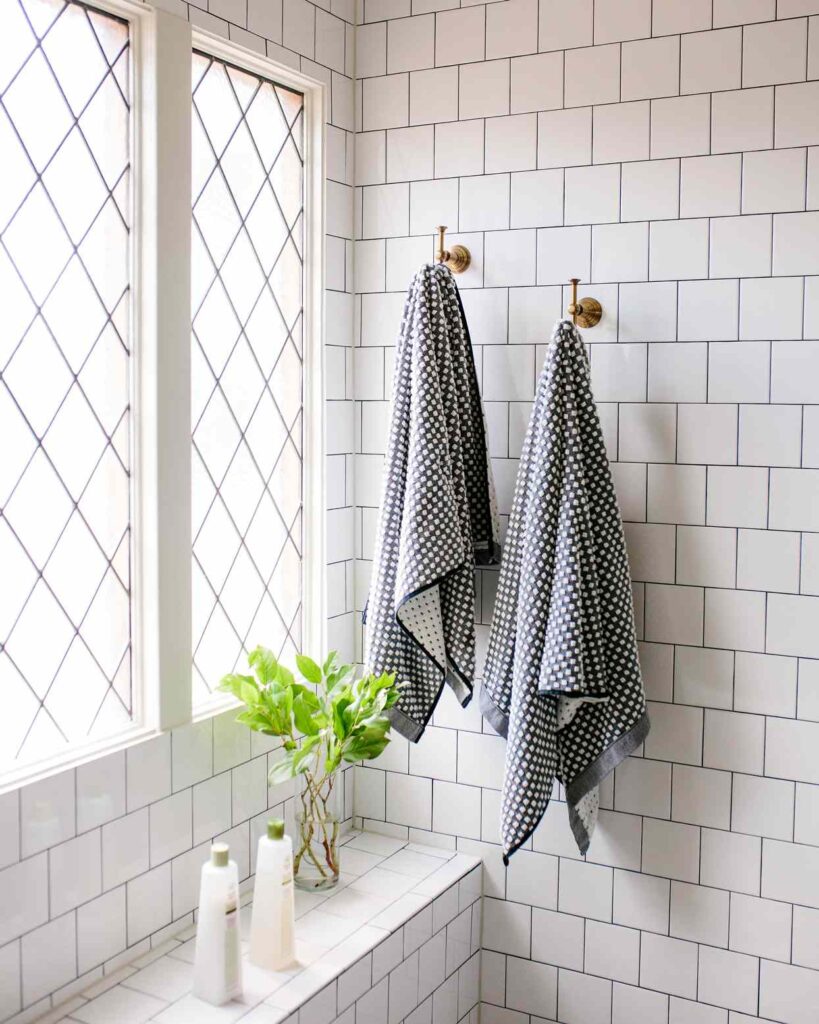
COURTESY OF BANDD DESIGN

photo: COURTESY OF BANDD DESIGN

Choosing the Right Hooks for Your Storage Needs

Choosing the right hooks for your storage needs is crucial to maximize their effectiveness. Start by measuring the space where you want to hang the hooks. This way, you can determine the right size and number of hooks you need.

Next, consider the weight of the items you want to hang. If you’re hanging something heavy, choose hooks that have a sturdy base and can withstand the weight. For light items like keys and jewelry, small decorative hooks are perfect.

Spacing your hooks correctly is also essential. Ensure that there is enough space between hooks to avoid overcrowding. Typically, the space between hooks should be at least half the width of the item you’re hanging.

DIY Decorative Hook Projects

If you’re feeling crafty, consider making your decorative hooks. Here are some easy DIY projects you can try:

  • Paint and decorate wooden clothespins and use them as hooks
  • Glue small toys or figurines onto plain hooks for a fun touch
  • Use old doorknobs or drawer pulls as hooks for a vintage look

These DIY projects are a fun way to add a personal touch to your home while maximizing storage space. Most importantly, they’re budget-friendly!

Troubleshooting Common Issues with Decorative Hooks

Like any other home product, decorative hooks can have their problems. One of the most common issues is loose screws or hooks falling off the wall. To prevent this, make sure you install them correctly. Use a level to ensure they’re straight, and use wall anchors for extra support.

If you’ve already installed your hooks, and they’re still falling off the wall or have loose screws, try tightening the screws or using a stronger adhesive. You can also consider replacing the hooks entirely.

Conclusion

Decorative hooks are a great way to maximize storage space while adding a decorative touch to your home. By choosing the right hooks, spacing them correctly, and installing them properly, you can create a clutter-free and organized space. If you’re feeling creative, try making your hooks using simple DIY projects. Don’t let clutter take over your home; try using decorative hooks today!

The Ultimate Guide to Choosing Screws for Your Drawer Slides

Drawer slides are an essential component in any piece of furniture that requires drawers, such as cabinets and dressers. To ensure that your drawer slides work properly and last for a long time, it is important to choose the right screws for their installation. In this guide, we will provide an overview of the different types of screws that can be used with drawer slides, as well as tips on how to choose the right size, material, and head type for your specific needs.

Why choosing the right screws is important

Choosing the right screws for your drawer slides is crucial for several reasons. First, using the wrong type of screw can affect the stability and durability of your drawer slides, making them prone to wobbling or breaking. Second, using screws that are too long or too short can damage the drawer slides or the surrounding furniture. Finally, using low-quality screws can cause rust or corrosion over time, which can compromise the functionality of your drawer slides.

Overview of different types of screws

The two most common types of screws that are used with drawer slides are wood screws and machine screws. Wood screws are designed to be used with wood, while machine screws are designed to be used with metal. Wood screws have a tapered shaft and a pointed end that helps them grip the wood, while machine screws have a uniform shaft and a flat end that requires a nut or washer to secure them in place.

Type of Drawer Slide

Before choosing the screws for your drawer slides, it is important to consider the type of drawer slide you are using. There are three main types of drawer slides:

  • Ball Bearing Drawer Slides: These are the most common type of drawer slides and are known for their smooth and quiet operation. They require screws to be inserted into pre-drilled holes in the slide.
  • Roller Drawer Slides: Also called Epoxy Slides, these are less expensive than ball bearing drawer slides but are not as smooth. They require screws to be inserted into the side of the slide.
  • Under Mount Drawer Slides: These are mounted underneath the drawer and require screws to be inserted into pre-drilled holes in the slide and the same screws are used to fasten the under mount slide’s front locking devices.

Screw Size

The size of the screw you choose for your drawer slide depends on the thickness of the drawer and the cabinet or dresser where the slide will be installed. It is important to choose a screw that is long enough to provide adequate support, but not too long that it penetrates through the other side. Typically, the recommended screw length for a drawer slide installation is between 1/2 and 3/4 of an inch.

Material

The material of the screw you choose also affects its durability and resistance to corrosion. Stainless steel screws are the most common and provide the best resistance to rust and corrosion. Zinc-plated screws are also popular and provide good resistance to corrosion. Brass screws are more expensive but are ideal for decorative finishes because of their golden hue.

Head Type

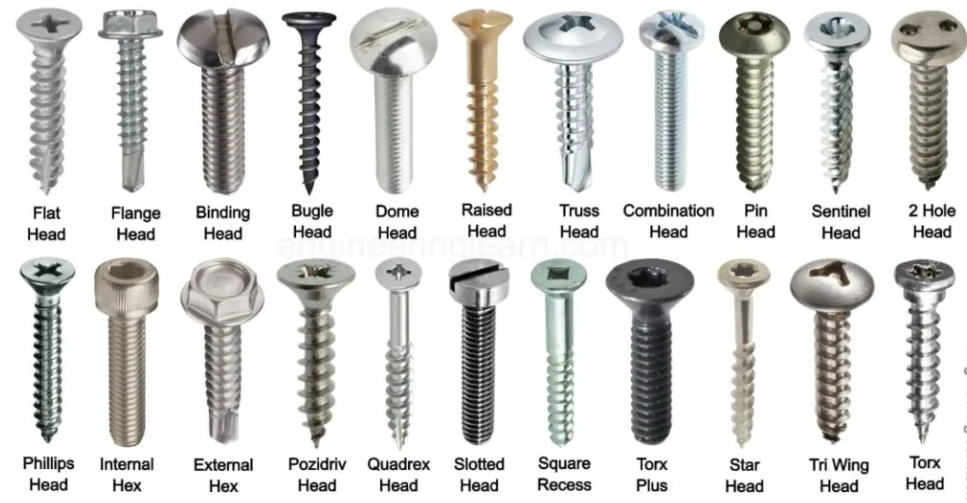
The head type of the screw you choose depends on the type of screwdriver you have and the aesthetic you want to achieve. There are four main types of screw heads:

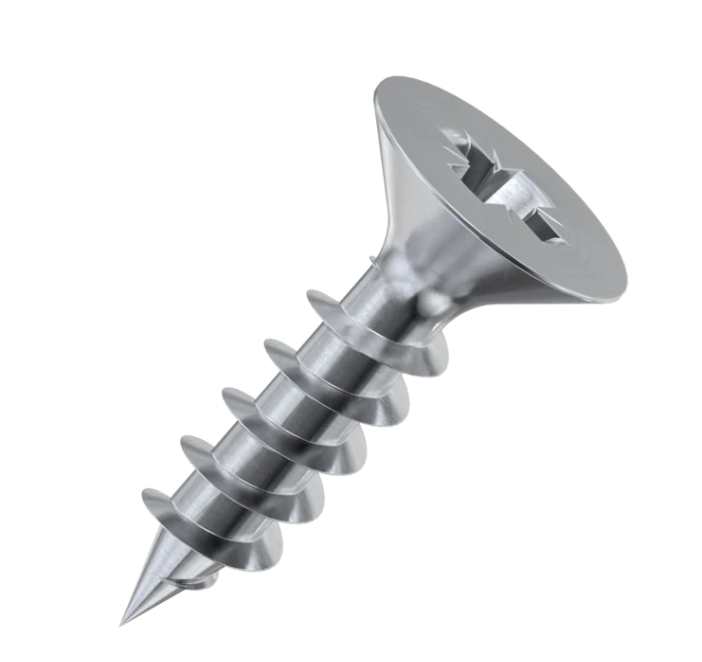
  • Flat Head Screws: These are the most common and have a flat top that sits flush with the surface of the material.
  • Pan Head Screws: These have a rounded top and are ideal for applications where the screw head will be visible.
  • Round Head Screws: These have a domed top and are often used in woodworking applications.
  • Truss Head Screws: These have a wide and flat top and are commonly used for heavy-duty applications.

Conclusion

Choosing the right screws for your drawer slides is essential for ensuring their stability and durability. When selecting screws, consider the type of drawer slide, screw size, material, and head type that is best suited for your specific needs. Following these guidelines will help you choose the right screws for your drawer slides and ensure a successful installation every time.

For more information on drawer slides and other woodworking supplies, visit woodworkerexpress.com.

Uncovering the Hidden Potential of Blind Corner Cabinets

If you’re like many homeowners, you’ve probably experienced the frustration of trying to access items stored in a blind corner cabinet. These cabinets, which are typically located in the corners of kitchen cabinets, are notorious for being difficult to use effectively. However, with a little bit of creativity and some clever design solutions, you can unlock the hidden potential of your blind corner cabinets and make the most of this often-overlooked space.

What are Blind Corner Cabinets?

Blind corner cabinets are cabinets that are located in the corners of kitchen cabinets. They are called “blind” because they are typically hidden from view, making them difficult to access and use effectively. These cabinets can be frustrating for homeowners because they are often awkward to use and can waste valuable storage space.

Their Common Problems

There are several common problems associated with blind corner cabinets. For one, they can be difficult to access, making it hard to reach items stored in the back of the cabinet. Additionally, because these cabinets are often hidden from view, it can be easy to forget what is stored inside them. This can lead to clutter and disorganization, as items are simply stuffed into the cabinet without any rhyme or reason.

Why Uncovering their Hidden Potential is Important

Despite their challenges, blind corner cabinets can actually be a great source of storage space in your kitchen. By uncovering their hidden potential, you can make the most of this often-overlooked space and optimize your kitchen storage and functionality. With the right design solutions and organizational tools, you can transform your blind corner cabinets into a functional and efficient storage area.

Design Solutions

There are several design solutions that you can use to make the most of your blind corner cabinets. These include:

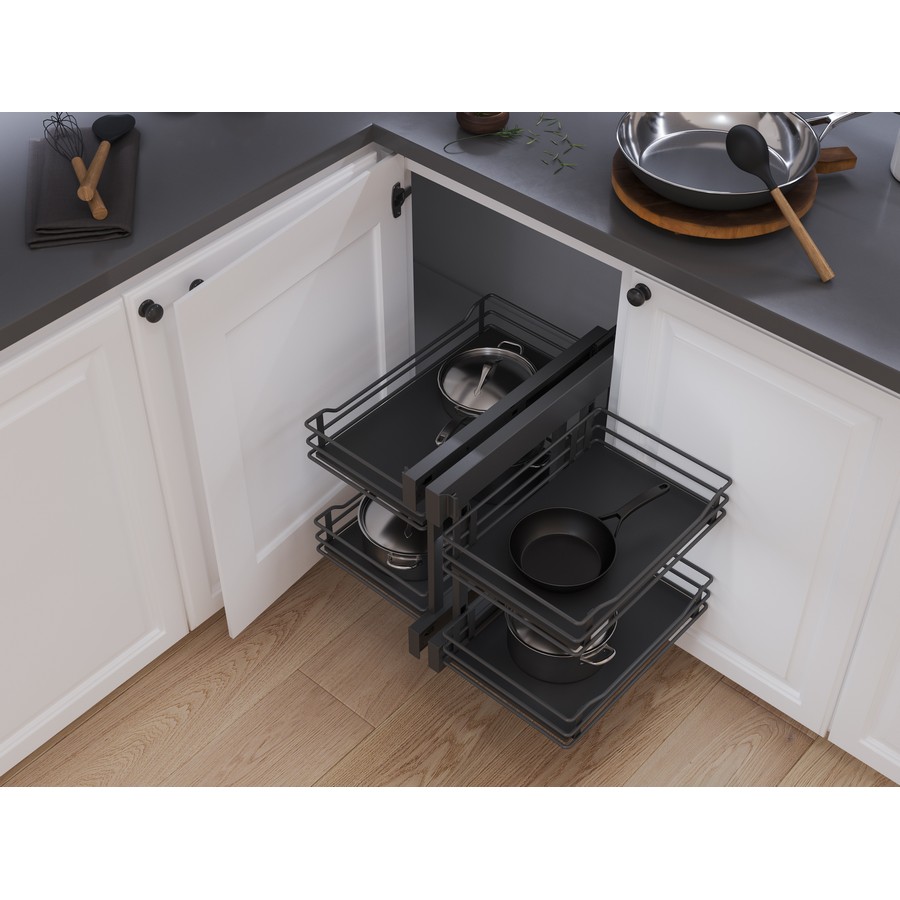
Pull-Out Shelves

Pull-out shelves are a great way to make use of the space in your blind corner cabinets. These shelves can be installed on rollers, making it easy to access items stored in the back of the cabinet. They also provide additional storage space, helping to maximize the use of the cabinet.

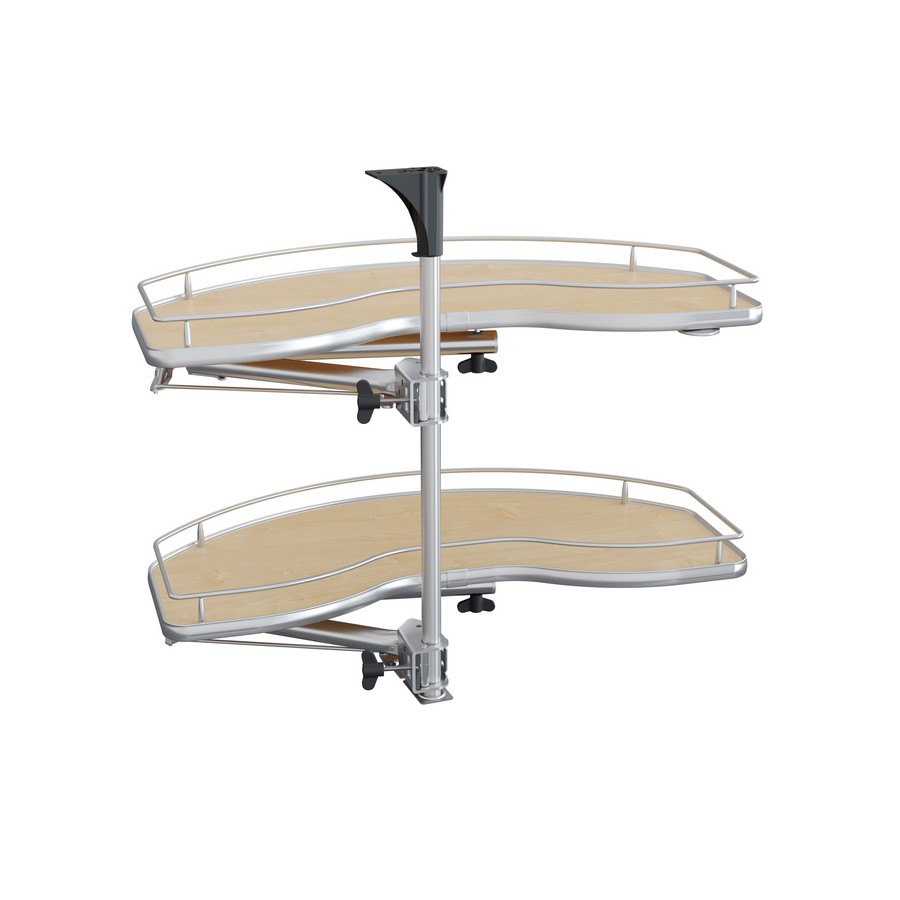
Swivel Trays

Swivel trays are another great option for blind corner cabinets. These trays can be installed on a pole and swivel out when you need to access items stored in the back of the cabinet. They are a great way to make use of the space in your blind corner cabinets while still providing easy access to your items.

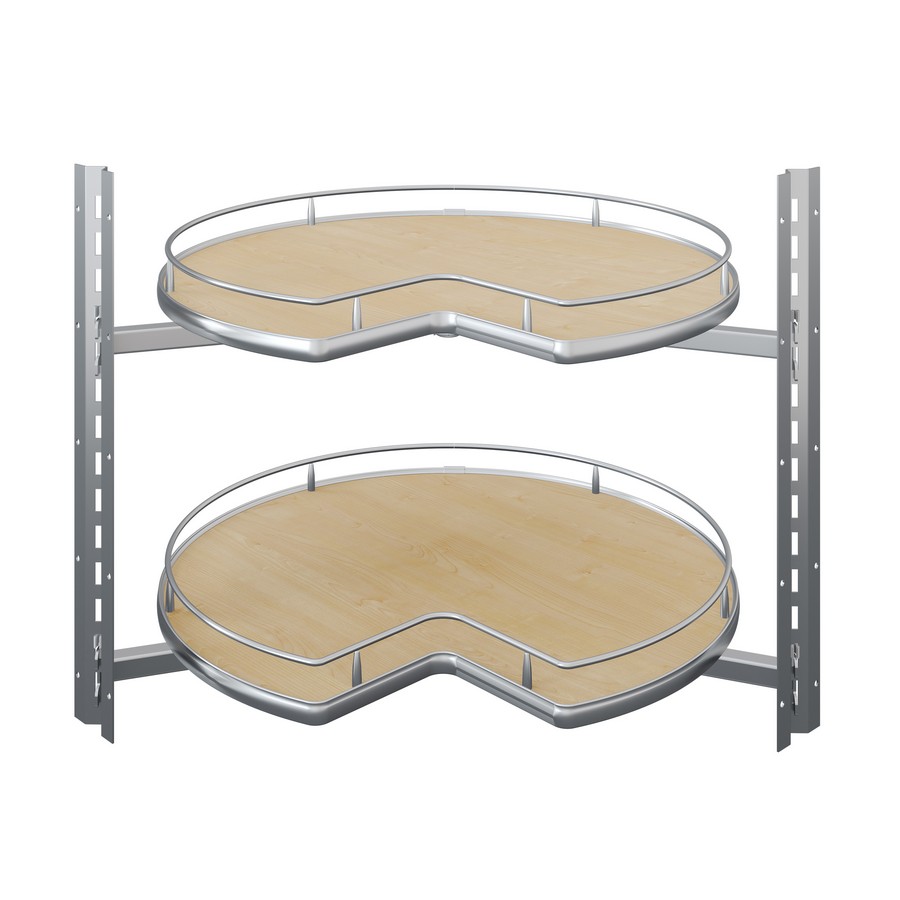
Lazy Susans

Lazy susans are a classic organizational tool that can work wonders in a blind corner cabinet. These rotating shelves make it easy to access items stored in the back of the cabinet, and they can be easily installed in your existing cabinet. They come in a variety of sizes and styles, making it easy to find one that fits your needs.

Corner Drawers

Corner drawers are a more advanced option, but they can provide a lot of additional storage space in your blind corner cabinets. These drawers pull out from the corner of the cabinet, providing easy access to your items. They can be custom-built to fit your specific space and needs.

Custom Solutions

If none of these options work for you, there are also custom solutions available. A professional kitchen designer can help you come up with a custom solution that meets your specific needs and works with your existing space.

Organizing Tips

Once you’ve installed your new design solutions, it’s important to organize your blind corner cabinets effectively. Here are some tips to help you get started:

Categorize and Prioritize Items

The first step in organizing your blind corner cabinets is to categorize and prioritize your items. Group similar items together, and prioritize the items that you use most frequently. This will make it easier to find what you need and keep your cabinets organized.

Use Containers and Dividers

Containers and dividers can be a great way to keep your items organized within your blind corner cabinets. Use baskets or bins to group items together, and use dividers to keep items from shifting around in the cabinet.

Label Everything

Labeling is an important part of organizing your blind corner cabinets. Use labels to identify what is stored in each container or drawer, making it easy to find what you need quickly.

Regularly Declutter and Reorganize

Finally, it’s important to regularly declutter and reorganize your blind corner cabinets. Go through your items every few months and get rid of anything that you no longer need or use. This will help keep your cabinets organized and make the most of your storage space.

DIY Projects

If you’re feeling ambitious, there are several DIY projects that you can undertake to make the most of your blind corner cabinets. These include:

Building Pull-Out Shelves and Trays

If you’re handy with tools, you can build your own pull-out shelves and trays for your blind corner cabinets. There are several tutorials available online that can walk you through the process step-by-step.

Installing Lazy Susans and Corner Drawers

If you’re looking for a more advanced DIY project, you can also install your own lazy susans or corner drawers. Again, there are plenty of tutorials available online to help you through the process.

Repurposing Household Items as Organizing Tools

Finally, you can also repurpose household items as organizing tools for your blind corner cabinets. For example, you can use tension rods to create dividers in your cabinets, or use magazine holders to store cutting boards or baking sheets.

Conclusion

Blind corner cabinets may seem like a lost cause, but with a little bit of creativity and some clever design solutions, you can transform them into a functional and efficient storage area. By following the tips and techniques outlined in this post, you can make the most of your blind corner cabinets and maximize your kitchen storage and functionality.

10 Creative Storage Solutions for Small Kitchens

Are you tired of digging through cluttered cabinets and drawers in your small kitchen? Don’t worry, you’re not alone. Many people struggle with organizing their limited kitchen space, but there are plenty of innovative solutions to help you make the most out of your small kitchen. Here are ten creative ideas to help you maximize storage space:

Maximizing Vertical Space

When you’re short on counter space, it’s time to look up. Here are two solutions to help you utilize the space above your cabinets:

  • Wall-Mounted Shelves: Install open shelves on the wall above your countertops to store dishes, spices, and other kitchen essentials. These shelves can also add a decorative touch to your kitchen.
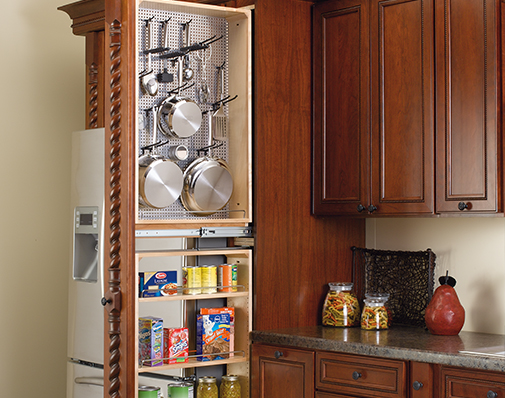
  • Pegboards: Pegboards are not just for tools. You can use them to hang pots and pans, utensils, and other kitchen items. They are easy to install and can be hung on any wall in your kitchen.

Utilizing Cabinet Doors

Don’t let the space on the back of your cabinet doors go to waste. Here are two solutions to help you maximize that space:

  • Door-Mounted Spice Racks: Install a spice rack on the back of your cabinet door to keep your spices organized and easily accessible. This will free up space in your cabinets and on your countertops.
  • Over-the-Door Organizers: You can also use over-the-door organizers to store everything from cutting boards to cleaning supplies. These organizers come in different sizes and designs to fit your needs.

Using Under-the-Sink Space

The area under your sink can be a treasure trove of storage space. Here are two solutions to help you make the most of it:

  • Pull-Out Organizers: Install pull-out organizers under your sink to store cleaning supplies, trash bags, and other items. These organizers are easy to install and can be customized to fit your needs.
  • Stackable Bins: Use stackable bins to organize your cleaning supplies and other items under your sink. These bins will help you access everything easily and keep your under-the-sink area clutter-free.

Multi-Functional Furniture

Furniture that serves more than one purpose is a great way to save space in a small kitchen. Here are two examples:

  • Kitchen Islands with Storage: A kitchen island can provide extra counter space and storage space. Look for an island with shelves, cabinets, or drawers to maximize its storage potential.
  • Banquette Seating with Hidden Storage: Banquette seating is not only cozy and comfortable, but it can also provide hidden storage space. Look for a banquette with a lift-up seat to store tablecloths, placemats, and other items.

With these creative storage solutions, you can make the most out of your small kitchen. Whether you’re renting or you own your home, these ideas are easy to implement and will help you keep your kitchen organized and clutter-free.

About Woodworker Express

Woodworker Express is a leading supplier of cabinet hardware, woodworking supplies, and furniture hardware. We offer a wide range of products for DIY enthusiasts, contractors, and professionals. Our products are high-quality, reliable, and affordable. Visit our website at https://woodworkerexpress.com to learn more.

Abrasive Disks, Belts and Wide Belts: An Overview of Sanding Tools

When it comes to woodworking or any type of DIY project, sanding is a crucial step in achieving a polished and professional finish. Sanding tools come in various shapes and sizes, each with their unique features and benefits. In this blog post, we’ll be taking a closer look at abrasive discs, belts, and wide belts, discussing their differences and which one would be the best fit for your project.

Definition of Abrasive Disks, Belts, and Wide Belts

Abrasive discs are circular sanding tools that attach to a power drill or sander and come in a wide variety of different sizes and grits and backers. Abrasive belts are sanding belts that fit onto a belt sander, while wide abrasive belts are wider sanding belts used for industrial sanding applications.

Purpose of Sanding Tools

Sanding tools are used to remove rough edges, burrs, or imperfections on various surfaces, including wood, metal, and plastic. Sanding also improves adhesion by creating a smooth surface for paint or glue to adhere to.

Types of Sanding Tools

There are various types of sanding tools, including orbital sanders, belt sanders, and disc sanders, each unique in its own way. In this post, we’ll be focusing on abrasive discs, belts, and wide belts.

Disc sander using Sanding Discs

Abrasive Discs

Abrasive discs come in various grits, with the lower numbers being coarser, and the higher numbers being finer. The materials used for abrasive discs include aluminum oxide, ceramic, and silicon carbide.

Materials and Grit Sizes

Aluminum oxide is the most common material used for abrasive discs and is suitable for sanding wood, metal, and plastic. Silicon carbide disks are best suited for sanding stone, glass, and ceramics.

Types of Abrasives Discs

Abrasive discs come in various shapes and sizes, including foam discs, hook and loop discs, and peel and stick (PSA) discs.

Foam discs are best for moist finishing clear coats,varnishes and gel coats. They produce equal pressure and provide a uniform scratch pattern. The foam backer ensures that they conform to any contour.

Hook and Loop sanding discs are perfect for easy attachment and removal to your power tools because of the velcro type backer.

Peel and Stick disc are also very easy to remove and attach as they utilize a pressure sensitive adheasive backer.

Uses and Applications

Abrasive discs are perfect for sanding small or intricate surfaces, such as door frames, furniture, and cabinets. They are also ideal for removing paint or rust from metal surfaces.

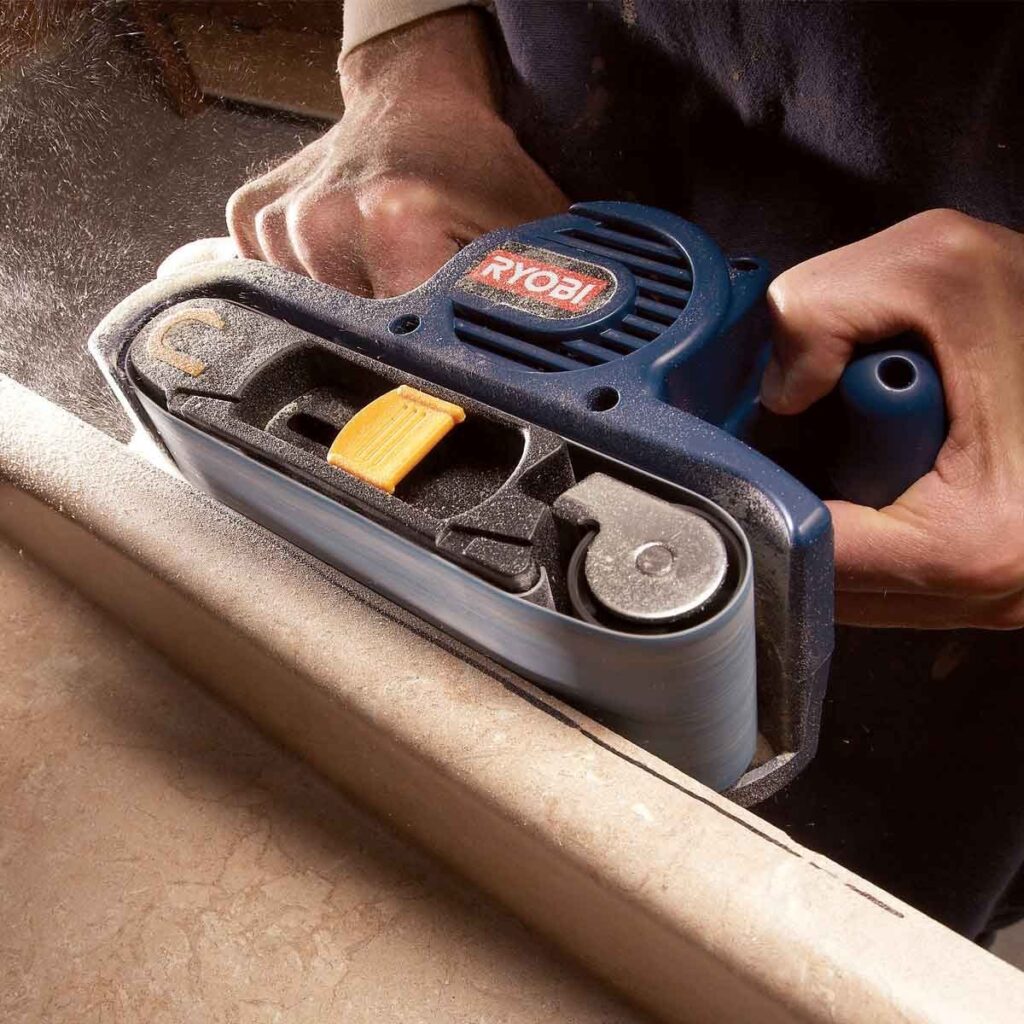
Sander with Sanding Belt in Use

Abrasive Belts

Abrasive belts come in various widths and grits and are ideal for sanding large surfaces, such as floors, tabletops, and doors. The wider the belt, the more surface area it can cover, resulting in faster sanding times.

Materials and Grit Sizes

Abrasive belts are made of the same materials as abrasive discs and are available in various grits, making them suitable for a wide range of applications.

Types of Abrasive Belts

Abrasive belts come in various types, including cloth-backed, paper-backed, and polyester-backed belts. Cloth-backed belts are durable and long-lasting, while paper-backed belts are more affordable and suited for lighter sanding applications. Polyester-backed belts are ideal for wet sanding applications.

Uses and Applications

Abrasive belts are ideal for sanding large surfaces, such as floors, tabletops, and doors. They are also ideal for removing old finishes or paint from wooden surfaces.

Wide Abrasive Belts

Wide abrasive belts are similar to abrasive belts but are wider, making them more suitable for industrial sanding applications.

Materials and Grit Sizes

Wide abrasive belts are made of the same materials as abrasive disks and belts and are available in various grits. They are suitable for sanding large surfaces, such as wooden boards or metal sheets.

Types of Wide Abrasive Belts

Wide abrasive belts come in various types, including paper-backed, cloth-backed, and polyester-backed belts.

Uses and Applications

Wide abrasive belts are ideal for industrial sanding applications, such as sanding large wooden boards or metal sheets. They are also suitable for sanding dense materials, such as particleboard or MDF.

Care and Maintenance of Sanding Tools

Caring for your sanding tools is essential to ensure their longevity and performance. Proper cleaning and storage are crucial, as well as replacing abrasive pads and belts when necessary.

Cleaning and Storage

After use, wipe your sanding tools clean with a dry cloth and store them in a dry, cool place. Avoid exposing them to moisture or extreme temperatures, which can damage the sanding surface and reduce their lifespan.

Replacing Abrasive Pads and Belts

Replace abrasive pads and belts when they become worn or damaged. Continuing to use them can result in reduced performance and may damage the surface you are sanding.

Ensuring Proper Use for Longevity

Ensure that you are using the correct grit and material for your sanding application. Also, avoid applying excessive pressure, which can result in overheating or damaging the sanding surface.

Conclusion

Sanding tools are essential for achieving a polished and professional finish in woodworking and DIY projects. Abrasive discs, belts, and wide belts each have their unique features and benefits, making them suitable for different sanding applications. By selecting the right sanding tool for your project and taking proper care of it, you can achieve a quality finish that will last for years to come.

From Dumb to Smart: How to Turn Your Kitchen into a Genius Hub!


Is your kitchen not the brightest? Well transform your kitchen into a smart haven with these tips and ideas. By upgrading to smart appliances, adding voice control, integrating smart lighting, and exploring gadgets for a convenient and connected kitchen experience, you can easily make your cooking space truly intelligent!

Smart Home concept

Steps you can take to create a Smart Kitchen:

  1. Smart Appliances: Consider upgrading your existing appliances to smart versions. Look for refrigerators, ovens, dishwashers, and other appliances that offer Wi-Fi connectivity and smart features. Smartphone apps remotely control these appliances and often integrate with virtual assistants like Amazon Alexa or Google Assistant.
  2. Voice Control: Set up a voice-controlled assistant, such as Amazon Echo with Alexa or Google Home with Google Assistant, in your kitchen. This allows you to control various aspects of your kitchen, such as setting timers, checking recipes, playing music, and even controlling compatible smart appliances, using voice commands.
  3. Smart Lighting: Install smart lighting solutions in your kitchen. You can use smart bulbs or smart light switches that can be controlled through smartphone apps or voice commands. This enables you to adjust the lighting levels, set schedules, or change the ambiance of your kitchen easily.
  4. Smart Plugs and Power Strips: Use smart plugs or power strips to make your existing appliances and devices smart. These can be plugged into your regular outlets and provide Wi-Fi connectivity to devices that wouldn’t otherwise be “smart.” You can control these devices remotely and even set schedules for their operation.
  5. Smart Kitchen Gadgets: Explore smart kitchen gadgets that can make your cooking and food preparation more efficient. This can include smart sous vide machines, precision cookers, coffee makers, or even smart scales and thermometers that connect to your smartphone or smart speaker.
  6. Kitchen Monitoring and Security: Install smart security cameras or sensors in your kitchen to monitor the area and enhance safety. These devices can send alerts to your smartphone if there’s any unusual activity or if you want to keep an eye on your kitchen remotely.
  7. Smart Home Hub: Consider setting up a central hub or smart home automation system that connects and controls all your smart devices in one place. This allows for seamless integration and control of various smart features throughout your kitchen and home.

Remember to research and select devices that are compatible with each other and fit your specific needs. It’s also important to consider the security and privacy aspects of smart devices by keeping firmware updated and using strong, unique passwords for your accounts.

GRABO: The Versatile Woodworker’s Solution for Effortless Heavy Lifting

Introduction:
In the world of woodworking, handling heavy objects and materials can be a daunting task. However, with the revolutionary GRABO Paver Vacuum Lifter, woodworking enthusiasts can say goodbye to the challenges of lifting and moving heavy items. In this blog post, we will explore how the GRABO can transform your woodworking projects by providing a powerful and versatile solution for effortless heavy lifting.

Efficiency and Safety Made Easy:
Woodworking often involves working with large and cumbersome materials such as timber, doors, and countertops. The GRABO Paver Vacuum Lifter simplifies these tasks by securely gripping the objects using its powerful suction system. With a press of a button, the vacuum seal is created, allowing you to effortlessly lift and maneuver heavy pieces without straining your muscles or risking accidents.

Powerful Seal and Electric-Powered Design:
What sets the GRABO apart is its exceptional seal and electric-powered functionality. The unit features a unique and powerful seal that ensures a strong and reliable grip on various woodworking materials. Unlike traditional air pump-based lifters, the GRABO is electrically powered with a built-in rechargeable battery. This means you can work without the need for external power sources, enjoying the freedom of movement in your woodworking projects.

Versatility for Woodworkers:
While the GRABO is an excellent Paver Vacuum Lifter, its applications extend far beyond pavers and slabs. Woodworkers will find this versatile tool indispensable in their craft. Here are some ways in which the GRABO excels in the woodworking realm:

Timber Handling:
Whether you’re moving large planks or hardwood panels, the GRABO makes it easy to lift and position timber for precise cuts and assembly.

Door Installation:
When hanging doors, the GRABO ensures a secure grip, making the process of aligning and fitting doors hassle-free.

Countertop Placement:
The GRABO is a valuable tool for positioning heavy countertops accurately. Say goodbye to straining your back and hello to effortless installation.

Sheet Goods Handling:
Moving plywood, MDF, or other sheet goods becomes a breeze with the GRABO. You can easily transport and position large sheets without worrying about slippage or damage.

Furniture Assembly:
The GRABO is your perfect partner when assembling furniture pieces. It enables you to lift and position heavy components, ensuring a precise and efficient assembly process.

Simplifying DIY Woodworking Projects:
Even if you’re a woodworking enthusiast working on DIY projects at home, the GRABO can significantly enhance your experience. Its compact size and easy storage make it a practical addition to your toolbox. Whether you’re building an extension, tiling your bathroom, or laying down pavers in your garden, the GRABO will simplify the heavy lifting involved, allowing you to focus on the creative aspects of your woodworking endeavors.

Using the GRABO Paver Vacuum Lifter:
Using the GRABO is a straightforward process that enhances your workflow. Here’s a step-by-step guide:

Press the GRABO firmly against the woodworking material you wish to lift.
Activate the vacuum seal by pressing the green button, ensuring a secure hold on the object.
Utilize the ergonomic handle of the GRABO to move the material effortlessly to the desired location.
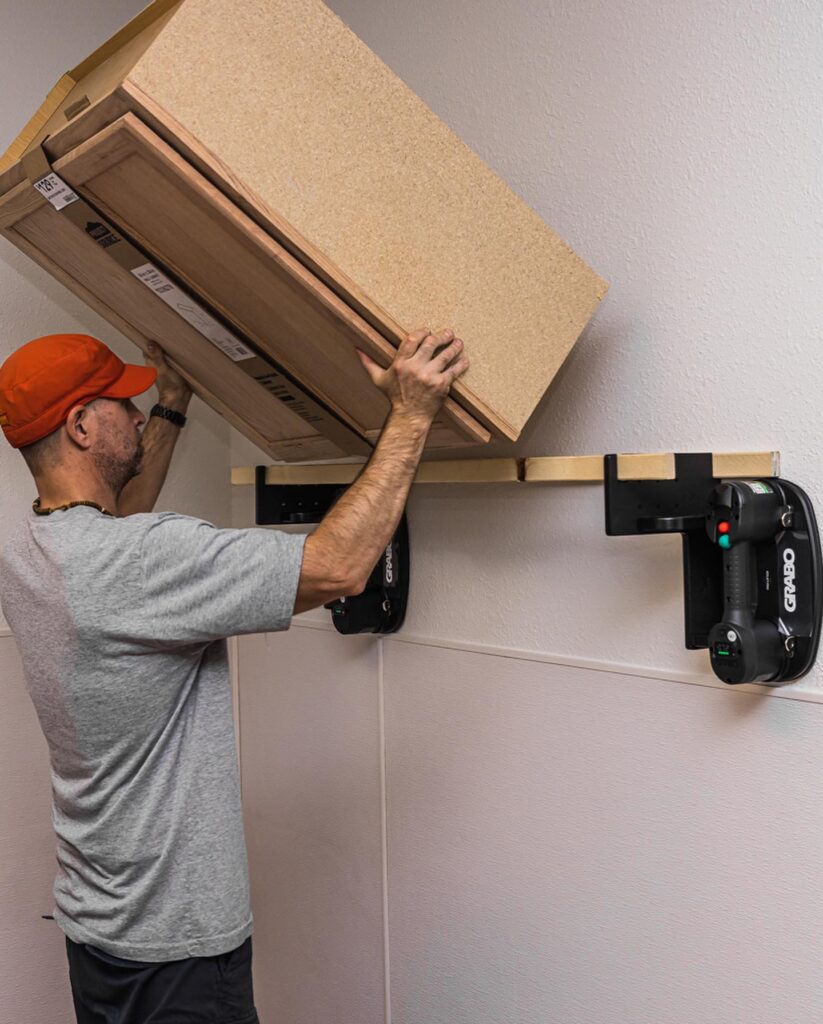
For larger or heavier objects, consider using two GRABO units to ensure stability and safety.
Release the material by pressing the red button once you have completed your task.
Conclusion:
The GRABO Paver Vacuum Lifter is a game-changer for woodworkers, offering a versatile and efficient solution for heavy lifting in woodworking projects. Its powerful seal, electric-powered design, and user-friendly operation make it a must-have tool for woodworking enthusiasts. With the GRABO, you can say goodbye to the physical strain and safety risks associated with manual lifting, allowing you to focus on the craftsmanship and artistry of your woodworking projects.

Whether you’re handling timber, installing doors, placing countertops, moving sheet goods, or assembling furniture, the GRABO provides a secure grip and effortless maneuverability. Its versatility and reliability ensure that you can tackle a wide range of woodworking tasks with ease and efficiency.

Even for DIY woodworking projects at home, the GRABO proves to be an invaluable asset. From building extensions to remodeling your space, this compact and portable tool fits seamlessly into your toolbox. It eliminates the need for excessive manpower, making heavy lifting a one-person job. With the GRABO, you can transform your home woodworking projects into enjoyable and satisfying experiences.

Using the GRABO Paver Vacuum Lifter is simple and intuitive. Just press it firmly against the woodworking material, activate the vacuum seal, and use the ergonomic handle to effortlessly move the object. Its electric-powered design ensures consistent performance, while the powerful seal guarantees a secure hold throughout the task. The GRABO’s efficiency and ease of use allow you to complete your woodworking projects in a timely manner, without compromising on safety or quality.

In conclusion, the GRABO Paver Vacuum Lifter is a versatile and indispensable tool for woodworkers. Its ability to handle heavy materials with ease, along with its powerful seal and electric-powered operation, sets it apart from traditional lifters. By incorporating the GRABO into your woodworking workflow, you can enhance productivity, reduce physical strain, and achieve exceptional results in your woodworking projects. Embrace the power of the GRABO and elevate your woodworking skills to new heights.

Elevate Your Cabinets: A Detailed Guide to Installing Decorative Hardware on Cabinet Doors and Drawer Fronts

Introduction:

Upgrading your cabinet doors and drawer fronts with decorative hardware is a simple yet effective way to enhance the aesthetic appeal and functionality of your kitchen or any other space with cabinets. In this detailed guide, we will walk you through the step-by-step process of installing decorative hardware, such as knobs and handles, to achieve a polished and professional look. Let’s get started on transforming your cabinets!

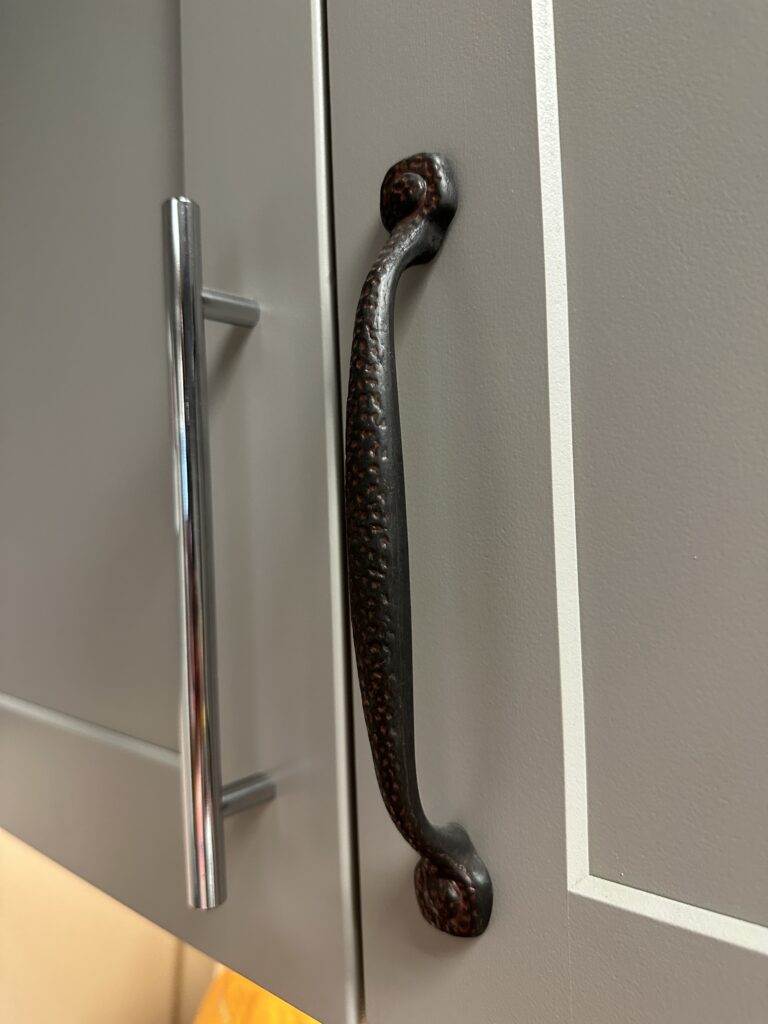
2 different decorative handles on a kitchen cabinet

Materials Needed:

Step 1: Planning and Preparation

Determine the placement of the hardware. Consider the size, style, and functionality of the hardware, as well as your personal preferences. Measure and mark the desired location for each piece of hardware on the cabinet doors and drawer fronts using a measuring tape and pencil.

Prepare the cabinets by cleaning the surfaces where the hardware will be installed. Remove any dirt, grease, or residue that may affect the adhesion or installation process.

Step 2: Installing Knobs on Cabinet Doors

Start by selecting the appropriate drill bit size for the screws provided with the knobs. Typically, a 3/16-inch bit works well for most knobs.

Hold the knob against the marked spot on the cabinet door. Ensure it is aligned with adjacent hardware and leveled. Mark the locations for screw holes using a pencil.

Attach the drill bit to your drill and carefully drill pilot holes at the marked spots on the cabinet door. Take care not to drill all the way through the door. A depth slightly shorter than the length of the screws is sufficient.

Align the knob with the pilot holes and insert the screws provided. Tighten them using a screwdriver until the knob is securely fastened. Avoid overtightening to prevent damage to the cabinet door.

Repeat this process for all the knobs on your cabinet doors, ensuring consistent spacing and alignment.

Step 3: Installing Handles or Pulls on Cabinet Doors and Drawer Fronts

Similar to the knob installation process, measure and mark the desired location for each handle or pull on the cabinet doors and drawer fronts. Use a level to ensure straight alignment.

Determine the appropriate drill bit size for the screws provided with the handles or pulls. Drill pilot holes at the marked spots using the selected drill bit.

If you have a cabinet template or jig, align it with the marked locations and use it as a guide for drilling the pilot holes. This can help ensure consistency and accuracy in hole placement.

Align the handle or pull with the pilot holes and insert the screws provided. Begin by hand-tightening the screws, then use a screwdriver to fully secure them. Ensure that the hardware is securely fastened without being overtightened.

For drawers, consider using longer screws provided with the handles or pulls, especially for thicker drawer fronts. This will provide a stronger and more secure attachment.

Repeat the process for all handles or pulls on both the cabinet doors and drawer fronts, maintaining consistent spacing and alignment.

Step 4: Finishing Touches and Inspection

After installing all the decorative hardware, double-check the tightness of each screw to ensure all knobs, handles, and pulls are securely fastened.

Take a step back and inspect the cabinets to ensure the hardware is level, aligned, and visually pleasing. Make any necessary adjustments to achieve a balanced and cohesive look.

Clean the cabinets and hardware with appropriate cleaning supplies to remove any fingerprints or smudges from the installation process. This will leave your cabinets looking pristine and ready to showcase their new decorative hardware.

Finally, step back and admire your newly upgraded cabinets! Appreciate the transformation and the added style and functionality that the decorative hardware brings to your space.

Maintenance Tips:

To keep your decorative hardware and cabinets in excellent condition, consider the following maintenance tips:

Regular Cleaning: Wipe down the hardware regularly using a soft, damp cloth to remove any dust or grime that may accumulate. Avoid using harsh chemicals that could damage the finish.

Preventive Maintenance: Periodically check the tightness of screws and fasteners to ensure they remain secure. If any become loose, simply tighten them with a screwdriver.

Cleaning Product Compatibility: When using cleaning products on your cabinets, ensure they are safe for the specific type of hardware and cabinet material. Read product labels and follow manufacturer recommendations.

Avoid Abrasive Materials: Use non-abrasive cleaning tools, such as microfiber cloths, to avoid scratching or damaging the hardware’s finish.

Handle with Care: Open and close cabinet doors and drawers gently, avoiding excessive force or pulling on the hardware. This will help maintain their integrity and prolong their lifespan.

Conclusion:

By following this detailed guide, you can successfully install decorative hardware on your cabinet doors and drawer fronts. This simple DIY project will elevate the overall look and functionality of your cabinets, giving your space a fresh and polished appearance. Enjoy the process and the satisfaction of completing this transformative upgrade. With your newly installed decorative hardware, your cabinets will not only be more visually appealing but also easier to use on a daily basis.