Achieve Perfectly Smooth Surfaces: The Key to Using Abrasives in Woodworking

As any seasoned woodworker knows, the final finish of a project can make or break its overall aesthetic appeal. By understanding the various types of abrasives available and employing the right techniques, you can elevate the quality of your woodworking projects and create flawless surfaces that are sure to impress.

Understanding Abrasives

Before we dive into the specifics of using abrasives, let’s first explore the different types available. The most common abrasives used in woodworking are sandpaper, sanding discs, sanding belts, and sanding sponges. Each of these options offers unique benefits and is suitable for different applications.

When it comes to sandpaper, you’ll find a wide range of grit sizes available. The grit size refers to the coarseness of the abrasive particles embedded in the sandpaper. Lower grit sizes, such as 40 or 60, are more aggressive and remove material quickly. Higher grit sizes, like 220 or 320, are finer and are used for smoothing and finishing surfaces.

Backing materials also play a role in the effectiveness of abrasives. Sandpaper can come with different backing materials, such as paper, cloth, or film. Each backing material has its own advantages and is suited for specific applications.

Choosing the Right Abrasive for the Job

Now that we understand the basics of abrasives, let’s discuss how to choose the right abrasive for your woodworking project. Firstly, it’s important to identify the type of wood you’re working with. Different wood species have different hardness levels, which can affect the sanding process.

Next, take into consideration the surface condition of your workpiece. If you’re starting with a rough or uneven surface, you may need a more aggressive abrasive to remove imperfections. On the other hand, if you’re working on a previously finished surface, a finer abrasive would be more appropriate for achieving a smooth, polished finish.

Lastly, match the abrasive to the specific task at hand. For example, when sanding curved surfaces or intricate details, sanding sponges or sanding blocks with flexible foam backing can provide better control and conform to the contours of the wood.

Preparing the Workpiece

If you’re working on a piece with an existing finish, it’s important to remove it before sanding. This can be done using a paint stripper or a sanding block with a coarse grit. Be sure to follow the manufacturer’s instructions when using chemical strippers and take proper safety precautions.

Once the surface is clean and free of any finishes, inspect the wood for imperfections such as dents, scratches, or gouges. Use a suitable wood filler or putty to repair these imperfections before proceeding with sanding.

Using Abrasives Effectively

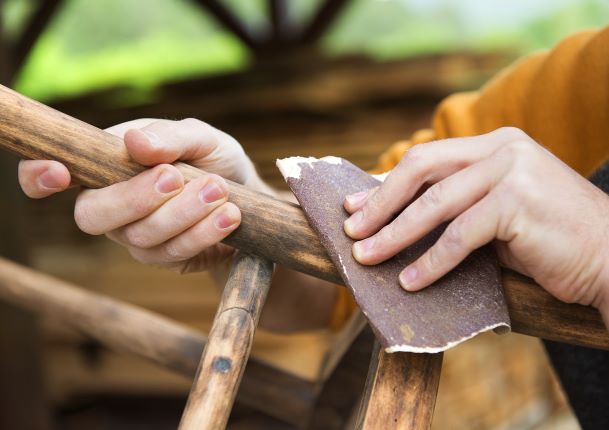
Now that your workpiece is prepped and ready, let’s delve into the techniques for using abrasives effectively. When it comes to hand sanding, it’s important to use the right technique and maintain a consistent motion. Sand in the direction of the wood grain, applying even pressure to ensure a smooth and even finish.

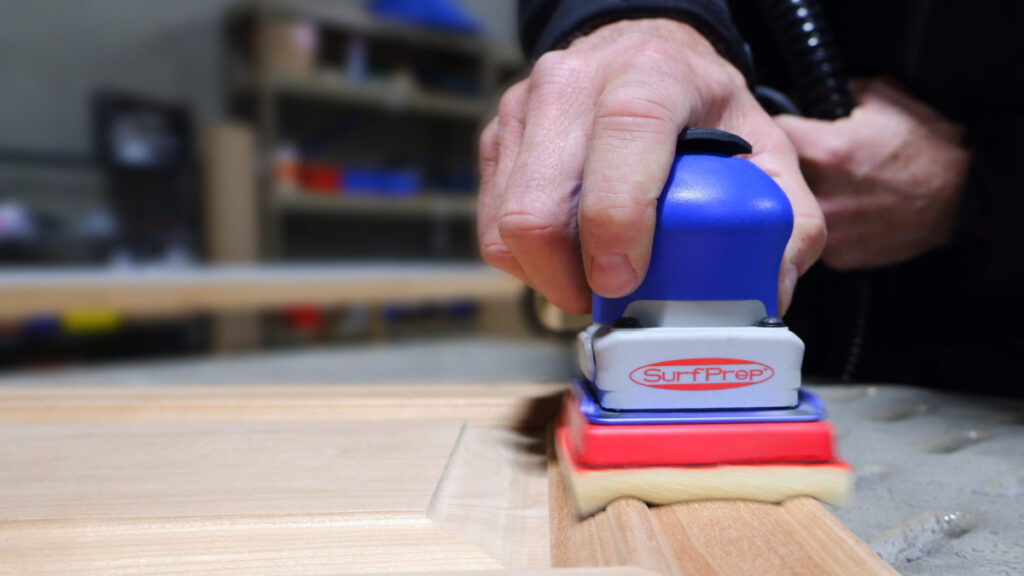
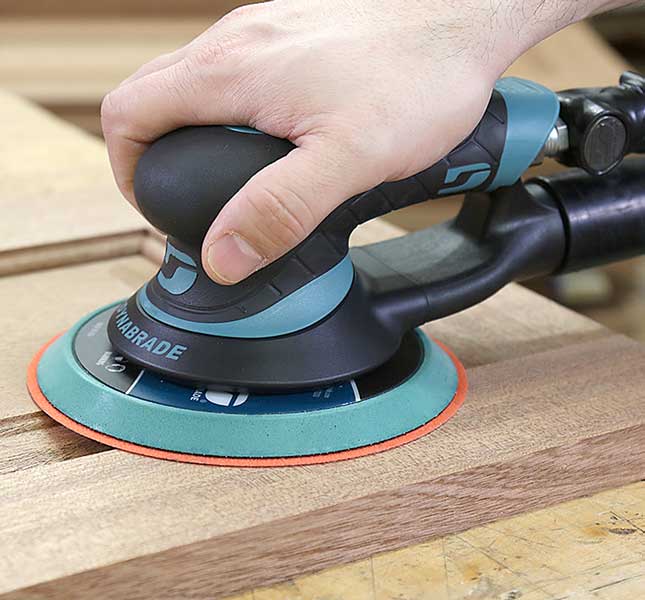
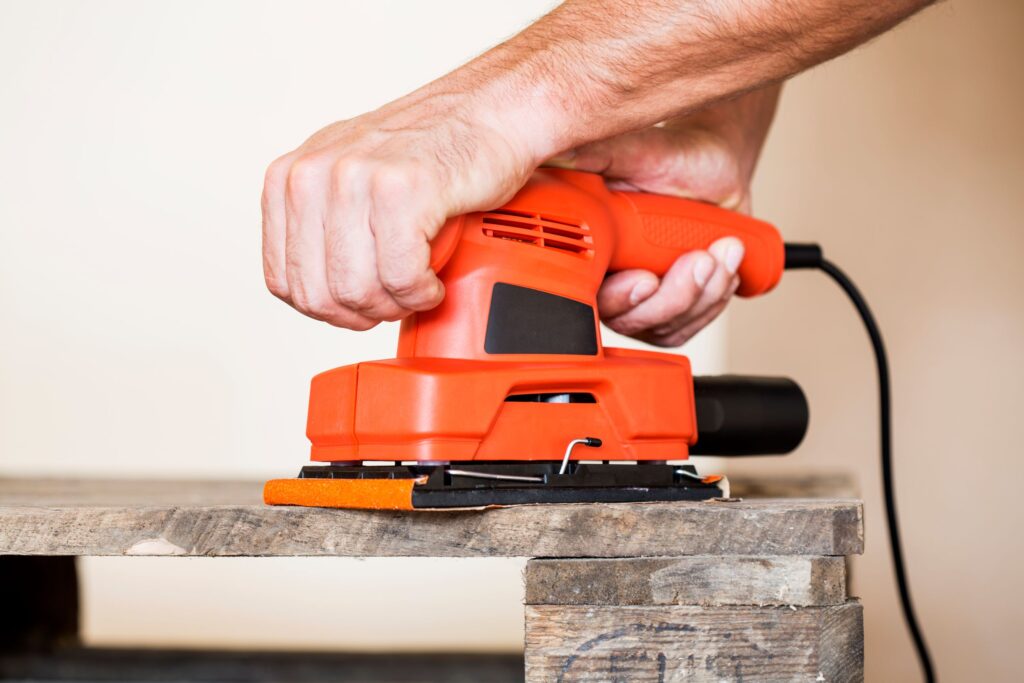
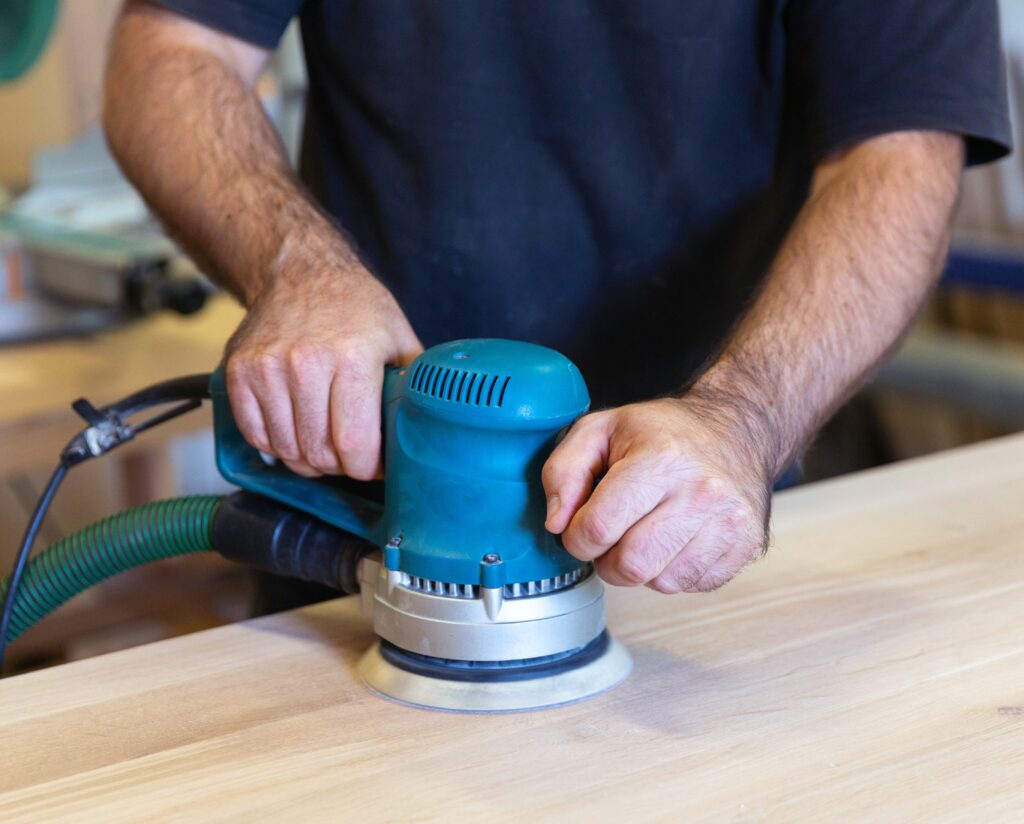
For larger projects or to save time, power sanders can be a great tool. There are different types of power sanders available, such as orbital sanders, belt sanders, and random orbital sanders. Each type has its own advantages and is suited for different tasks. Be sure to select the appropriate grit size for your power sander and follow safety guidelines when operating these machines.

While using abrasives, it’s important to avoid common mistakes that can lead to subpar results. One common mistake is applying too much pressure, which can cause uneven sanding and damage the wood. Additionally, make sure to change sandpaper regularly to ensure optimal performance and prevent clogging.

Finishing Touches

Once you’ve achieved a perfectly smooth surface, it’s time to apply the finishing touches. Choosing the right finish is crucial for protecting the wood and enhancing its natural beauty. There are various finishes available, such as varnish, lacquer, or oil-based finishes. Consider the desired look and level of protection when selecting a finish for your project.

When applying finishes, follow the manufacturer’s instructions and use a clean brush or cloth. Apply thin, even coats and allow sufficient drying time between coats. Once the final coat is applied, you can further enhance the smoothness of the surface by buffing it with a fine abrasive pad or steel wool.

Lastly, maintaining the smooth surfaces of your woodworking projects is essential for their longevity. Regular dusting and cleaning can help prevent scratches and preserve the finish. Additionally, be mindful of placing objects on the surface to avoid any potential damage.

Conclusion

In conclusion, achieving perfectly smooth surfaces in woodworking is a combination of using the right abrasives and employing effective techniques. By understanding the different types of abrasives available, selecting the right abrasive for the job, and following proper sanding techniques, you can elevate the quality of your woodworking projects and achieve flawlessly smooth surfaces.

Remember, practice makes perfect, so don’t be discouraged if you don’t achieve perfection right away. With time and experience, you’ll master the art of using abrasives and create stunning, smooth surfaces that beautifully showcase your woodworking skills.

What do you use 400 grit sandpaper for?

If you’re someone who enjoys woodworking, metalworking, or any kind of crafting that involves smoothing surfaces, then you’ve likely come across sandpaper at some point. Sandpaper comes in a variety of grits, or levels of abrasiveness, and one of the most commonly used is 400 grit sandpaper.

Man Hands using and orange and black sanding apparatus  with 400 grit sandpaper
Man Hands using and orange and black sanding apparatus with 400 grit sandpaper
  1. Smoothing wood surfaces: If you’re working with wood and you want a smooth surface, 400 grit sandpaper is a good choice. It can help to remove small imperfections, such as bumps or rough spots, and leave you with a silky smooth finish.
  2. Preparing surfaces for painting: When you’re preparing a surface for painting, it’s important to have a smooth and clean surface. This grit can help to remove any roughness or bumps, making it easier for the paint to adhere properly.
  3. Sanding between coats: If you’re applying multiple coats of a finish, such as varnish or lacquer, it’s important to sand between coats to ensure a smooth and even finish. 400 grit sandpaper is often used for this purpose.
  4. Smoothing metal surfaces: If you’re working with metal, this grit of sandpaper can be used to smooth out any rough spots or imperfections. This can be especially useful if you’re working on a metal object that will be visible, such as a piece of jewelry.
  5. Removing rust or paint: If you’re trying to remove rust or paint from a metal surface, 400 grit sandpaper can be a good choice. It’s not as abrasive as some other grits, so it’s less likely to damage the metal underneath.

Overall, sandpaper is a versatile tool that can be used for a variety of finishing and smoothing tasks. Whether you’re working with wood, metal, or other materials, having the proper grit of sandpaper on hand can be a helpful addition to your toolkit. Check this out if you want to learn more about sandpaper for woodworking.

What is the best sandpaper for woodworkers?

Sanding a wood surface with orbital sander in a workshop

The best sandpaper for woodworkers depends on the task at hand. Here are some general guidelines:

  1. Grit: The grit of the sandpaper refers to the size of the abrasive particles on the paper. The higher the grit number, the finer the sandpaper. For most woodworking tasks, you’ll want to use a range of grits, from coarse to fine. For example, you might start with a 60-grit sandpaper to remove rough spots, then move to a 120-grit paper for smoothing, and finish with a 220-grit paper for a final sanding.
  2. Type: There are two main types of sandpaper: open-coat and closed-coat. Open-coat sandpaper has larger gaps between the abrasive particles, which makes it less likely to clog with sawdust. This type of sandpaper is good for rough sanding tasks. Closed-coat sandpaper has a denser pattern of abrasive particles, which makes it better for fine sanding tasks.
  3. Material: Sandpaper can be made from a variety of materials, including aluminum oxide, silicon carbide, and zirconia alumina. Aluminum oxide is the most common material and is suitable for most woodworking tasks. Silicon carbide is harder and more durable, making it better for sanding harder materials like metal or glass. Zirconia alumina is the most durable material and is best for heavy-duty sanding tasks.

In summary, the best sandpaper for woodworkers depends on the specific task at hand. It’s always a good idea to have a range of grits and types of sandpaper on hand to tackle different projects.

What kind of abrasive is generally used for sanding of wood and paint?

When it comes to sanding wood and paint, abrasives are essential tools in achieving a smooth and polished finish. There are several types of abrasive materials that can be used for sanding, but not all of them are suitable for wood and paint. In this blog, we will discuss the most commonly used abrasive for sanding wood and paint.

The most popular abrasive material used for sanding wood and paint is sandpaper. Sandpaper is a paper or cloth backing with abrasive particles bonded to it. The abrasive particles are typically made of aluminum oxide, silicon carbide, or garnet. Sandpaper comes in different grit sizes, which determine the coarseness of the abrasive particles.

For sanding wood and paint, the most commonly used grit sizes are between 80 and 220. Grit sizes between 80 and 120 are considered coarse and are used to remove paint, rust, and old finishes. Grit sizes between 150 and 220 are considered fine and are used to smooth out the wood or paint surface.

Aluminum oxide is the most commonly used abrasive material in sandpaper. It is a tough and durable material that is resistant to wear and tear. It is also a versatile material that can be used for both wood and paint sanding. Aluminum oxide sandpaper is also relatively affordable and readily available.

Silicon carbide is another abrasive material that is sometimes used for sanding wood and paint. It is a harder material than aluminum oxide, which means it can be used for more aggressive sanding. However, silicon carbide sandpaper is also more expensive than aluminum oxide sandpaper.

Garnet is a natural abrasive material that is sometimes used for sanding wood and paint. It is a softer material than aluminum oxide and silicon carbide, which means it is less aggressive. Garnet sandpaper is also relatively affordable and environmentally friendly since it is made from a natural mineral.

In conclusion, sandpaper is the most commonly used abrasive material for sanding wood and paint. Aluminum oxide is the most popular abrasive material due to its durability, versatility, and affordability. Silicon carbide and garnet are also sometimes used, but they are more expensive and less commonly available. When selecting sandpaper for wood and paint sanding, it is essential to consider the grit size and the abrasive material to achieve the desired finish.

What abrasive materials are used for wood sanding?

There are several types of abrasive materials used for wood sanding such as sandpaper, abrasive pads, steel wool, sanding sponges and the list goes on.

sanding wood with sandpaper

Let’s dive into the most popular abrasive materials for the woodworking industry!

  1. Sandpaper: This is the most common type of abrasive material used for wood sanding. Sandpaper comes in different grits, ranging from coarse to fine. The coarse grits are used for removing heavy material, while the finer grits are used for smoothing and finishing.
    • Abrasive pads: These are made of synthetic materials and are used for finishing wood surfaces. They come in different shapes and sizes and can be used by hand or with power tools.
    • Steel wool: This is a fine abrasive material made of steel fibers. It is used for smoothing and finishing wood surfaces.
    • Sanding sponges: These are flexible foam blocks coated with abrasive material. They are used for sanding curved or irregular surfaces.
    • Emery cloth: This is a type of sandpaper that is coated with abrasive particles of aluminum oxide or silicon carbide. It is used for heavy-duty sanding and removing rust from wood surfaces.
    • Diamond abrasives: These are abrasive materials made of industrial-grade diamonds. They are used for sanding and polishing hard wood surfaces, such as hardwood floors.

    The choice of abrasive material depends on the type of wood, the desired finish, and the level of sanding required.

    How to Sand and Finish Your First Woodworking Project

    Man using an orbital sander on wood
    Man Hands using an orbital sander on wood

    Sanding and finishing are possibly the most important steps in any woodworking project, as they can help to smooth out rough surfaces, remove imperfections, and protect the wood from damage. For a beginner, this process can be very over whelming. Not to worry because In this blog post, I will walk you through the steps of sanding and finishing your first woodworking project, so you can achieve professional-looking results. (Fingers-Crossed)

    Step 1: Gather your materials

    Before you start sanding and finishing your project, make sure you have all the necessary materials. You will need:

    • Sandpaper: You will need a few different grits of sandpaper for different stages of sanding. For rough sanding, use a lower grit paper such as 80 grit. For medium sanding, use a medium grit paper such as 120 grit. For fine sanding or sanding of the finish coat, i like to use a higher grit paper around 320 grit.
    • An Orbital Sander and or a sanding block: A sanding block will help you apply even pressure and keep your sandpaper flat as you work. You can use a store-bought sanding block or make your own by wrapping sandpaper around a block of wood.
    • A dust mask: Sanding can create a lot of toxic wood dust, so it’s very important to protect your respiratory system by wearing a dust mask.
    • An air blower or a clean, dry cloth: You will need a clean, dry cloth to wipe away dust and debris as you work.

    Step 2: Sand your project

    Once you have gathered your materials, it’s time to start sanding your project. Begin by sanding with a low grit sandpaper (such as 80 grit) to remove any rough or uneven surfaces. Use long, even strokes if sanding by hand and apply moderate pressure. When you’re finished, wipe away the dust with a clean, dry cloth.

    Next, switch to a medium grit sandpaper (such as 120 grit) and repeat the process. This will help to smooth out any remaining rough spots and prepare the surface for finisheing. Again, be sure to wipe away the dust with a clean, dry cloth when you’re finished.

    Finally, depending on the project you can switch to a higher grit sandpaper (such as 150 grit) and give your project a final sanding. This will help to remove any swirls left by the sand paper.

    Step 3: Prepare the surface for finishing

    Before you apply a finish to your project, it’s important to make sure the surface is clean and free of dust and debris. Use a clean, dry cloth to wipe away any remaining dust and then allow the project to dry completely.

    Step 4: Apply the finish

    There are many different types of finishes you can use on your woodworking project, including oil, varnish, and polyurethane. Each type of finish has its own unique properties, so it’s important to choose the one that best suits your project. If this is your first ever project, i would highly reccomend and oil finish such as Tung oil. It is very forgiving and will not leave drips or sags thanks to the fact that the oil is absorbed into the wood.

    To apply the finish, follow the manufacturer’s instructions carefully. In general, you will want to start by applying a thin, even coat of tung oil onto your project. Let it dry and repeat!

    Step 5: Allow the finish to cure

    After you have applied the final coat of finish, it’s important to allow the finish to cure completely before using or handling your project. Curing times will vary depending on the type of finish you are using, so be sure to follow the manufacturer’s instructions for the specific product you are using.

    During the curing process, the finish will harden and become more durable. This is an important step, as it will help to protect your woodworking project from damage.

    Step 6: Sand and buff the finish

    Once the finish has cured, you can give your project a final sanding and buffing to remove any imperfections and create a smooth, professional-looking finish.

    To sand out the finish, use can use a higher grit sandpaper (such as 320- 400 grit) and apply light pressure. Wipe away the dust with a clean, dry cloth when you’re finished.

    ++Optional++To buff the finish, use a soft, lint-free cloth and apply a small amount of buffing compound. Rub the compound into the surface in a circular motion until the finish is smooth and shiny.

    Step 7: Enjoy your finished project!

    Congratulations! You have successfully sanded and finished your first woodworking project. Take a moment to appreciate your hard work and the beautiful finished product. With practice and patience, you will continue to improve your skills and create even more impressive projects in the future.

    I hope this blog has helped you understand the process of sanding and finishing a woodworking project. With these steps in mind, you will be well on your way to creating beautiful, professional-looking pieces that you can be proud of. For more Woodworking knowledge check out this video.