
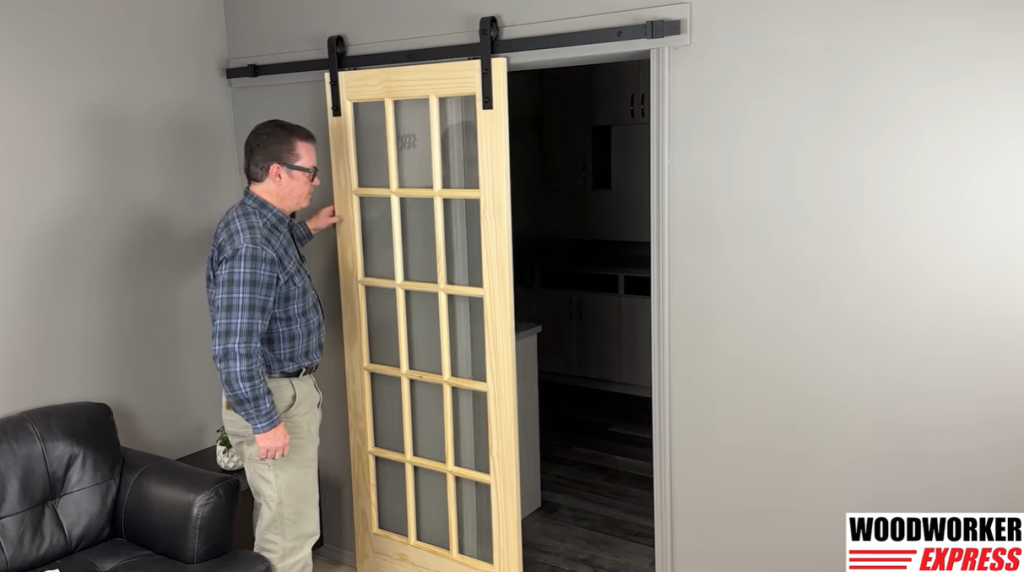

Installing barn door hardware is a simple way to upgrade a closet, pantry, laundry room, or doorway without the need for a traditional swinging door.
The key to a smooth, secure installation is to mount a sturdy header board to wall studs, level the track, attach the door hangers, and install the safety hardware.
This step-by-step guide covers the installation of our WE Preferred barn door hardware kits, including the key measurements, tools, and tips you’ll need to get the job done right.
Quick Skim: Barn Door Hardware Installation Guide
| Installation Step | Key Measurement or Tip |
|---|---|
| Header board | Use a 1×4 or 1×6 pine board secured to wall studs |
| Header board length | At least 72 inches for a 72-inch kit or 78 inches for a 78-inch kit |
| Header overhang | At least 2 inches on the side where the door opens |
| Track mounting height | Door height + 1-3/4 inches from the floor |
| Door hanger placement | 1-1/2 inches from the top and 2 inches from each side |
| Hanger bolt holes | Start with a 1/8-inch pilot hole, then drill to 3/8 inch |
| Anti-jump discs | At least 2 inches from the inside edge of each hanger |
| Floor guide | Position to keep the door aligned as it slides |
| Door stops | Set the open and closed positions to prevent overtravel |
Important: These measurements apply to the hardware shown in the installation video. Always check your kit’s instructions before drilling, since mounting requirements can vary.
What You’ll Need to Install Barn Door Hardware
Before you begin, gather your tools and check that your kit includes the required parts.
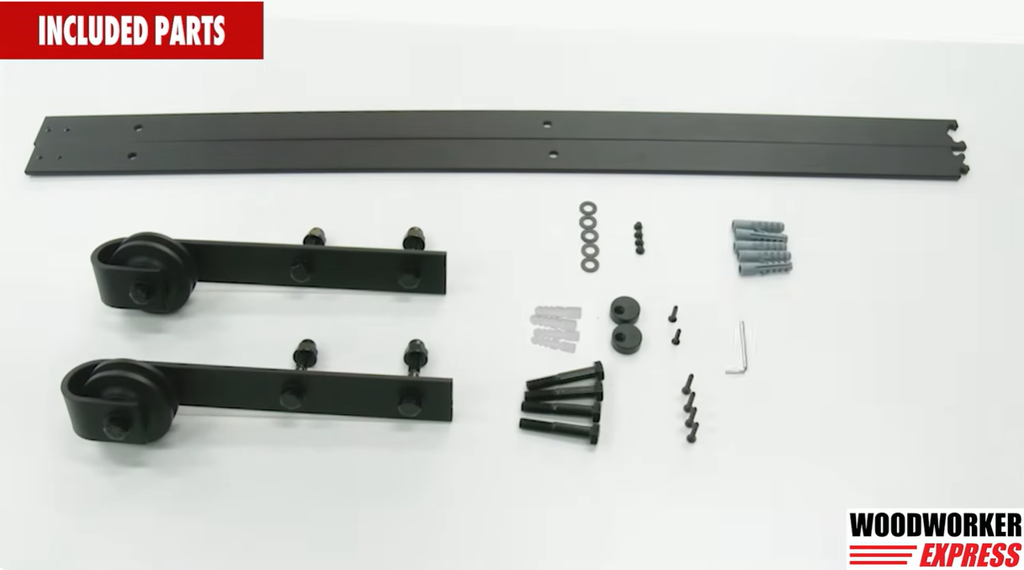
Tools and Materials
- Barn door hardware kit
- Barn door sized for your opening
- 1×4 or 1×6 pine header board
- Stud finder
- Measuring tape
- Level
- Pencil
- Power drill and screwdriver
- 1/8-inch and 3/8-inch drill bits
- Wood screws suitable for securing the header to wall studs
- Wrench or socket set
- Allen wrench (typically supplied with the kit)
- Safety glasses
- Paint or stain for the header board (optional)
For a concrete floor, you’ll also need a 5/16-inch masonry drill bit and the appropriate anchors.
Before installing: Confirm that your door’s weight and thickness meet the hardware kit’s limits. Also check that you have enough open wall space for the door to slide without hitting furniture, switches, or trim.
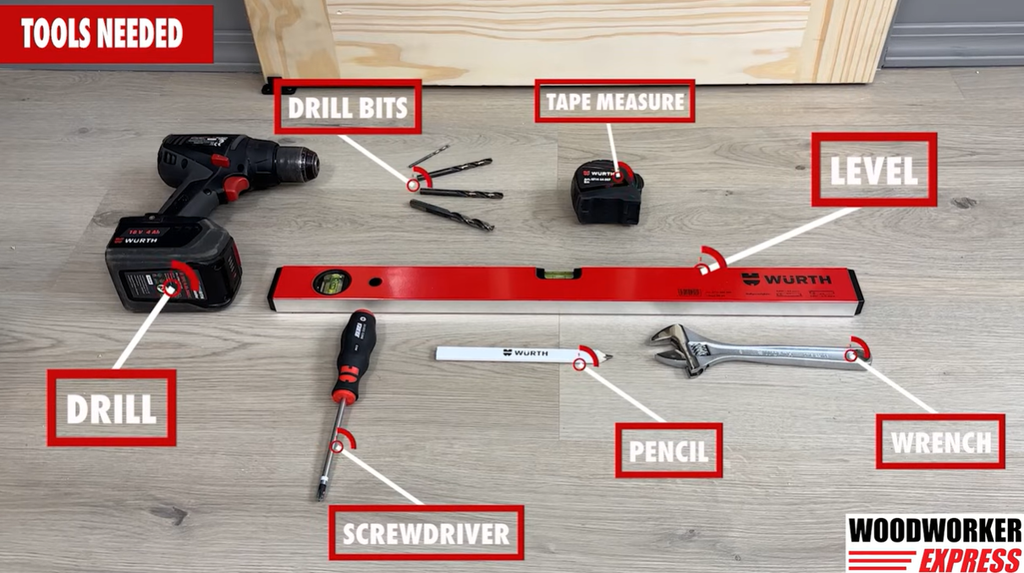
Step 1: Install the Header Board
The header board provides a secure mounting surface for your barn door track. This is one of the most important parts of the installation.
Never install barn door hardware directly into drywall without proper structural support. The header must be firmly secured to the wall studs.
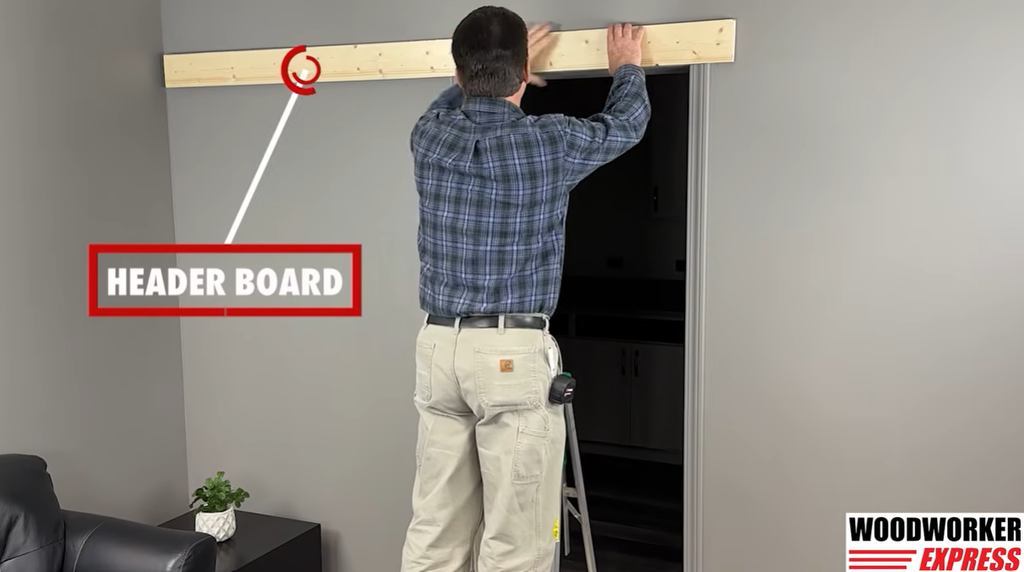
Measure the Header Board
For the kits covered in this guide:
- 72-inch hardware kit: Use a header board at least 72 inches long.
- 78-inch hardware kit: Use a header board at least 78 inches long.
A 1×4 or 1×6 pine board is recommended. Confirm that your chosen board and mounting fasteners meet your hardware kit’s support requirements.
Mark the Installation Height
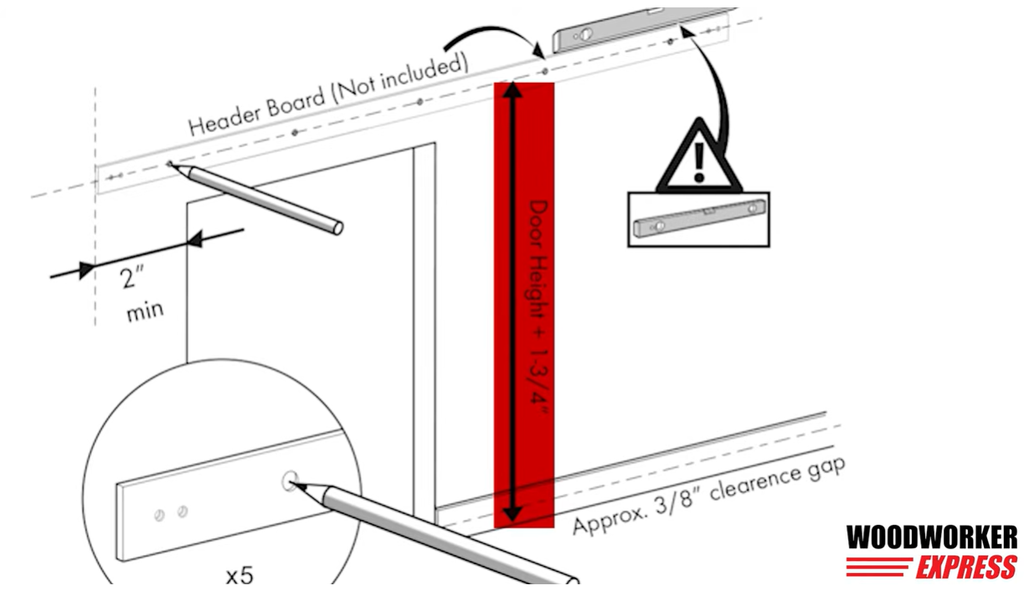
Measure your barn door from top to bottom. Add 1-3/4 inches to that measurement.
Track mounting height = Door height + 1-3/4 inches
For example, if you’re installing an 80-inch-tall barn door:
80 + 1-3/4 = 81-3/4 inches
Measure 81-3/4 inches up from the finished floor and mark the wall. This mark identifies the center height of the track’s mounting bolt holes.
Position the header so the track mounting holes will land securely on the board.
Prepare the Door Trim
If you’re installing an 80-inch door over an 80-inch opening, you may need to remove the top trim and cut the side trim pieces to make room for the header.
If your door is taller and the existing trim won’t interfere with the header or sliding door, you can leave the trim in place.
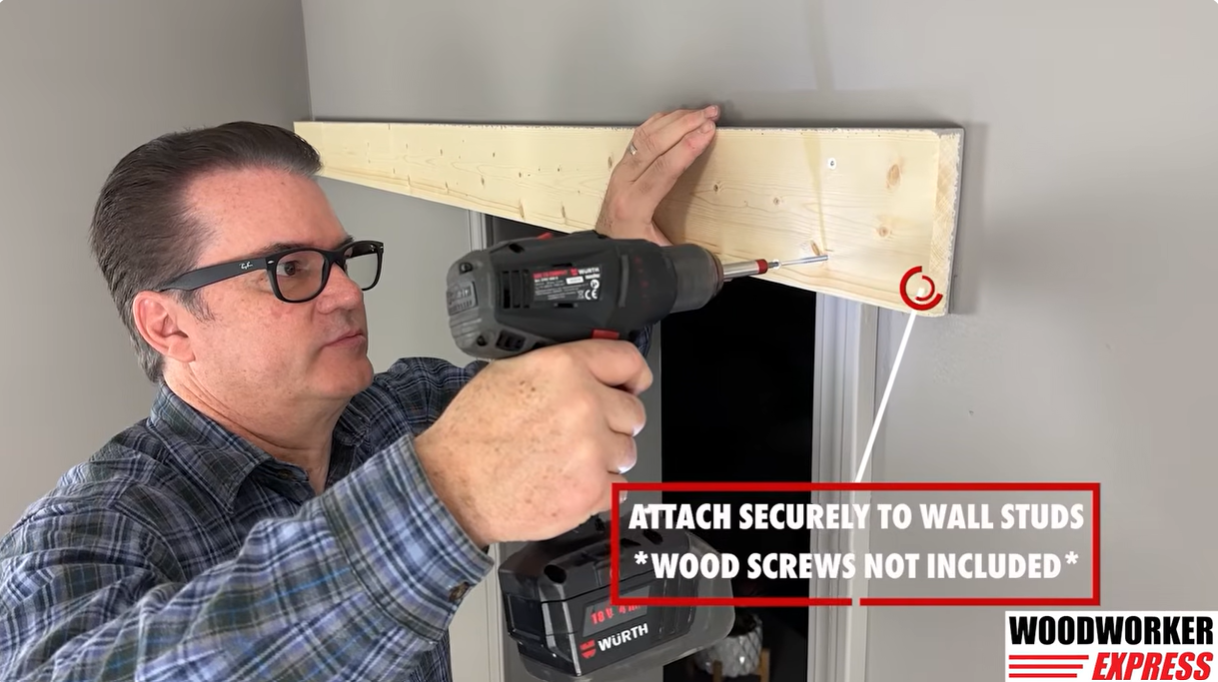
Secure the Header to the Wall
- Use a stud finder to locate and mark the wall studs.
- Position the header above the doorway.
- Leave at least 2 inches of header overhang on the side where the door will open.
- Use a level to make sure the board is straight.
- Secure the header to the wall studs with suitable wood screws.
Once installed, paint or stain the header to match your trim or room decor.
Step 2: Install the Barn Door Track
The track supports the door and allows it to slide open and closed.
The kits shown in the video include two track sections that connect with a puzzle-style joint.
Position and Level the Track
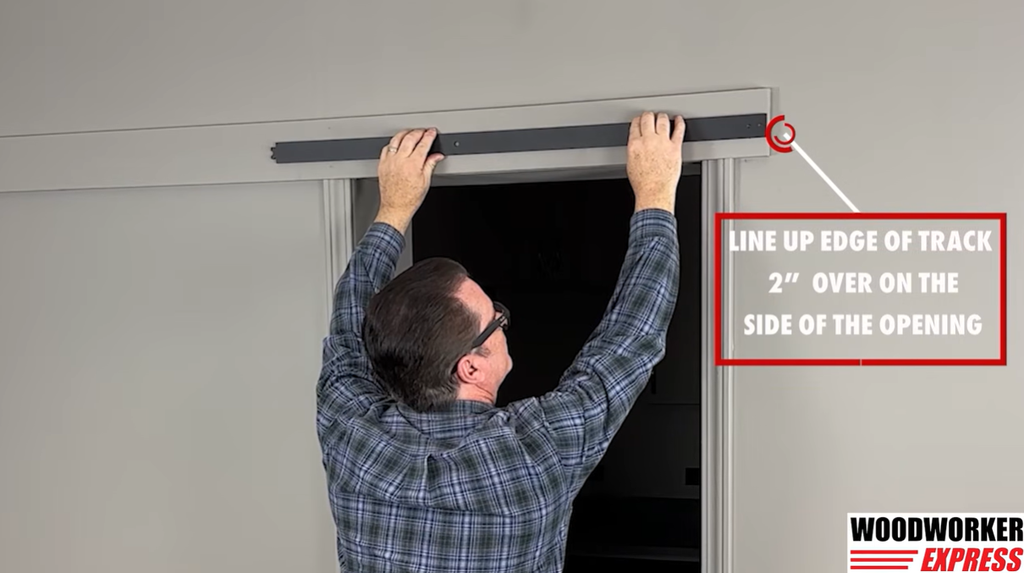
Start with the track section that extends 2 inches beyond the doorway on the opening side.
Measure up from the finished floor using your door height plus 1-3/4 inches. Align the center of the track’s mounting holes with this mark.
Use a level to make sure the track is straight. Connect and align the second track section, then mark the mounting hole locations on the header board.
Drill and Secure the Track
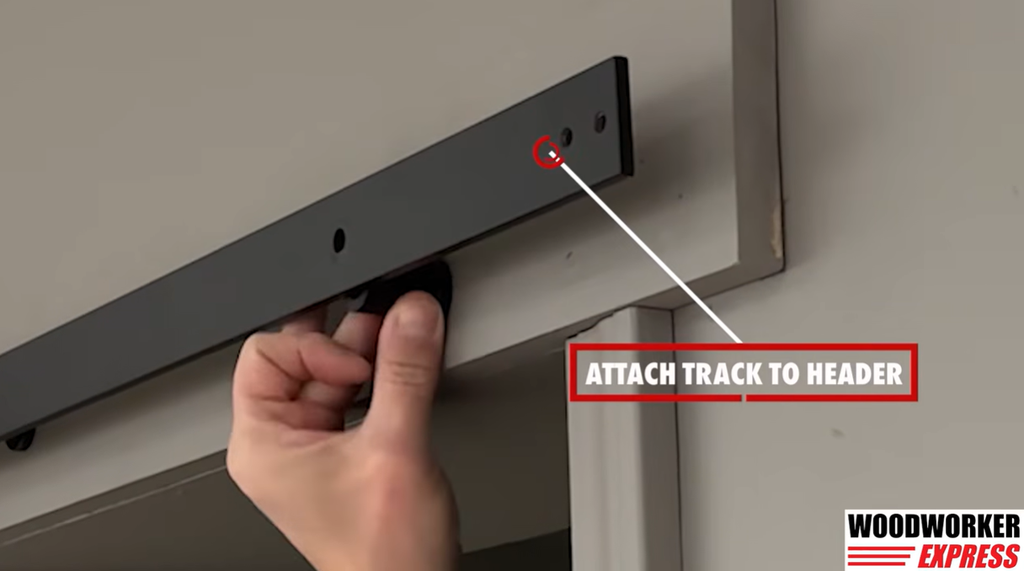
- Drill 1/8-inch pilot holes at the marked locations.
- Place the supplied spacers behind the track.
- Align the track with the pilot holes.
- Attach the track using the supplied mounting bolts and washers.
- Tighten the hardware according to the kit instructions.
Check that both track sections meet evenly and the entire track is level.
Installation Tip: Take your time leveling the track. Even a small slope can cause the door to drift open or closed.
Step 3: Attach the Door Hangers
The door hangers connect your barn door to the rollers that travel along the track.
Mark the Hanger Holes
For the hardware shown in the video, measure:
- 1-1/2 inches down from the top edge of the door.
- 2 inches inward from the side edge of the door.
Mark the location for the upper hanger bolt.
Place the hanger against the door, align its upper hole with your mark, and make sure the hanger is square. Use the lower hanger hole to mark the second drilling location.
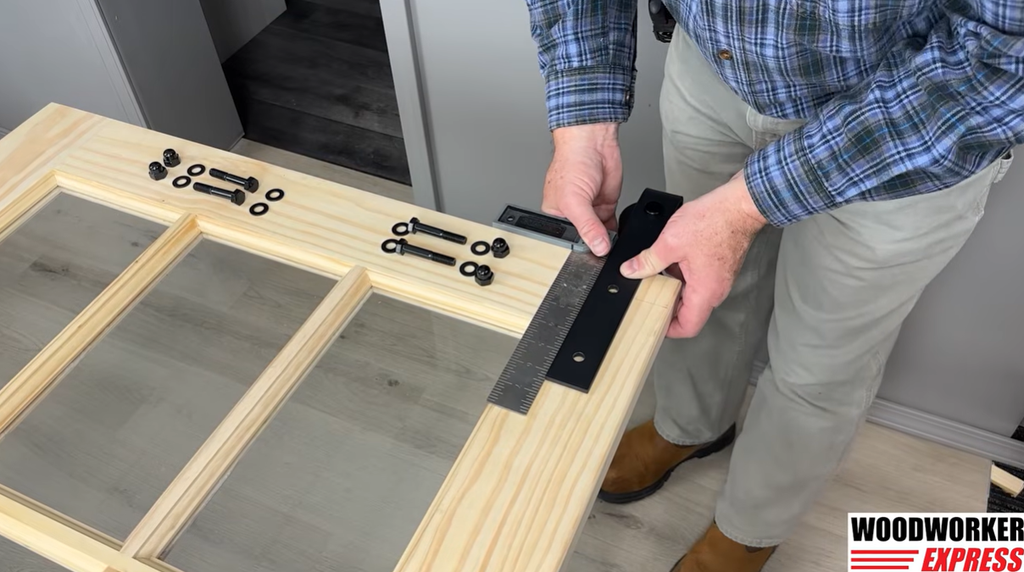
Drill and Install the Hangers
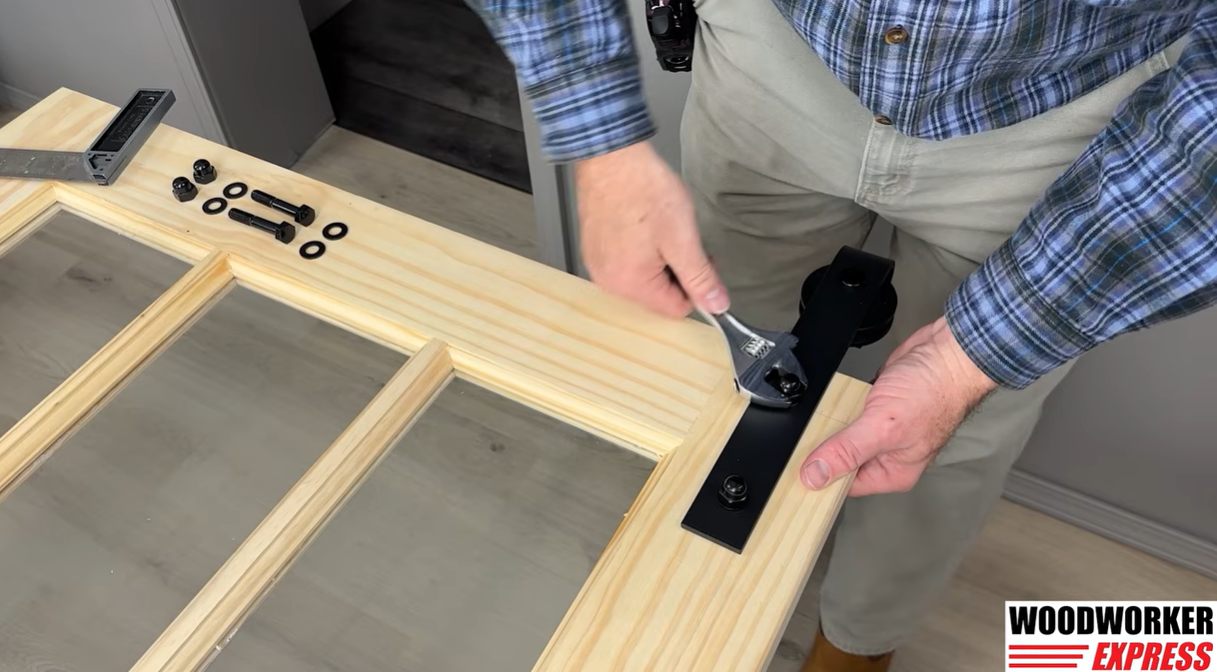
- Drill a 1/8-inch pilot hole through each marked location.
- Enlarge the holes using a 3/8-inch drill bit.
- Place the hanger against the door.
- Insert the supplied bolts, washers, and nuts.
- Tighten the hardware securely.
- Repeat the process on the other side of the door.
Make sure both hangers are straight and evenly positioned.
Installation Tip: Use a backing board when drilling through the door to help prevent wood from splintering. Confirm that the door has enough solid material to support the hangers.
Step 4: Install the Anti-Jump Discs
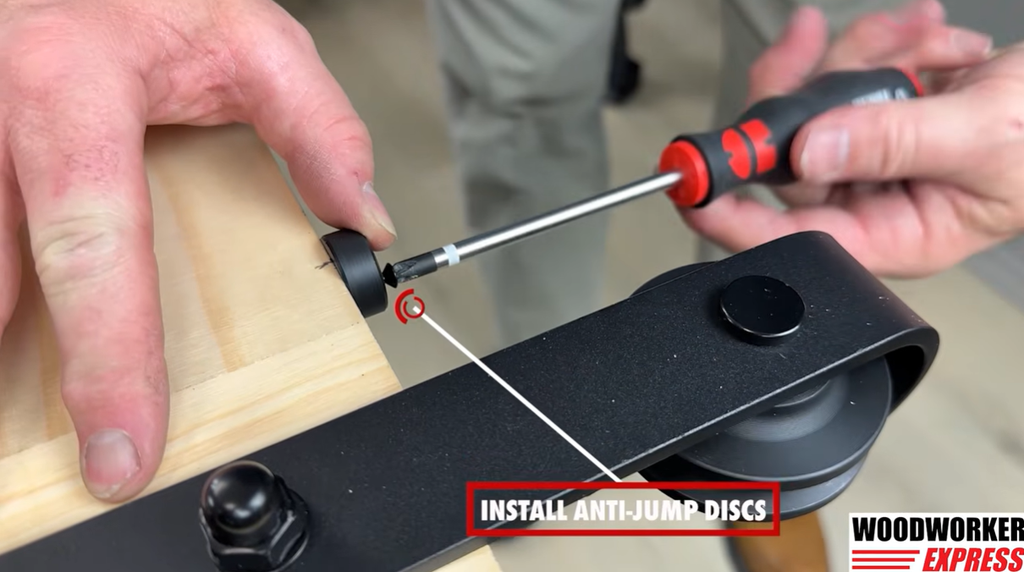
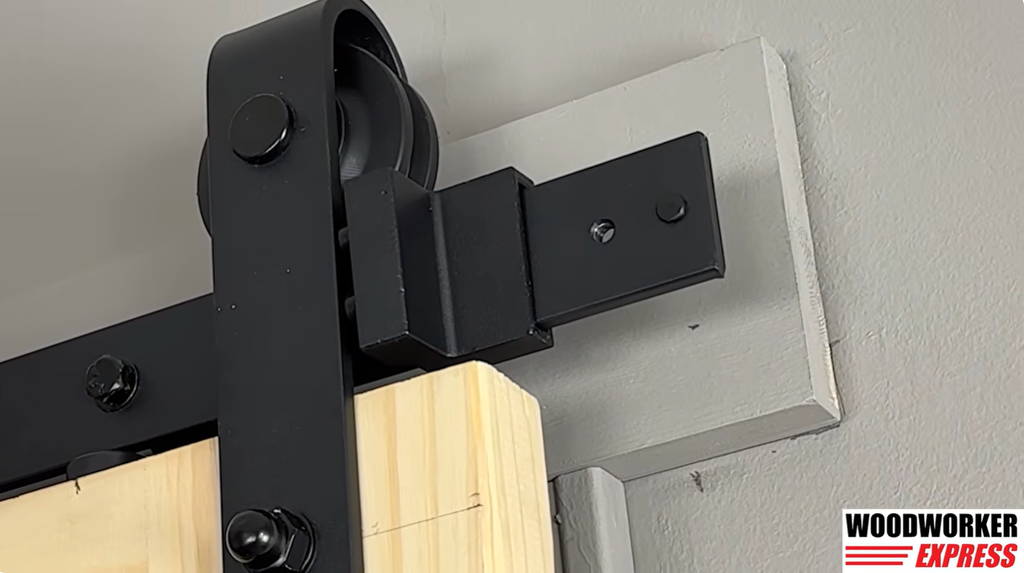
Anti-jump discs help prevent the door rollers from lifting off the track during use.
These small parts play an important role in keeping your barn door secure.
Position the Anti-Jump Discs
- Place the first disc on the top edge of the door.
- Position it at least 2 inches from the inside edge of the hanger.
- Secure it with the supplied screw.
- Leave the screw loose enough for the disc to rotate.
- Repeat on the opposite side of the door.
Before hanging the door, rotate both anti-jump discs toward the front of the door.
You’ll move them into their final position after the door is on the track.
Step 5: Hang the Barn Door on the Track
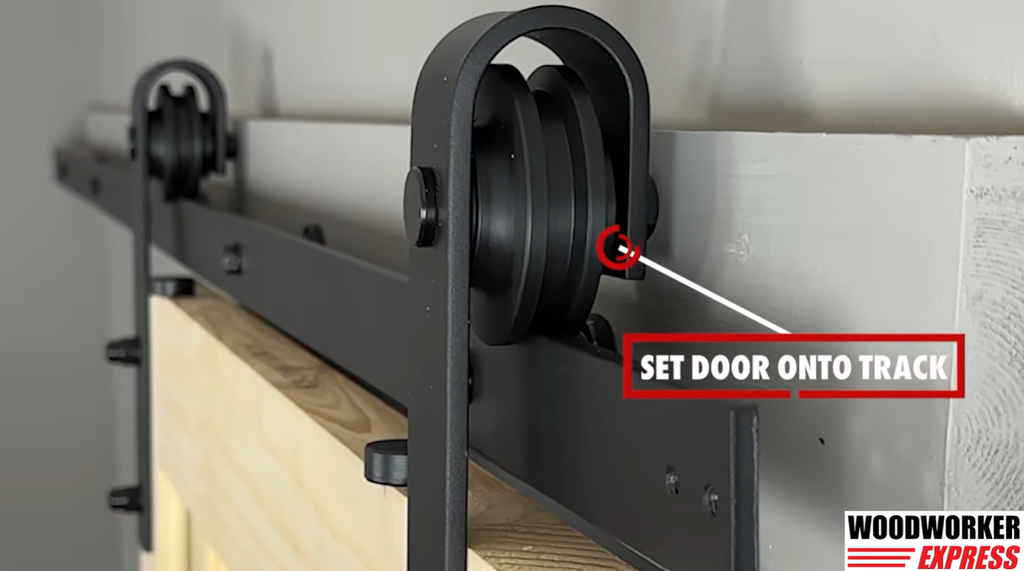
This step is easier and safer with a second person, especially if you’re installing a large or heavy door.
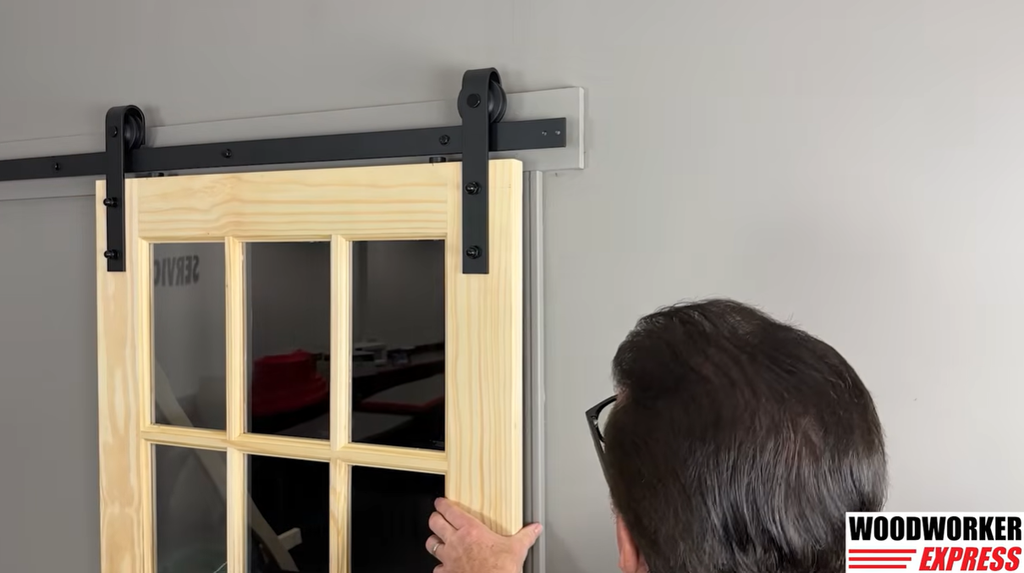
Carefully lift the door and position the hanger rollers on top of the track.
Make sure both rollers sit properly before releasing the door.
Once the door is securely hanging, rotate the anti-jump discs toward the wall to engage them. Secure them as directed in your hardware manual.
Important: Keep the door supported and prevent it from rolling off either end of the track until you install the door stops.
Step 6: Install the Floor Guide
The floor guide keeps the bottom of your barn door aligned as it moves.
Without a properly installed guide, the door may swing away from the wall or shift from side to side.
Mark the Floor Guide Location
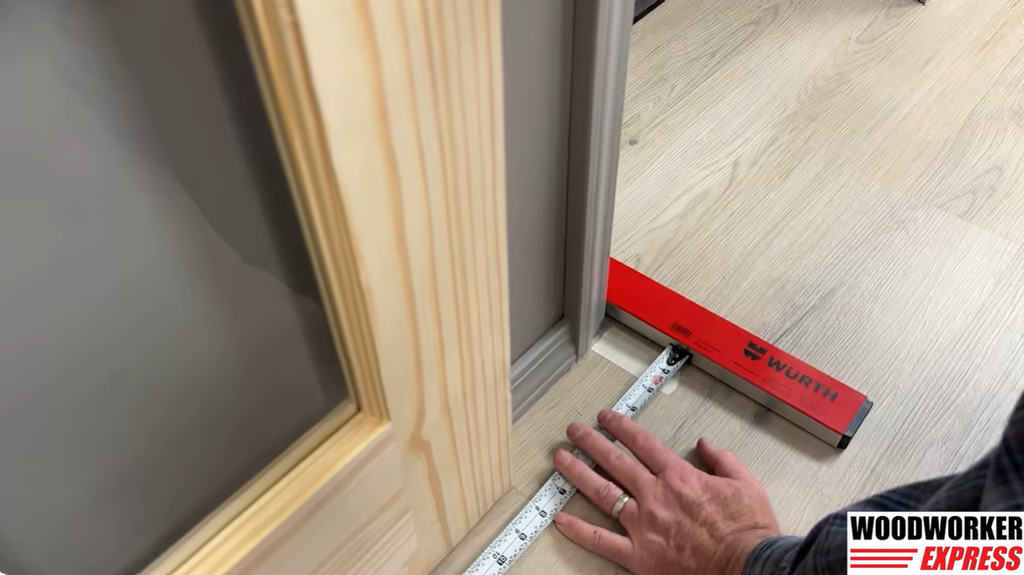
Carefully slide the door toward its fully open position while preventing it from rolling off the track.
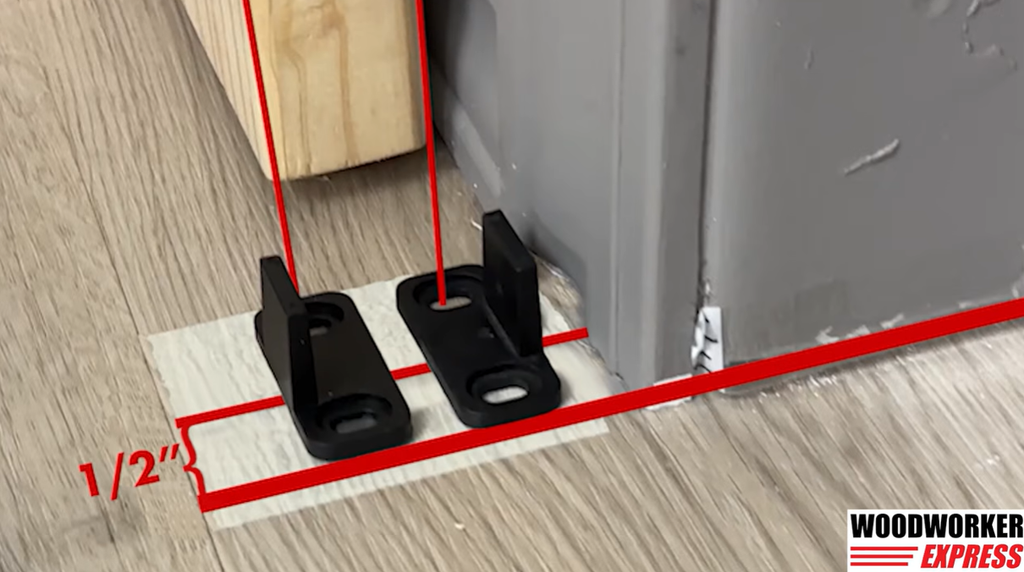
From the edge of the doorway opening, measure 1/2 inch toward the door, as shown in the installation video.
Mark this point on the floor. It will serve as the center reference for the floor guide.
Next, use the door to mark its inside and outside edges on the floor. These marks will help you position the guide and locate its mounting holes.
Attach the Floor Guide
Position the guide using your marks, then fasten it with the supplied screws.
If you’re installing the guide on concrete:
- Drill 5/16-inch holes at the mounting locations.
- Insert the supplied concrete anchors.
- Secure the floor guide with the appropriate screws.
Check that the guide keeps the door aligned through its full range of movement.
Some floor guides require a groove in the bottom of the door, while others fit around its edges. Follow the instructions for your specific guide.
Step 7: Install the Door Stops
Door stops limit how far your barn door can travel along the track. They help keep the rollers from moving beyond the intended opening and closing positions.
Install the Closed-Position Stop
Slide the door into its fully closed position.
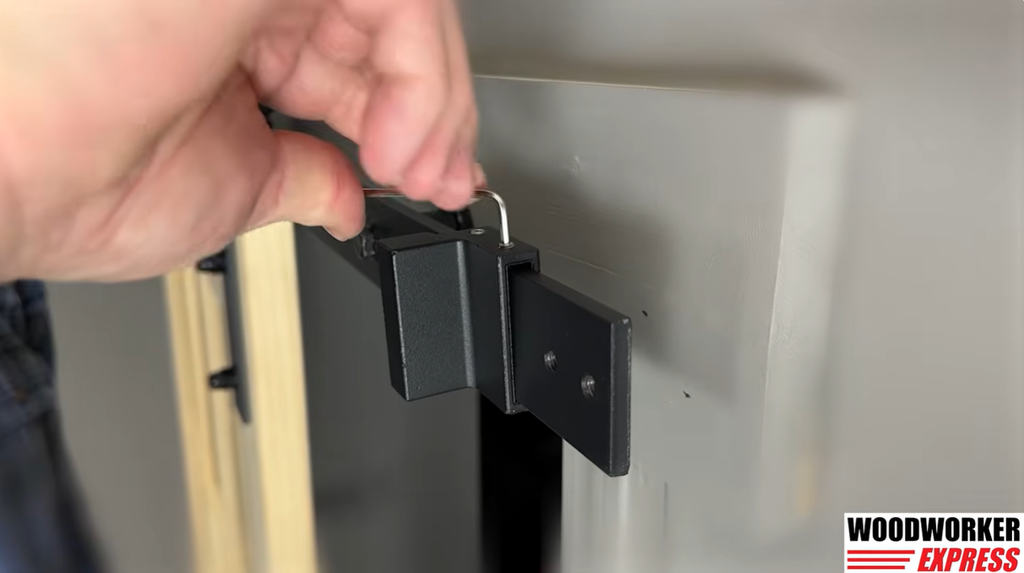
Place the first door stop against the hanger so it touches the hanger at the desired stopping point.
Tighten the stop using the supplied Allen wrench.
Install the Open-Position Stop
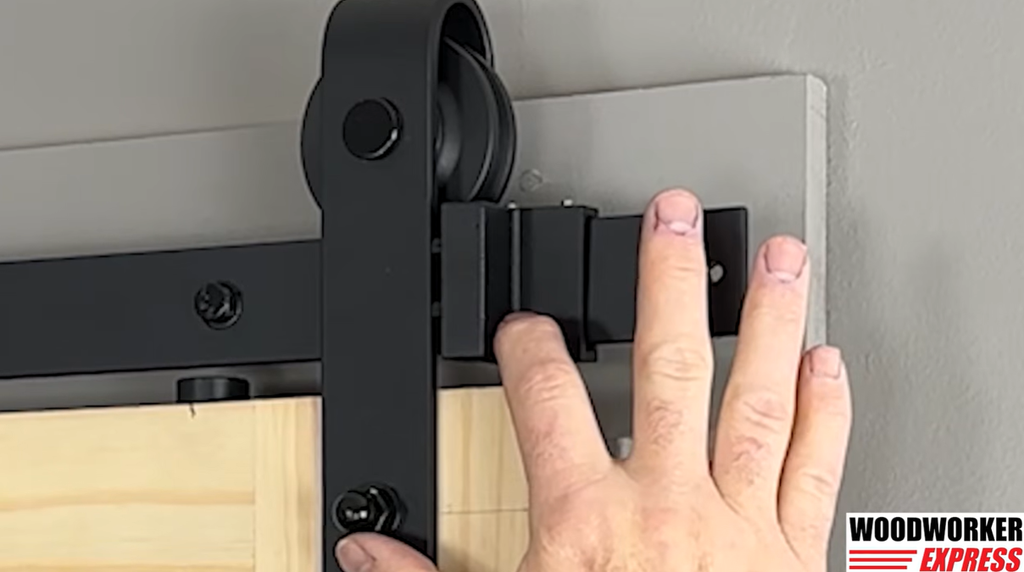
Carefully slide the door into its open position.
For the installation shown in the video, the recommendation is to leave at least 1 inch of the door edge inside the doorway opening when the door is fully open.
Position the second stop against the hanger and tighten it.
Test both stopping points to make sure the door stays within its intended travel range.
Step 8: Install the Track Hole Caps and Test the Door
The final step is to install the supplied hole caps into the small holes at both ends of the track.
These caps give the track a clean, finished look.
Once the caps are installed, slowly slide the door open and closed several times.
Check that:
- The rollers move smoothly along the track.
- The track stays level and secure.
- The anti-jump discs are properly engaged.
- The floor guide keeps the door aligned.
- Both door stops prevent excess travel.
- The door clears the wall, trim, and floor.
- All mounting hardware is secure.
If the door sticks, drifts, or makes unusual noise, check the track alignment and hardware placement before using it regularly.
Common Barn Door Hardware Installation Mistakes to Avoid
A few simple mistakes can affect how well your barn door works. Here’s what to watch for.
1. Mounting the Track Directly to Drywall
Drywall alone cannot safely support a heavy sliding door. Secure your header to wall studs or use another manufacturer-approved structural mounting method.
2. Installing an Uneven Track
An unlevel track can cause the door to roll on its own. Check the level before drilling and again after tightening the bolts.
3. Using the Wrong Track Height
Mounting the track too low can cause the door to drag against the floor. Mounting it too high may leave too much space beneath the door.
For the kits shown in the video, use the door height plus 1-3/4 inches to locate the track mounting holes.
4. Skipping the Anti-Jump Discs or Floor Guide
These parts help keep the door on its intended path. Install both, even if the door seems to slide well without them.
5. Forgetting to Check Wall Clearance
Before drilling, make sure the door has enough space to slide fully open. Look for light switches, outlets, baseboards, door trim, and other objects that could block its movement.
Final Takeaway: How to Install Barn Door Hardware
A successful barn door installation starts with secure wall mounting, accurate measurements, and a level track. Once those parts are in place, attaching the hangers, anti-jump discs, floor guide, and door stops is straightforward.
Whether you’re updating a pantry, closet, laundry room, or home office, the right sliding door hardware can help you save floor space and give your room a fresh look.
Ready to get started? Explore the selection of barn door hardware and track at Woodworker Express to find the right fit, finish, and style for your project.