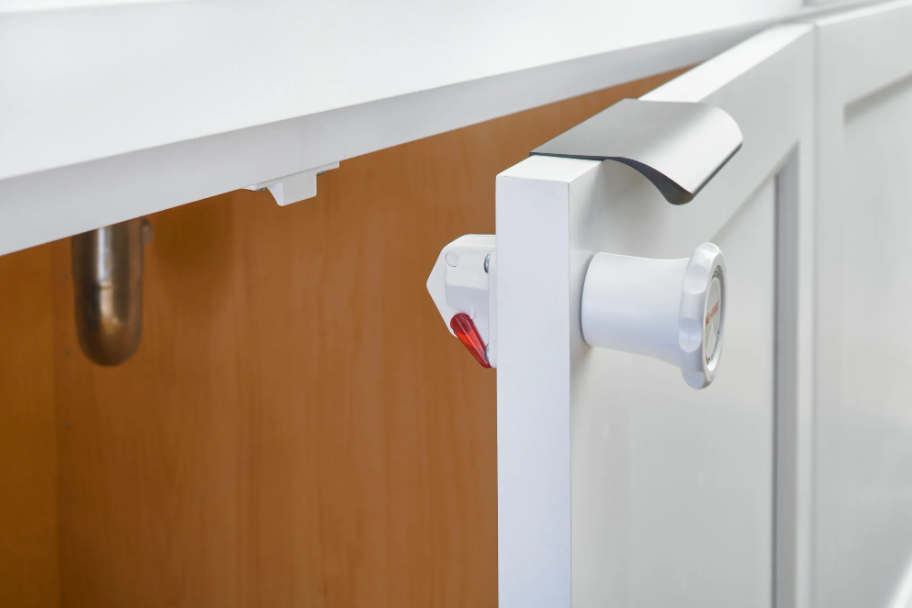

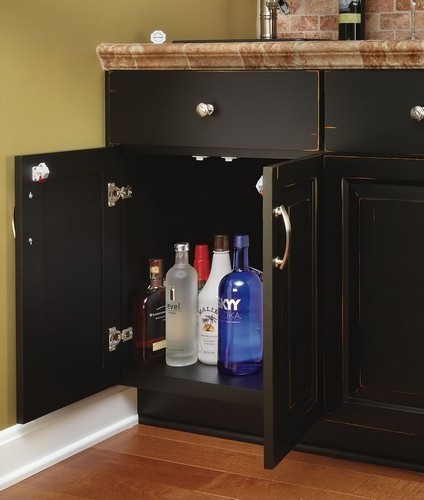
Childproofing cabinets does not have to mean adding visible latches or bulky hardware to your cabinet fronts. The Rev-A-Shelf Child Cabinet Security Locking System installs inside cabinet doors and drawers, where it stays out of sight until you need it.
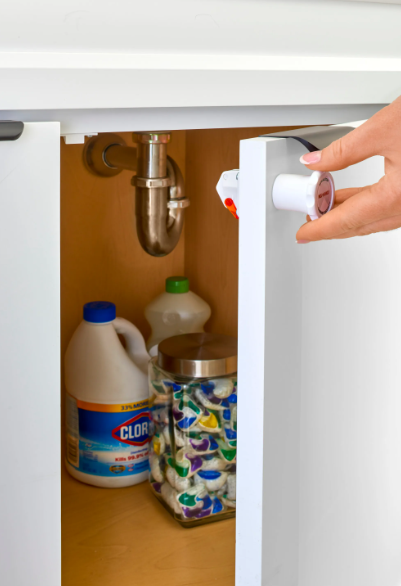
A special magnetic key placed against the outside of the cabinet releases the internal catch. Remove the key, and the catch springs back into the locked position. The starter kit includes five locks and two magnetic keys, making it a practical option for kitchens, bathrooms, laundry rooms, and other cabinets you want to help keep off limits to young children.
Quick Skim: Rev-A-Lock Child Cabinet Security System
| Feature | Details |
|---|---|
| Best For | Helping restrict children’s access to cabinet doors and drawers |
| Lock Style | Concealed magnetic cabinet lock |
| Operation | Magnetic key releases the lock from outside the cabinet |
| Starter Kit | 5 locks with strike plates, templates and screws, 2 magnetic keys, 1 drill stop and instructions |
What Is the Rev-A-Shelf Rev-A-Lock?
Rev-A-Lock is a concealed cabinet locking system that uses magnetic force to release the lock through the cabinet door.
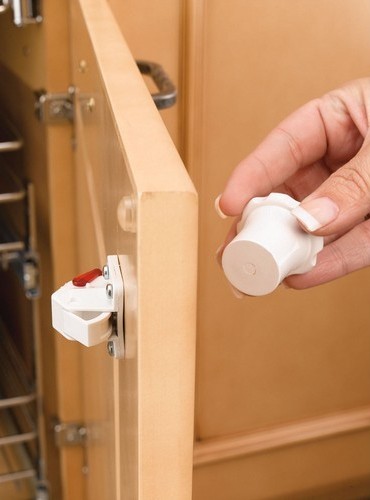
Once installed, the locking hardware sits on the inside of the cabinet. You do not have to mount a latch, button, or release lever on the finished exterior. To gain access, place the magnetic key against the outside of the door at the lock location. The magnet releases the catch so the cabinet can open. When you remove the key, the catch returns to its locking position.
That hidden design is one of the system’s main advantages for kitchens and other finished spaces. You can add a cabinet-security measure without changing the look of your knobs, pulls, doors, or drawer fronts.
What Comes in the Rev-A-Lock Starter Kit?
The Rev-A-Lock starter kit contains the hardware needed to secure five cabinet doors or drawers.
The kit includes:
- 5 Rev-A-Lock locks
- 5 strike plates
- Installation templates
- Sets of mounting screws
- 2 magnetic keys
- 1 drill stop
- Installation instructions
The kit is sold as a complete set. Individual Rev-A-Lock locks with strike plates and replacement magnetic keys are also available separately from Woodworker Express.
The attached installation sheet also identifies the plunger, extension slug, drill-depth gauge, and red unlocking bar as parts of the locking system.
Why Choose a Hidden Magnetic Child Proof Cabinet Lock?
No Visible Lock on the Cabinet Front
Because Rev-A-Lock mounts inside the cabinet, the lock does not interrupt the finished look of the door or drawer.
This can be especially useful on remodeled kitchens, decorative cabinetry, vanities, or other areas where you want to keep the exterior clean.
Magnetic Key Access
There is no exterior button or latch for a child to manipulate. Adults open the cabinet by placing the Rev-A-Lock magnetic key against the correct area of the cabinet door.
Keep both supplied keys somewhere accessible to adults but out of children’s reach.
Works on Doors and Drawers
The system is designed for both cabinet doors and drawers, allowing you to use the same locking method throughout several areas of the home.
The lock assembly can be used with wood, glass, metal, and particleboard cabinets. Installation requirements may vary with the cabinet construction, so follow the instructions appropriate for your application.
Temporarily Disable the Lock
Each lock includes a release or unlocking bar. When engaged, it keeps the lock disengaged so the cabinet can open normally without using the magnetic key.
This can be useful when childproofing is temporarily unnecessary.
When you need the locking function again, reactivate the lock. The attached instructions specifically tell users to push the unlocking bar back down before relying on the lock again.
Rev-A-Lock Components
The installation instructions identify these main parts:
| Component | Purpose |
|---|---|
| Installation guide/template | Positions the lock, strike plate, and mounting holes |
| Lock assembly | Main concealed locking mechanism |
| Plunger | Operates with the lock according to door thickness |
| Magnetic key | Releases the installed lock from outside the cabinet |
| Strike plate | Engages with the lock when the cabinet closes |
| #4 x 1/2″ pan-head Phillips screws | Secure the hardware |
| Drill-depth gauge | Controls the depth of the main drilled hole |
| Extension slug | Used for certain thicker door configurations |
| Unlocking bar | Temporarily disengages the lock |
Door Thickness and Lock Configuration
The Rev-A-Shelf instructions include a configuration chart based on cabinet door thickness:
| Door Thickness | Configuration Listed in Installation Sheet |
|---|---|
| 1/2″ to 5/8″ | Omit the plunger and extension slug |
| 5/8″ to 1-1/8″ | Omit the extension slug |
| 1-1/8″ to 1-9/16″ | Use all components |
The plunger must be properly inserted for the lock to function and an extension slug may be required when drawer construction creates a thicker front.
How to Install the Rev-A-Shelf Rev-A-Lock
Before you begin, gather a power drill, Phillips screwdriver, punch or nail, 9/32-inch or 7 mm drill bit, and an optional 1/16-inch drill bit for pilot holes. The kit also includes a double-sided template, lock assembly, magnetic key, striking plate, drill-depth gauge, extension slug, plunger, screws, and unlocking bar.
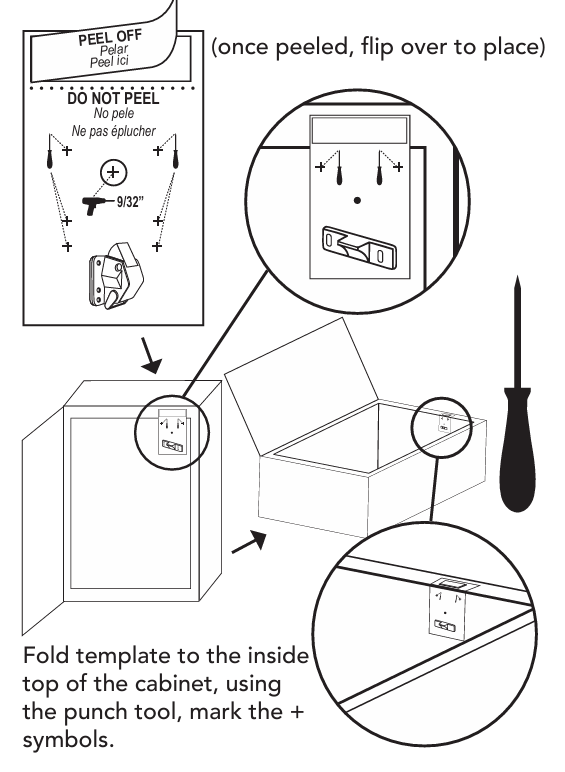
Step 1: Position the Installation Template
Peel the narrow backing strip from the Lock Assembly side of the double-sided template.
Flip the template over and apply that side to the cabinet frame so the Striking Plate side faces outward.
Fold the template toward the inside top of the cabinet. Use a punch or nail to mark the plus symbols shown on the template.
Step 2: Transfer the Template to the Cabinet Door
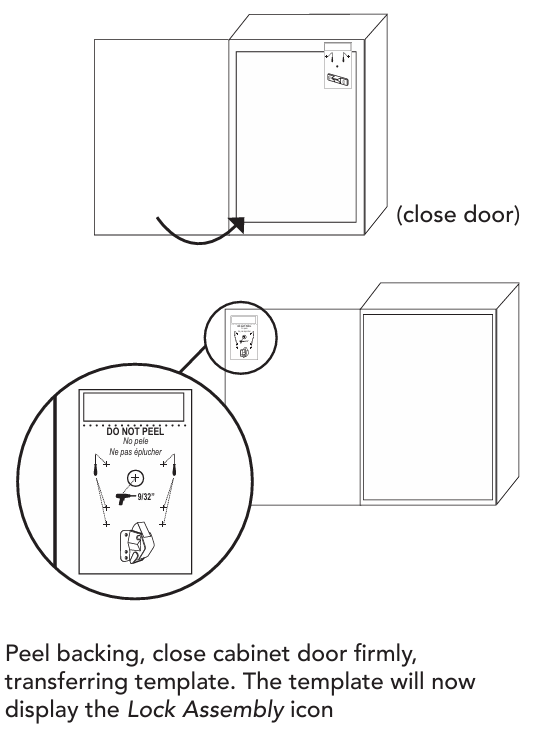
Peel the remaining backing from the template.
Close the cabinet door firmly against it. This transfers the template from the cabinet frame to the inside of the door.
The transferred template should now display the Lock Assembly icon.
Step 3: Mark the Lock Locations
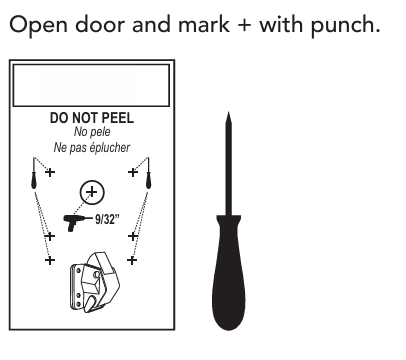
Open the cabinet door.
With the template in place, use a punch or nail to mark the indicated plus symbols for the lock assembly and drilling location.
Step 4: Set the Correct Drilling Depth
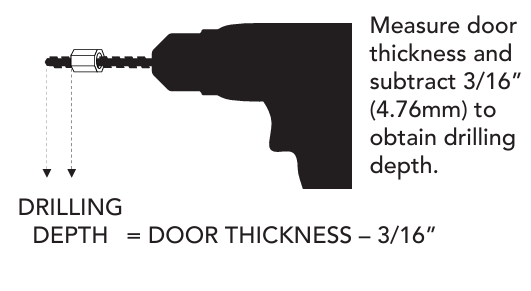
Measure the thickness of the cabinet door.
Subtract 3/16 inch, or 4.76 mm, from the door thickness to determine the correct drilling depth.
Set the supplied drill-bit depth gauge to that measurement before drilling.
Drilling depth = door thickness minus 3/16 inch.
Step 5: Drill the 9/32-Inch Hole
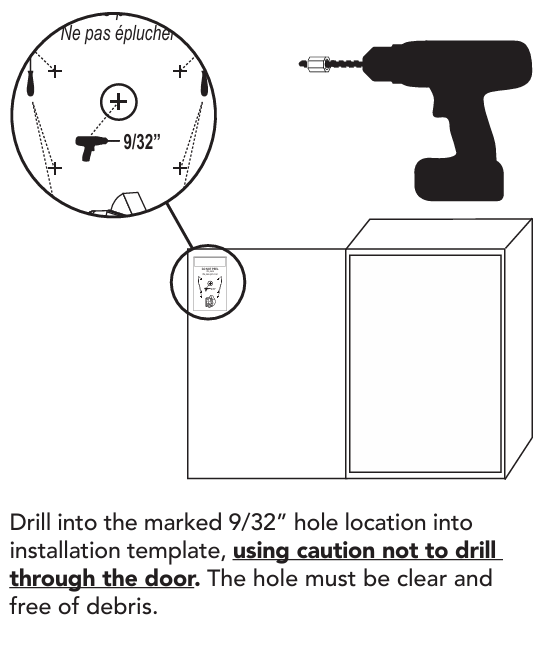
Using a 9/32-inch or 7 mm drill bit, drill into the marked hole location through the installation template.
Use caution and do not drill through the cabinet door.
After drilling, make sure the hole is clean and free of debris.
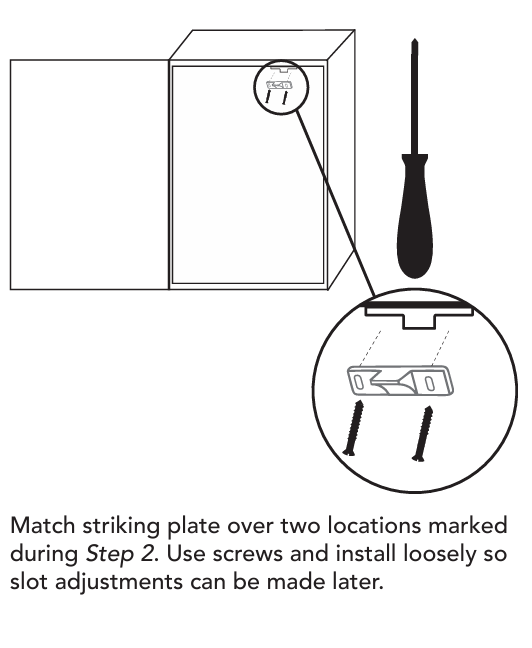
Step 6: Install the Striking Plate
Position the striking plate over the two locations marked earlier.
Install the screws loosely at first. This allows you to make small adjustments to the striking plate position before tightening everything into place.
Step 7: Install the Lock Assembly
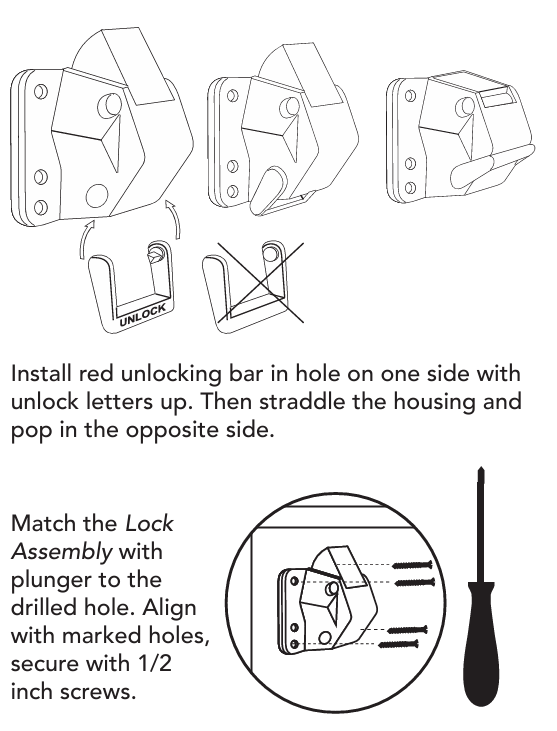
Match the lock assembly and plunger to the drilled hole.
Align the lock with the marked screw locations and secure it with the included 1/2-inch screws.
Install the red unlocking bar by inserting one side into the lock housing with the UNLOCK lettering facing up. Then straddle the housing and snap the opposite side into place.
Test the Magnetic Key
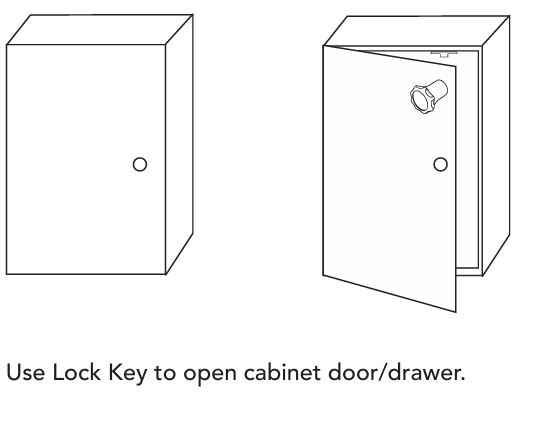
Close the cabinet door and confirm that the lock engages.
Place the magnetic Rev-A-Lock key against the outside of the cabinet door at the lock location. The key should release the lock and allow the door or drawer to open.
How to Use the Red Unlocking Bar
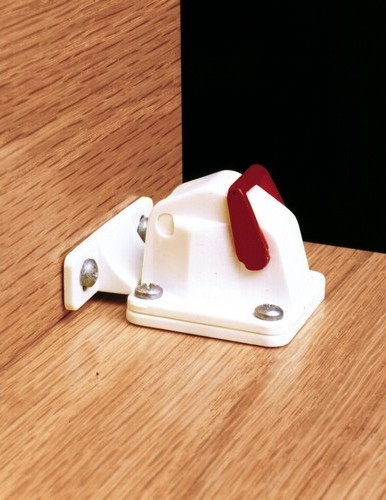
Rev-A-Lock also gives you the option to keep a cabinet unlocked for an extended period.
The installation sheet instructs you to install the red unlocking bar into the opening on one side of the lock with the UNLOCK lettering facing up. Straddle the lock housing with the bar and snap the opposite side into place.
Do not overstretch the unlocking bar during installation.
When you want to restore normal locking operation, push the bar down again to reactivate the lock.
Where Can You Use Rev-A-Lock?
The five-lock starter kit makes it easy to target several cabinets in areas where young children may have access.
Common applications include:
- Kitchen base cabinets
- Bathroom vanities
- Laundry-room cabinets
- Cabinet drawers
- Utility-room storage
- Cabinets containing items you want to keep secured from children
Because the locks remain hidden inside, they can be a good fit when you want added cabinet security without changing the room’s finished appearance.
Who Is the Rev-A-Lock Starter Kit Best For?
Rev-A-Lock is a practical choice for homeowners, parents, grandparents, and DIYers who want to help limit access to cabinets while keeping childproofing hardware out of sight.
It is especially useful when you want:
- A concealed alternative to exterior cabinet latches
- One magnetic key system for several cabinets
- Locks for both doors and drawers
- The option to temporarily disengage individual locks
- A starter kit with the templates and installation hardware included
The five-lock, two-key configuration also provides a convenient starting point for childproofing the cabinets that need attention first.
Final Takeaway: Rev-A-Shelf Child Proof Cabinet Locking System
The Rev-A-Shelf Child Cabinet Security Locking System combines concealed hardware with simple magnetic-key access. Five locks let you secure several cabinet doors or drawers, while two keys give adults convenient access without adding visible childproofing hardware to the cabinet fronts.
For installation, accurate template placement and controlled drilling matter most. Measure the cabinet door, set the supplied drill-depth gauge carefully, keep the drilled opening clean, and verify the strike-plate alignment before closing the door. Once installed correctly, the Rev-A-Lock stays hidden inside the cabinet until you need to release it with the magnetic key.
Shop the Rev-A-Shelf Rev-A-Lock Child Cabinet Security Locking System from Woodworker Express.